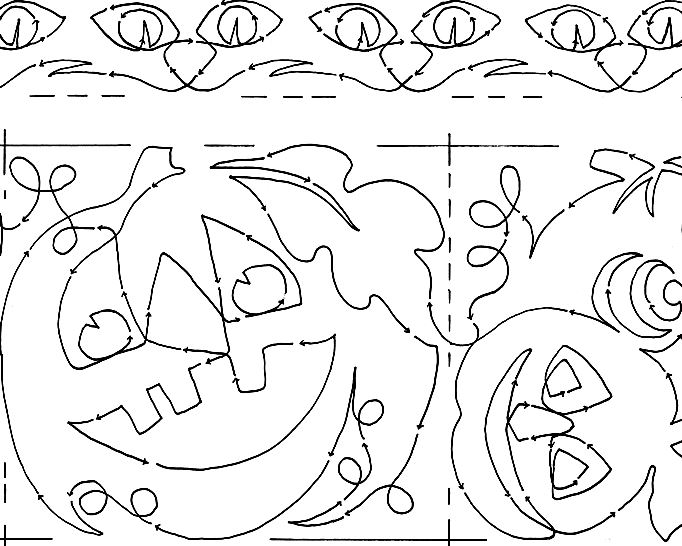
The most common Chinese ways of saying Happy New Year are Gong Xi Fa Cai(Mandarin) and Gong Hey Fat Choy (Cantonese). Even though the pronunciations are a little different, both are written the same.
Ever since I was young I have been fascinated by the Far East. I used to go with my Mother to visit “artsy” Lila L. She had her hair bound up with chopsticks and black lacquered furniture inlaid with Mother of Pearl. Chinatown was my favorite place to eat and I loved getting those prize balls at the gift shop and unwrapping yards of paper strips to find the tiny toys inside.
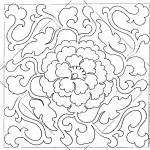
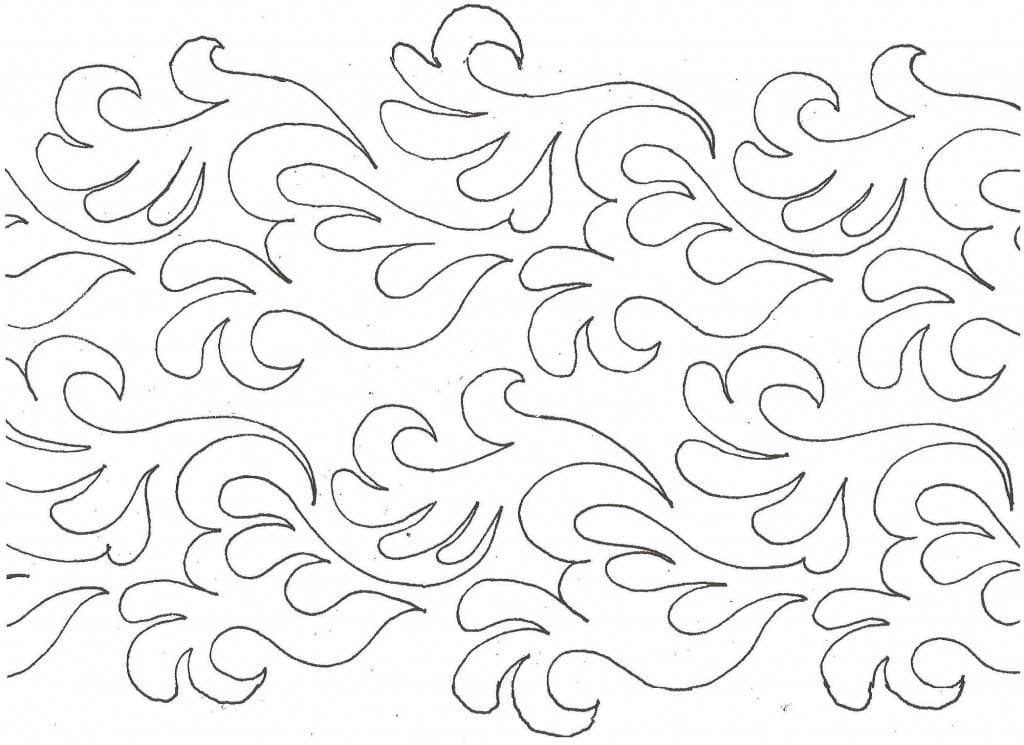
Little did I know I would “marry” into the army and live in the Orient. This amazing experience has increased my delight in all those memories and many new ones; like the Chinese Lion dance (always thought I’d draw this but haven’t yet!) , Sizzling Rice Soup and playing the Kayagum (like Koto). Subsequently I’ve drawn a number of popular Chinese inspired patterns. I’ll include Japan and Indonesia too! So for the New Year I’m passing along the celebration to you!
Get a copy of the CHINESE MEDALLION SET – FREE with purchase of any Oriental pattern.
Brrr! Everything is snowy! Let’s have a JANUARY WHITE SALE All white themed patterns 15% OFF through January.
January 2015 white sale
Isn’t it fun to build a snowman? Here’s a cute SNOWMAN pillow designed for one of our birthday partys. All the little girls made their own. It was so fun. This picture is the one my daughter finished. Your kids can have fun with this too – even boys! It’s a FREE DOWNLOAD.
How do you decorate for the Holidays? Do you have a Christmas Quilt in the master bedroom? Is your family room festooned with strings of apples and garlands of holly? Or perhaps you’ll be skiing for the Holidays at your mountain cabin decorated with homespun plaid and flannelette quilts? If so you might want to snuggle-up with a cozy throw in front of the fireplace or display a quilt proudly over the railing on the balcony. Enjoy these super savings as you plan your beautiful rooms.
In the Summer there are bugs everywhere—even the computer has bugs! Heehee. For fun, pick your favorite and sew it right into your next quilt—just one or two in an out-of-the-way place. I’m including all the bug drawings I’ve sold over the years in this FREE OFFER. Just size them to fit. Draw your own too—maybe you have a “favorite.” Modern custom quilting lends itself to spur-of-the-moment bugs. I’ve shown a sketch of ideas for that. Pantographs also have room for bugs. I’ve included a few ideas of how I might stitch them in a panto. So get dancing! It’s young and whimsical!
2 NEW PANTOS IN JULY
“CHINTZ & INDIA BORDERS & CORNERS” #2451 $18.00 These 2 unique border patterns with South Asian Elegance will add a decorative finish to your quilts.
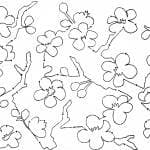
“CHERRY BLOSSOMS” #2453- 10 inch $14.00 There’s nothing quite so pretty as pale blossoms against the dark bark of the Cherry tree. No wonder there are Cherry Blossom festivals around the world!
I do not have IQ so I can’t tell you in Intelliquilter terms, but Linda Lawson has a video about lining up my Pictogram Patterns and you will find some excellent tips in that video. You can see it on Longarm Chat. http://longarmchat.com/index.cfm/event/Video.Home
Click on the title to read some “nitty gritty” information that may help as you plan the layout on your screen.
Background information for Pictograms:
1. Each panel was originally drawn at 11″ x 36.” Depending on what size you are going to make it, you’ll need to adjust the following information accordingly.
2. All our patterns have a 3″ registration system. That means, if you had the hard copy, you could slide each ensuing paper panel to the right or left in increments of 3″ ( eg. 6″, 9″, 12″ etc.) and they will still “fit” together.
3. With this registration system the stitching line reaches up to the top line every 3 inches. (If it isn’t visible, imagine a line across the top).
4. The stitching line reaches down to the bottom line every other 3 inches. (Imagine a line across the bottom.)
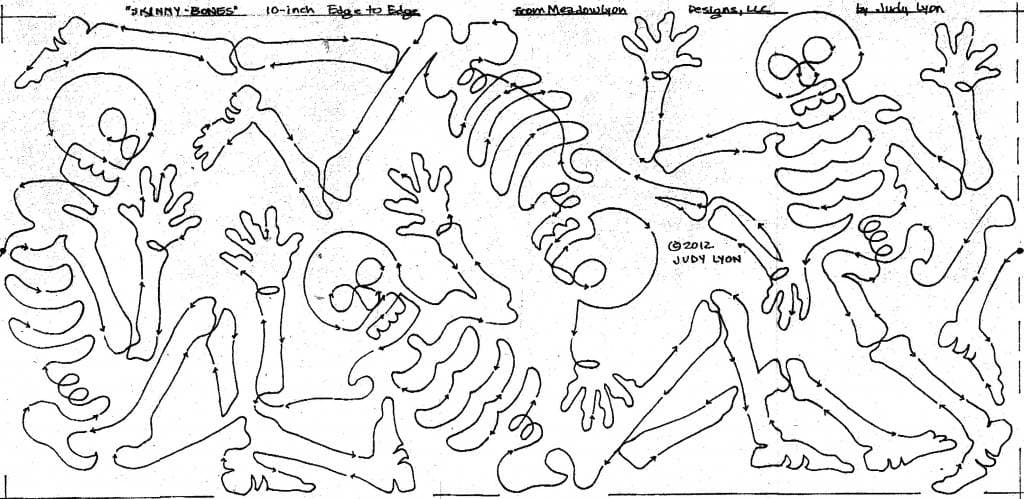
5. MeadowLyon Pictograms are not designed to interlock, they just come up or down to the line. It gives the effect of interlocking, but does not cross the line!
6. Yes, you can put each panel right on top of itself and it will work. But, you probably won’t want the panel to be placed exactly above itself or the animals and other motifs will be on top of themselves.
7. I recommend choosing the second or third panel to begin the second row. Make sure the “up” points fall between the “down” points. (You’ll probably put the second row on the screen and simply move it to where it looks good and nothing touches where it shouldn’t.)
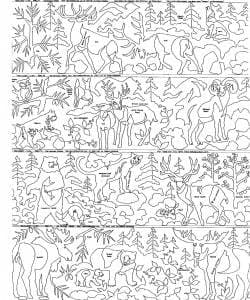
As you look at previews of our Pictograms on this website, you will see the ups and downs clearly. For example, in the “Backwoods” pattern you’ll notice some mountain peaks, etc. that go up to the top line and see the spaces above them. Then you’ll see feet of animals or etc. coming down to the bottom line and notice space beneath them on the next panel. With each row simply slide the panels to where the peaks come up under a space or etc. But do not try to interlock, or cross the line. It’s not necessary and may cause overlapping.
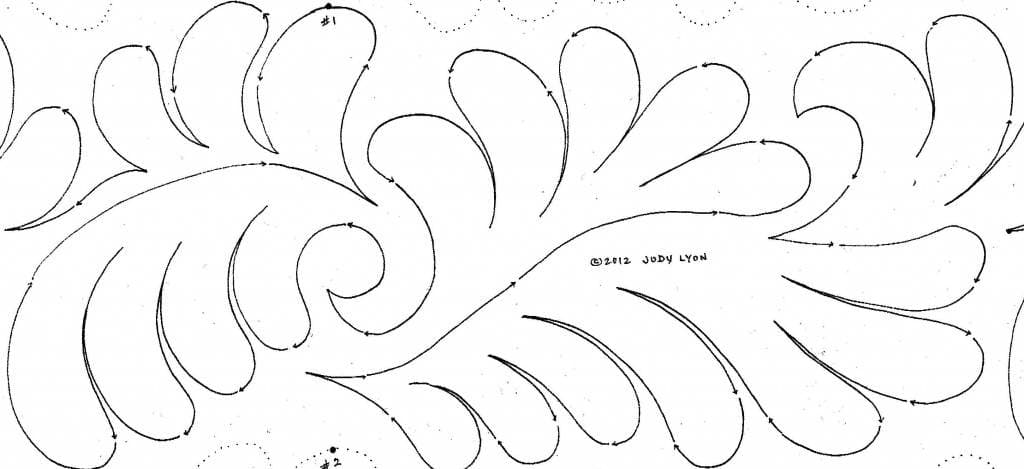
Congratulations! You’ve purchased a “Pictogram” – MeadowLyon’s unique 12 ft. non-repeating roll. You’ll have lots of pictorial material from which to choose. Its four panels can be arranged to create a scene, of sorts, on a wall hanging or small quilt. Also, extended rows can be repeated above or below to cover a quilt with Edge-to-Edge quilting.
We recommend starting alternate rows at the beginning of a different panel each time. This will prevent the motifs from standing on top of themselves. Of course you can start alternate rows wherever you like. Our registration system prevents upper and lower rows from touching when you slide the pattern in increments of 3 inches; eg. 3”, 6”, 12” etc.
For accurate placement, align the bottom line* (or dots or corner points) to the previous top line. You might do this by lowering the needle at the exact top right hand corner of the panel recently completed, then inserting a pin at that point. Roll the quilt and after shifting the pattern and replacing the clamps, move your needle once again to that point and adjust the laser to the lower right corner of the new panel.
Caution: if you leave a space there will be a space – it’s best to match the lines with your laser, then slide the machine across the quilt to see if any stitching falls above the line and adjust slightly if needed.
* Note: If your pattern does not have a bottom and top line, you can draw it in by laying a yardstick along the lowest points (or highest) on the paper pattern and drawing a line to intersect with the dashed line at the end of the pattern.
1. EDGE TO EDGE PANTOGRAPH ALIGNMENT as printed on paper rolls
Aligning MeadowLyon Patterns:
This MeadowLyon continuous-line pattern can be repeated above or below itself to cover a quilt with Edge-to-Edge quilting. We recommend starting alternate rows in a different spot and on many patterns have indicated the place we recommend on the bottom edge of the pattern. This will prevent the animals (or motifs) from standing on top of themselves. Of course you can start alternate rows wherever you like. Our registration system prevents upper and lower rows from touching when you slide the pattern in increments of 3 inches; eg. 3”, 6”, 12” etc.
For accurate placement, align the bottom line* (or dots or corner points) to the previous top line. You might do this by lowering the needle at the exact top right hand corner of the panel recently completed, then inserting a pin at that point. Roll the quilt and after shifting the pattern and replacing the clamps, move your needle once again to that point and adjust the laser to the point recommended for alternate rows.
Caution: if you leave a space there will be a space – it’s best to match the lines with your laser, then slide the machine across the quilt to see if any stitching falls above the line and adjust slightly if needed.
* Note: If your pattern does not have a bottom and top line, you can draw it in by laying a yardstick along the lowest points (or highest) on the paper pattern and drawing a line to intersect with the dashed line at the end of the pattern.
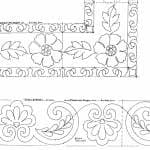
…using Wedding Bell Swag, Floral Medallion, Rosebud Striped border. etc. I’ve posted a Floral Wholecloth Layout with many of the floral patterns. Reading through the following directions (although specific for the three listed) will be helpful in planning your individualized quilt layout.
The following instructions come with the Floral Medallion pattern but they may be useful for setting up quilting for the Wedding Bell Swag with other combinations.
So you want to make a whole cloth quilt?
There are many options, so have fun mixing and matching.
Here are some pointers for completing an 80” sq. Wedding Bell Quilt as pictured on the Wedding Bell Swag posting.
Patterns needed: Wedding Bell Swag Border
Rosebud Striped Border
Floral Medallion
You can make a 108” quilt by following the included diagram. The Additional Tips for quilting the swag will be helpful.
1. The Wedding Bell Swag pattern prefers a 30” throat space.
(I have a 24” and although I finally got everything
joined-up piecemeal, it took time! If you decide to try it,
be sure to quilt AROUND the corner’s edge as far as you can.)
2. If necessary you can make the quilt slightly smaller or a few inches
larger by changing the length of the outer stripes.
3. After loading the quilt start at either the top or the bottom.
I recommend Quilting across the entire end including both complete
corners. The followingmethod will maintain the “fit” of the stripes.
(You’ll need to cut the corner from the main pattern so you can
“attach” it to both ends.)
Additional Tips
A. First, starting at the corner, quilt the flowery, be-ribboned
Wedding Bell Swag halfway across.
B. Go back and quilt the stripesaround the corner and under the swag
half-way across. (If you don’t want the stripes you could use
stippling.)
C. Move the corner into position at the other end.
D. Quilt the flowery swag the rest of the way including the corner.
E. Now quilt the stripes the rest of the way and around the corner.
F. Place your needle at the inside corner of the swag and with a
wet-erase marker or a pin, put a dot on the quilt at that
point.
Repeat at the other end.
4. Align and stitch the Rosebud Border ¼” inside the swag. (Measure this
from the points that you marked. The ¼” may vary with the stretch
of your fabric so adjust the Rosebud stripes so they come out even.
Move the corners in and tape or paper-clip in place.)
When stitching, I apply clamps on the track to stop the stripes evenly
at both the top and bottom, but it’s not necessary. Machines love to
go straight!
5. Center the lower portion of the Floral Medallion with the inside of the
Rosebud Border. (The pattern between corners should be
approx. 37 ¾”.)
It’s likely to have shrunk to about 37”. The Floral Medallion
measures 36” square. You’ll need to allow ½ ” all around it.
Therefore start ½ ” inside the inner corner of the Rosebud border.)
6. Stitch across the first panel, then align the top corner point with the
lower corner of the next panel. Do not leave a space, but do move
the machine across and make sure high points do not extend
beyond the line of the pattern and adjust slightly if necessary.
7. Continue by stitching center and upper panels.
8. Allowing ½ ” space – align, center, and stitch the opposite Rosebud
Border (upside down).
9. Allowing ¼” align, center and stitch the opposite Wedding Bell Swag
border, upside down, with corners attached.
You may find it necessary to reload the quilt and quilt it from the
opposite end if your batting is thick and minimizes the throat space.
As before, stitch half-way across, then go back and do the stripes.
Repeat the rest of the way across.
10. Remove quilt and re-load to stitch the two sides. You’ll have to
pull the clamps very tightly.
11. Align and stitch the Rosebud border. (This will help to evenly
distribute the fullness which is inevitable.)
12. Align and stitch the Wedding Bell Swag pattern between the corners.
Again go half-way and then do the stripes, repeat.
13. Turn the quilt and repeat steps 11 and 12 for the borders on the
opposite side.
14. Finally roll the quilt to the middle section and, IF DESIRED, apply a
fine stippling style of your choice between the flowers and ribbons of
the center medallion to create a “faux trapunto.” You may also
apply the same stippling around the ribbons of the swag borders
If you are transferring the designs to stitch on a home sewing machine or to embroider by hand you may find these methods helpful:
CENTERING – MeadowLyon Block Patterns have “centering lines” for easy placement. I think the easiest way to find the center of a square is to draw lines with a disappearing marker or simply a length of thread, diagonally both ways, from corner to corner. Poke a pin through the center of the pattern into the center indicated on the fabric. Using the “centering lines”, measure* to assure they are parallel to the outer lines of the fabric “block.” ( * Of course I “eyeball” it and you probably will too!)
TRACING – Place the paper pattern on a light box, an empty picture frame with glass, or a window. Tape in place. Next place the fabric over it and center it using the convenient centering cross-lines. Tape in place. Trace the design onto the fabric with a.) a washable marker or washable fabric marker; b.) a disappearing marker; c.) tailor’s chalk pencil; d.) a carbon leaded pencil that will wash out. There are lots of great products on the market! You can even get a white Clover marker to use on dark fabrics.
TRANSFERRING BY CARBON – On a hard surface, place a transferring medium such as dressmaker’s carbon* or “Saral” carbons over the fabric. Next place the paper pattern on top and trace over it with a ball point pen or stylus. (* Personally I do not like the carbon that is purple. It’s wet and smears all over!)
CREATE A STENCIL – Option A – Stitch through the paper pattern and after placing it on the fabric use a pounce pad to make through the “stencil.” This is convenient if you need to transfer the same design many times. Option B – Lay :” Bridal Tulle” over the pattern and trace with a fine line, permanent marker. When you want to transfer the pattern, lay the Tulle over the fabric, pin in place, and draw over the line with a chalk pencil. The chalk line will go through the holes of the Tulle to the fabric.
TRANSFER PENCILS – The latest tool is a great one. The transfer pencil (made by Fons and Porters and other brands too) create an iron-on stencil just like the old embroidery transfers. Simply turn the block pattern over, place it on a light box or window, and draw the line on the back of the block. When you’ve finished you’ll be able the place the block (right side up) over your fabric and “iron on” the stitching line.
TEAR AWAY – Option A – Trace the design from the pattern onto a tear away paper such as that sold through Golden Threads. Adhere the tissue to your fabric with pins or spray adhesive. Sew through the paper and tear away. Option B – Lay “Press n’ Seal” plastic wrap over the paper pattern. Trace the design onto the film with a washable marker*. Stick the film to your fabric and stitch through it. Tear away. ( * Always test the marker in a trial run first. Vis-a-vis markers for transparencies, Dry erase markers and permanent markers work well on the film, BUT, if you are using a long-arm machine, the heat of the needle may “set” vestiges of marker in your fabric.)
LONG-ARM MACHINE QUILTING – Of course you can place the pattern on the bed of your quilting machine table and follow the line with your laser or pointer. If you’re working from the front of the machine, DeLoa Jones suggests you place the pattern on a cookie sheet and adjust the laser to the page. You’ll still need to find the center of the block and direct your laser to that point. Then you can move to one of the starting points on the continuous-line block pattern and begin stitching.