I love seeing ruins and cultural influences in the Caribbean!
I want to introduce my “Mayan Tree of Life.” It’s not new, but I love it! I made it and the pantographs for it back in 2007. I’ve always loved Archaeology to the point of taking a few classes in college, where I was exposed to the so-called, Tree of Life Stone.
As a student, each day I passed a 5′ replica of the Izape Stelae #5 in the lobby of the Maeser Bldg. I was mesmerized by it and the images it held. So years later I decided to make a quilt focusing on that stone.
Several years ago when we visited Chitzen Itza and other sites in the Yucatan peninsula my interest was heightened. I drew several Mayan patterns as a result of that trip. I learned on that trip that the buildings/ruins had been painted in bright colors. They were not the bare stone we see today, hence the bight colors I chose for the figures on the stone as the central focus of my quilt. It shows the family of Lehi with angels (blue) surrounding the Tree of Life. I attached white beads for fruit as in his dream.
Layout for Mayan quiltMy interepretation of colors on Tree of Lifecolors on ruinscolors on Buildings
1) For the borders I designed several pantographs/borders/sashings as inspired by the ruins and srtifacts of meso-america. The largest border is entitled “Mayan Glyphs” and pictures representations of many of the recurring glyphs found throughout the area interpreted into continuous-line drawings. I learned many things, such as: a single bar equaled 5 years and single blocky circles, one year. It was fascinating.
Mayan Glyph #1Mayan Glyph #8Top Left corner of Mayan QuiltMayan Glyph #13Glyphs on wall of ball courtGlyphs on the astronomy tower
2) Inner borders were done with my sashing “Mayan Trim,” inspired by vases, etc. (Tricky to do “hand-guided!”) You can see Kukulcan , too!
OLYMPUS DIGITAL CAMERA
3) The next border is “Feathered Serpent or Kukulcan.” It is a combination of two images, one from El Castillo at Chichen Itza and the other from numerous bas reliefs on scattered temples throughout the region. As the The Mayan version of the Great White God it scrolls down the side of staircases and is ubiquitous in Yucatan. (You’ll even see him in National Treasure 2!)
Kukulcan at Chichen Itzaserpent headserpent coming down stairwell
4) Finally in the green area around the stone I stitched my earlier 6″ pantos Jungle and Rainforest.
The challenge that year for Machine Quilters Showcase was “Tropical.” What better way than to use these images from the American tropics embellished with tropical fruits and the Jaguar from my “Big Cats” block set.
Jaguar on Mayan Tree of Life
The quilt has traveled a bit. It was showcased and video made of its visit to Festival of Quilts in Birmingham UK. It has also been displayed/entered in other contests across the country
Quilted with Portico Blooms
In the next few years I designed some narrow pantos for smaller machines. (I can’t find a picture of the mosaic in Playa del Carmen that inspired “Laguna de Cancun.”) A great thing about Portico Blooms is that the combined 4.5″ rows create an 8-inch flower!
When making this quilt I was concerned that the bright orange backing would show through the loosely woven white front, so I have another layer of white cotton fabric beneatheth the front. Then I used 2 layers of batting. (I was really worried!)
I always like to give a recipe in my blogs. I hope you’ll enjoy this original recipe.
A few years ago we did some DNA testing. I was from all over the globe! But the biggest surprise was a high percentage of Irish ancestry! So I’m wearin’ more “green” these days!
Enjoy a FREE tutorial for my “Irish Blessing” Quilt. Just some honest Irish instructions. NO BLARNEY!
If you make it please share a Pic. It’s stitched with “Celtic Chain” which has 2 different borders. I’ve shown both so you can get the idea.
Our guild had a challenge to do a 2 color quilt, or at least a block. I thought about my favorite color – RED. Then I determined to use blue and include all my hand-dyed indigo pieces. But when I looked through my stash for a solid piece, I didn’t have exactly the right color blue! Well, of course, it had to match my hand dyes and that may be a problem. As I was fooling around with swatches I hit upon the idea of using green for St. Patrick’s Day. It could be scrappy and “use up” some of my many odds and ends. I must admit, however, I bought a few more for the mix! The ones I already chose out of my stash are on the left. The new ones are on the right. For this sample I couldn’t make it scrappy like I want for the whole quilt – remember, it was a 2 color challenge. Now I even have a 2 color quilt board on Pinterest!
The first thing I did to start was make a bunch of half-square triangles. (Whoever thought of that name?) I tried making 2 from a small square to confirm my calculations were correct. Then I made the rest with my “8 in one blow” method. Either way I made them a little larger than I needed so I could trim them to size.
Next I started cutting the various other pieces. I sewed the long strips together and combined them into the little checker boards and striped squares. When they were pressed I laid a few of each on the ironing board for you to see. Next came the actual sewing into strips according to the schema plan I made up for the PDF.
Now I have one block finished to show you!!! I love the way it turned out, don’t you? Of course, I plan to “quilt” it with my Celtic Chain pattern with 2 borders and 4 different blocks. Maybe I’ll go scrappy with the designs too, and mix them all in.
Before I forget, I’ve got a St. Patrick’s Day recipe for you. It’s my very favorite Rosemary Cheddar Soda bread. Wait ’til you taste it – fabulous!!!
This was fantastic. I made it exactly (I almost never do) except for baking it on a Pizza Stone.
Rosemary Cheddar Irish Soda Bread
A tasty Irish Soda Bread with sharp cheddar and fresh rosemary. This is aperfect as a side to your corned beef dinner.
Prep Time 10 minutes Cook Time 25 minutes Author foodnessgracious
Ingredients
2 cups all purpose flour
1/2 teaspoon baking soda
3/4 teaspoon cream of tartar
1/2 teaspoon kosher salt
1/4 teaspoon cracked black pepper
2 tablespoons fresh chopped rosemary
2 cups grated sharp cheddar
1 cups buttermilk
1 whole large egg
Instructions
Heat the oven to 425 degrees F. Lightly flour a non stick baking tray or spray with a non stick spray.
In a large bowl, whisk together the flour, baking soda, cream of tartar, salt, pepper, rosemary and cheese.
Add the egg to the buttermilk and beat until mixed.
Add the buttermilk mixture to the flour and lightly mix through until it becomes sticky and a ball forms.
Dump the dough out onto a flour dusted work surface and roughly knead the dough into an ball shape. It may be on the wet side so have some extra flour on hand for dusting.
Place the dough onto your prepared baking tray. Take a sharp serrated knife and cut an X on top of the soda bread.
Season the top with some more salt and pepper and bake in the oven for 25 minutes and the top is golden brown.
Let cool for 20 minutes before slicing and serving with butter. If you can resist!!!
There’s a LUCKY sale this week! So many great Asian patterns! Of course they are great even when there’s not a special sale!
CHINESE NEW YEAR??? WELL there are New Years celebrations all over Asia. Japan has Oshogatsu on Jan 1st, and Little New Year on Jan 15th. In Indonesia it’s Tahun Baru Imlek. So Hooray! – It’s a great time to celebrate everywhere.
At Meadowlyon you’ll find exciting Asian patterns from all of them.
I love my Chinese Pandas quilt! Many people have asked for a pattern for it! So, this year for Chinese New Year I’m delighted to offer you a simple pattern for the Chinese Lanterns I made to border the Chinese Pandas Quilt.
Why do I like Asian things so much?
Because I lived there!
My History with “Chinese things.”
I grew up in LA and we OFTEN stopped by Chinatown to buy those fun little balls -“prize balls! Have you ever seen them? There is a narrow paper ribbon wrapped round and round forming a ball. As a child unwraps the ribbon little prizes spill out: a ring, a tiny plastic animal, or a candy! I’ve been looking online and can’t find the name or pictures of them. How sad! They seem to have disappeared!
Another influence was Mrs. Lila L who lived up the street. She wore her hair in a bun pierced with two chopsticks and in her home were beautiful treasures including a large black lacquered dresser inlaid with mother-of-pearl. I wanted that when I grew up!
Little did I know then, how excited I would be when I married a man who took me to the Orient!! (Well, the Army did—but that counts!)
My first experince living in the Orient was in Korea. I loved walking through the market and enjoying the beauty of the Ancient culture all around me. That’s when I first found out there actually were tall thin mountains as I had seen in Oriental paintings!
Other places were Malaysia – I didn’t even know where that was before we got sent there! That’s where I got interested in Wayang Golek (Indonesian Puppets). From there we visited Singapore.
Later my husband and I were missionaries in Thailand. There was amazing “Art” and inspiration there.
Okay enough reminiscing!!
Now some FOOD for thought!
Chinese Almond Cookies are a MUST for New Year!
I made this recipe for the first time and it was GREAT! Probably sweeter, more delicate, and richer than those I’ve had before. The ones in Chinatown back then, in the old days, were probably made with shortening and these had butter. It was a notable (good) taste! I got the recipe from Pinterest, so I can’t publish it here. Sorry! But if you search chinese new year recipes and look for “CHINESE ALMOND COOKIES,” you’ll find several with all very similar ingredients. I will tell you this, the one I choose had almond flour in it. I think it was significant. Luckily I had some on-hand!
SHOULD YOU TRY THEM? “SHUR.” (“yes” in Chinese;)
This is the year of the Snake and I also saw “Snakey” Breadsticks, etc. they were cute! These are my only “Snakey” looking patterns.
SnakeskinTornado
EGG ROLLS
I’VE DECIDED TO THROW IN ONE OF MY VERY MOST FAVORITE ASIAN FOODS. I’VE BEEN MAKING THEM FOR YEARS.
Mine are not like commercial egg rolls. I don’t prefer those. Mine are kinda chunky, as you can see.
You might enjoy some of my past Chinese New Year blogs:
“Baby Its Cold Outside”-Snow/Ice Dyeing and a Potpourri of other Dyestuffs. If you haven’t tried snow or ice-dyeing you’ve missed loads of fun. Trudging out into the snow filled yard with boots and rubber gloves is the perfect way to spend a snowy afternoon. You’ll be amazed at the beautiful colors that emerge as the procion color-infused snow melts through the fabric!
Here’s a copy of my PDF. It has some additional “ICE DYEING” instructions to supplement my earlierSnow-dye blog. A couple of years ago I gave this Ice-dying class to a guild in Alabama. You can download the whole thing above.
The following are images from the PDF:
These shirts were “tie-dyed” in the “underneath” tray!
I made this fun quilt about 20 years ago, and this past week when we were visiting our daughter, she had put it on my bed. It was so fun to sleep under it’s snuggly warmth.
So I thought I’d give you the measurements and show you all the blocks in case you’d like to make one for your kids.
I measured the blocks in this old quilt the best I could!!
With a few small exceptions all the fabrics were flannette.
It looks like some of the Snowmen were fatter or thinner, but – “who knows?”- it’s been washed dozens of times!
Back then I wasn’t a “quilter,” so I tied it with little snowballs.
They were just perfect!
Thanks for enjoying this old Quilt with me. It holds lots of memories!
What can we do with these block patterns? Let’s build a quilt with the free printable PDF Nativity Blocks Download. WAIT! I’ve decided to offer the Embroidery files FREE for these blocks also. What a DEAL! Every few days I’ll highlight another of the block plans. But you can see them ALL, here in my Nativity Block Blog.
Consider Having a Title or not: I like “Silent Night” as well as “Il est Né, le Divin Enfant” You may have an even better idea.
The download for the Free Nativity Quilt Tutorial (designed for the “One-piece” Joyful Birth Quilt) has patterns for the palm fronds and holly that you can use if you want. I pasted “pieces” of that tutorial on the mock-ups for the blocks.I didn’t get carried away with it, because I’ll actually put them on when it’s on my “design wall.” I’m not even certain about the color for the sashing, but I do want it to look Christmasy. I have some fabric that looks like sand, and/or rocks and/or palms – Can’t decide!
All the time I was drawing these patterns I spent a lot of time in the Scriptures. I wanted to get everything right and to express the joy of this story! I hope yoou’ll feel that way too.
I have other suggestions for using them, too! Read on!
You might be able to tell I was trying to make these Nativity drawings appealing to children. That’s another reason why I’ve described some of my thoughts and feelings about each block. Of course, I don’t expect you to add all that “script” to the quilt, but I wanted you to understand where I was coming from.
Here’s a totally “faked” composite. Even all the blocks are still edited differently!I’d love to see what you do with it!
So what about other ideas now!
Something we did for our family was unroll the full pantograph down the hall and let the kids color the pictures. For these “blocks” I suggest something similar. Let your children color these block pictures. Since they’re free, you can print as many of the blocks as you want. You could even use them for a Sunday School class.
Something else I started was to applique and embroider them. Here are a couple of examples–one very involved and the other “not so much!”
Here are “How-To” steps for the embroidery.
I don’t have pictures of kids coloring the blocks and will try to get some!!But HOW ABOUT paint!
OLYMPUS DIGITAL CAMERA
On this shephered I used Tsukineko ink and applied it with their little Fantastix coloring sticks. The sticks are like empty magic markers. They suck up the ink and don’t let it go (or run). It just goes where you want it to go. I find it seldom goes past the stitching lines. (See the example above.)
I also like to use Shiva Paintstiks. I NEVER apply the paint like a crayon! I smear it on a paper plate(palette) and lightly brush it onto the quilt with a stiff brush.
Add some fun to your quilts with Neon thread and a little Black Light flashlight.
How did I get started on this “Black Light” jag? My friend and customer Julie Lucht sent me pictures of quilts she was making for her grandchildren. They were stitched with MeadowLyon designs and highlighted under “Black Lights.” Check these out and you’ll see why I was so excited!
Wow, I was motivated! I could do that for my grandchildren and pass them out at our family reunion this summer!
I wouldn’t have to “piece” the quilts – just use uncut pieces of fun fabrics. Hooray!!
Here are the 11, and almost 12 quilts I’ve made so far!
I’ll include links to the pantos and some pix of the original fabrics.
As Julie was sharing her photos she mentioned that they were not all stitched with “Neon” thread. So I did some experimenting also!
Here are some things I learned:
At first, I ordered machine quilting/embroidery thread. I would say to quilters, “Don’t bother.” It was too thin for a strong statement on the quilt. See how it turned out on the Dino-babies quilt back. On the front of that quilt I used a heavier thread. I wish I’d done it all in heavier weight.
I also found that heavy thread from varying companies was successful. Unfortunately, some the threads I liked best were discontinued spools I had on hand. I loved some of the colors of Superior’s Brytes and Highlights. Neither of which are still available (except on my shelf )
Another that was successful was Linda Taylor’s Neon thread.
A strong heavy weight “white” thread is always successful.
To begin, I shone the black light flashlight over my thread racks to determine the strength of various colors.
Before stitching out a quilt I laid the backing fabric out and draped various threads over it- lighting it up with the black light flashlight. That way I could adequately see which thread showed best! Sometimes it was a surprise. Once I thought I had found a green that was good, but when I stitched it out on the space quilt, the “Earth” did not show up at all!
Back to the Spacemen quilt again (many disappointments), there was a heavy white thread that showed up great, but as it was in the bobbin, the top thread kept breaking so I had to switch to a less heavy white. It still showed, but not as good by comparison. On that same quilt the neon green I used does not show as well as the ordinary white. Humpf!
Hot pink and hot orange and bright gold were all super! And a heavier lime green was wonderful too.
All my backings were dark colors; Black, navy, dk brown, hot pink, and royal blue. Interestingly the pink shows as dk. blue with the Black Light!
My successful colors in plain lightWith Black light!
Linda Taylor’s Thread by Design Tex 4; Fluorescent Orange, Highlighter Yellow, Psychedelic Green
Superior Highlights #731 Neon Green
Superior Brytes Neon Green
Sulky Poly Deco
YLI Jeans Stitch Tex 90; White & Hot Pink
New Brothread Glow in the Dark Embroidery Thread Tex 30; It’s not as thick as I would like.
Julie suggests trying Glide #10002 Super White!
Aurifil’s Everglow from Tula Pink looks promising, but it does not specify thickness.
There are others online that look promising.
What about “Glow in the Dark ” Thread?
What’s the difference between Neon and Glow in the Dark? Glow in the Dark actually retains light for a period of time. The claims are it will retain “glow” for 3-8 hours. This shows brightly after 3 hours and there is a very faint glow after 8 hours that the camera couldn’t pick up, but could be seen.
The best that I’ve found is the big one – BulingBuling TMLuminous Embroidery Thread. It is still a thin embroidery weight.
In this picture is the Brothread Glow in the Dark thread I purchased. It is the one I decided was too thin. But….Maybe it would be a great alternative to carrying a Black Light flashlight.
Glow in the Dark Simthread looks promising, too. It should”Glow in the Dark” glow for an extended period without black lights. I’m not sure the thickness of this thread from amazon. Sadly it did not have staying power. I returned it.
So get busy. Buy a Black Light Flashlight, Search your Thread Drawer and HAVE FUN!
Spring is Exciting! I think of Sunny Days and bright breezes.
In the grocery store, I bought a beautiful, potted Blue Hydrangea. Suddenly I loved the spring flowers. Having it on my kitchen table has brought me so much happiness, I wanted to share it with others.
My mind raced to devise a quilt design on which to display a Hydrangea Pantograph. It’s been fun and I found that the emergence of the pretty spring flowers here in Kansas has lifted my spirits.
It’s really a simple design. Here’s how you do it.
1. Measurements for cutting flower block2. Sew squares for corners3. Trim corners4. Trimmed and pressed5. Pressed from front6. Finished flower – 9 1/2 “7. Measurements for chain block. 8. Piecing plan for chain – Piece large strips, then cut the 2″ sections. 9. Finished chain – 9 1/2″10. Pressed from back11. Pressed from front12. Arrangement of blocks
This could be adapted for pansies or any number of flowers in our gardens by changing the colors on this very simple pattern.
There are spring flowers everywhere I look. They bring the promise of re-birth and new days of peace and plenty. The world will become right again. Have faith!
The Desert is starting to bloom! It’s an awakening time of year! If you haven’t been out to see the open landscapes, I encourage you to go! If not enjoy pictures posted on the internet.
The big Fabric companies are announcing new specialty fabrics emblazoned with cactus and succulents. So hurry out to buy a few yards of the fun “sandy” fabrics.
The Results
One of my favorite new patterns is “High Desert.” It’s the one filled with my memories. I love to see designs like this stitched out over quilts. It induces the viewer to “zoom in” and have a closer look. It’s so interesting.
“Oh yeah! Cactus! My mom was a crafty sort and she just had to have some of that decorative Cholla Cactus wood. I can remember her with a handkerchief tied around her face like a mask and wielding a big butcher knife held by big heavy gloves – scraped the “stickers” off the cactus!! Those stickers are terrors!! They are the enemy! I know that from experience. But, Cactus Flowers were another thing! They were friendly and had beautiful, brightly colored flowers.
I’m fascinated by the varieties of Desert Landscape. I guess that’s because I am a Southern California girl! We had a Desert Cabin just outside Joshua Tree National Park. I loved to stand on the large boulder in front of our house and feel the strong wind blow against me! I would dress up in my boots (protection against snakes, you know!) and wander through the dry “wash” and go climbing over the boulders and up “Rattlesnake Hill” behind our cabin. My brother and I would shoot at old tin cans with his Bebe gun and sometimes a jackrabbit, too.
More Desert patterns: (Not dessert – but still yummy!)
But there’s more to the name than that. When I was a girl our family would often drive from LA to Utah or to Lake Mead in Nevada. Going through Las Vegas, we always stopped for the night at the “Desert Rose Motel!” I doubt it’s still there, but if you drive into Las Vegas from the south on the old road, watch for it.
SOOOoo …I found a great picture of beautiful succulents and decided to mock-up a quilt to match it. I sewed strips round and round the center in the colors I saw in the photo. I over-layed the Desert Rose patterns over it. I love it and hope you do too. If you make an actual quilt Pleeeze send me a picture!
Desert Rose Quilt Construction:I had noticed that the succulents often had a tinge of fushia or purple along the outer edge of the petals. I wanted to achieve this look and so inserted thin strips randomly through the blocks.
Mock Desert Rose quilt design. It’s so easy!! I just pulled these fabrics out of my stash and randomly sewed them in place! For this “mock” quilt I made only 2 blocks and tinted them differently so I could show you a “whole” quilt. It’s beautiful, isn’t it? You’ll definitely want to try this!
Hey, all this talk about “Desert” is making me hungry for “Dessert!” What do we eat in the Desert? Prickly Pears? Aloe Vera Juice? Jack Rabbit Stew? Get some ideas at the end.
Cactus Flower – this is the quilt I started as an example.
Hooray, it all went together well and I barely had enough fabric! I quilted it with my Cactus Flower pattern with a variegated deep red thread which stood out great on the black backing! In the side borders I used Saguaros from my Cactus Garden Pattern.
ASSEMBLY Adding Spines
For the spines I finally settled on a rayon thread which frayed pleasantly!And, oh yes, the pink wasn’t as bright as I wanted so I spray-painted the fabric with Neon Pink spray paint.
Try a taste of Desert food! Rattlesnake Hot Dogs, Joshua Tree Date Shakes andDate Crumble.
Rattlesnake Hot DogsBrowning Rattlesnake DogsJoshua Tree Date ShakeDate Crumble RecipeDate CrumbleDate Shake Recipe
Serving as a missionary has given me an added opportunity to appreciate all the Blessings God has given me – AND to ALL of us. I think we don’t always recognize and give thanks to Him who gave them all.
So, this past year as I was making a quilt with animals flowers, etc. (as I am wont to do) I felt I should add the phrase “The Lord God Made Them All.” In fact, I felt “He” wanted me to say that! After all, I firmly believe He did make them all.
The phrase comes from a lovely old hymn entitled “All Things Bright and Beautiful.”
From Wikipedia: “All Things Bright and Beautiful” is an Anglicanhymn, also sung in many other Christian denominations. The words are by Cecil Frances Alexander and were first published in her Hymns for Little Children of 1848. The hymn is commonly sung to the hymn tune All Things Bright And Beautiful, composed by William Henry Monk in 1887.
As quilter’s we commonly use motifs from nature and the beautiful world around us. I decided to applique those words across the quilt and my friend, who quilted it for me with my Chicken Feathers, stitched over the words with my Sunflowers pattern. Very appropriate indeed. I’m considering adding it to the quilts I make and design in the future.
If you have a quilt that seems appropriate, I’ve made a little PDF. It contains the letters which could be appliqued, but also a continuous line version for machine quilting. “The Lord God made them All”
The quilt is a hodge podge of designs found online and modified. There was even a panel of roosters bought at the local quilt shop. I guess the little chick is the only truly Judy Lyon creation and I did add the little plastic wings on the bees. Hmm. It can be washed but can’t go in the dryer! Because the roosters had printed “frames” around them I had to make “frames” around the pieced hens, beehives, and ducks I pieced. Now that you know, you can probably spot the difference. That became a bit grueling!
I’ll share some closeups in case you like the idea.
I’ve saved scraps from the original quilt to make an easier version as a “strip” quilt. But I’ll need to make a lot of chicks and more Bees! This time instead of plastic wings, I’ve got a branch of artificial flower petals to try.
TIGER STORY: embroidered on a quilt from the Hill Tribes of Thailand.
For a long time Lawloua walked to the forest. Lawloua shot a gibbon in the tree. The tiger bit Lawloua. The tiger put on his clothes and carried a Gibbon with a gun, came home.Lawloua’s wife and young sister waited it.The tiger cut the gibbon into 4 pieces and counted and said: share our one bite. After finished the Gibbon, the Tiger enter to bedroom and bit Lawloua’s wife.At night the Tiger asked and said: where you sleep tonight young sister Jor. For a minute she took a skirt cover the pan and the pan cover her in. ? maybe she was hiding. At morning the sun was shining. The Tiger saw sister Jor sleep on the roof. Suddenly the Tiger jumped on to the roof to bite her but she threw chilly (chili) to its eyes.The tiger no has wisdom. It ran to wash eyes at the pail of water.One day the crow flew to the roof. She gave it any kind (? what) for tell her parent. The crow went and tolt (told) Jor’s father and put down a kind for him. They conversed for about they how to help their daughter. They dug a big hole wait for it and they would kill it.They prepared some munitions. They arrived Lawloua’s house. They asked their people. Jor called the Tiger come home. They tolt a lie and said to it sing song. They took the Tiger to dip up water. The tiger went to fell in the hole and then they killed it that time. They took Jor go back home.
How about some Tiger cookies?
Black dough on parchment paper.
Black dough rolled to 1/4.”
Orange dough on parchment.
Roll orange dough flat and place flat black on top.
Cut them in half.
Roll up one half.
Finish rolling up both halves, separately.
Cut now if you want spirals.
Flatten roll to make striped version.
Fold over flattened roll.
Roll it into paper to round it out.
Dip a cup in a mixture of half brown and half white sugar. Press in onto the top of each slice.
Baked spiral version.
Baked striped version.
Here are the steps in shaping the tiger cookie doughs.
It is not the cold spooky orange and black of Halloween. No, It’s a warmer combination of gold and orange and brown; touched with the reds of Christmas which are soon to come. It is the color of fall leaves, first on the trees, then blanketing the ground below.
It’s a beautiful combination of them all, isn’t it?
Can you EAT those colors? YES! See below for FREE PUMPKIN-MANIA Recipe booklet!
Thanksgiving Story : When my kids were small I discovered this cute story and made a big Turkey puppet and big puppet children. They came with us each year to school and kids were chosen out of the classroom to re-enact the story multiple times. Here, my daughter copied it for her kids.
Maybe your kids can do this little play!
“Patience and Daniel were little English children in the settlement at Plymouth. One day their Father brought them a young turkey to raise and play with. They were so happy to have their nice pet. What’s his name they asked. But he didn’t have a name. You choose a name Daniel said to his little sister patience. She named him (let the kids choose.)____.When their Indian friend, Takset, came to play he was so surprised. All three children spent many happy hours that summer playing with their pet _____.
When they walked to the stream to get water for their mother, _____ Turkey followed them. When they shouted and ran noisily about the turkey was frightened and flew into the branches of the tree to hide.When the children ate their snacks, ____ turkey pecked at their feet hopoing to have a snack too..When autumn came Father said, “___ turkey is the biggest turkey in the settlement and we’ll cook him for our big Thanksgiving feast.”
The children were shocked. That night Patience and Daniel cried themselves to sleep.But in the night Takset crept into the village. He carried ___ turkey away in a big sack.The next morning the turkey was no where to be found so Father and mother baked a different turkey for the feast.When all of their Indian friends came, they were surprised to see Takset with ______ turkey. They were so happy! The children played all day and that night three happy children fell into their beds, dreaming of playing together the next day.
Yikes, I can’t believe it’s so late! Where has this month gone?? I just realized I’d better get this post out before it’s too late.
I have some Quilt mockups, but now it’s too late to start for Thanksgiving. Oh well, here they are anyway.The first is for my newest pattern: “HUNTING.”Fall is Hunting Season!
This year I just can’t seem to get enough of my yummy brown Pumpkin Filling. I’ve already used it several old ways and invented some new treats. In fact, I love all things Pumpkin! I thought I’d share them with you.
“BATS” Yesterday I added a new FREE pdf ! You’ll love the way it looks on your Halloween Quilt!
Look what My grandson served us when we visited last Halloween! Do you have a favorite Feet-Loaf recipe? Use onion slices for toenails! See recipe below.
The air is getting a little cooler, thank goodness! I just hope it doesn’t get so cold the kids all have to cover up their costumes with coats. AND! Heaven forbid, snow like we had one year. It’s late & We’ve got to get those Halloween patterns off the shelves before they’re mummified!
Halloween Kaleidoscope Quilt. Can you see how I tried out my Halloween pantographs on it?
I love my Halloween Kaleidoscope Quilt. I love making Kaleidoscopes and arranging them in new ways.Click HERE for the tutorial.They make a perfect quilt for so many of these Halloween fabrics!
Plus, I’m always thinking about all the yummy treats for Halloween. I hope you like my – Floating on Air -“GHOSTIES” – to go along with my “Ghostly Feathers”pattern. Learn how to make them below.
Every October when our kids were small I would decorate the front door with spider webs made of black or white yarn and hang big plastic spiders on them. Then, there was the year James made Jack Pumpkinhead and he has been our door greeter ever since. See him in last years Halloween post. AND get the recipe for ouryummy “pumpkin-filled” Pumpkin Face Cookies.here
Don’t get creeped-out by my “Spider Webs” Pantograph. Ohhh, they’re so realistic and soooo Creeeepy! It reminds me of the spiders the boys made in Cub Scouts. See below.
Okay – I’m not really crazy about spiders. I step on them purposely, but I had 5 boys and, well, boys like stuff like that! Here’s a paper bowl spider I taught the boys to make in scouts. Kids love creeping it along! It has been loads of fun over the years. 25 years to be exact! (It’s a little weather-beaten!)
Make the “control” hand piece with wooden strips and tie the strings to them. One string to the body. 1 each to the front and back legs and 2 legs each to the center sticks.
A close-up. The body is made from a heavy paper bowl and the bulging eyes were added with instant papier mache then painted.
Each of the boys made one. I love him all sprawled out. Put a screw eye in the center of the spider and attach it’s string to the center of the control.
Attach wooden legs with a small square of black cloth, wrapped around and glued in place-+ and wrapped with string to secure them. Glue them to the under-side of the body.
Here’s a close-up of the legs with the string glued on.
When you want to put him away, wind him up to prevent the strings from getting tangled.
Enjoy his creepy crawly movements!
Here are some other fun Halloween patterns and recipes/ideas to go with them!
My mom used to add chocolate chips to her meringues. She called them Surprises! I didn’t do it on these “Ghosties” but you might want to try it. The chips don’t show on the outside!
It was fun coming up with new cookies this Halloween. Serve them with your “Ghostly” quilt.
Fit a pastry bag with a coupler or large round tip.
Fill it with the meringue.
Pipe out: head first then swing over to the arms and swish down the tail!
All piped out on parchment paper and ready to bake.
Checked for doneness at 50 min. It’s just right and light as air.
Yumm! all baked and ready to float away!
I can’t resist!
Isn’t this a fun Ghost pie my friend Virginia made?
Do you have a ghost cookie cutter? Let me dig through my baking drawer and see if I have one.
It’s windy today and I’m afraid the leaves will turn and blow off the trees before I can get my Thanksgiving candles made. Go here for the Ice Candle tutorial. Make them NOW while there are still leaves to gather and put them in your freezer!
Last weekend for Memorial Day we camped on the Oregon Beach. It was wonderful. The weather was ideal and the countryside and beach beautiful. There is so much of America that I love.
The kids were playing with others in the campground and on the beach. ONE OF THE FATHER’S CAME OVER AND INTRODUCED HIMSELF. Our kids had been playing together all day. Later that night we took some left-over Ribs to their family and they shared thin peanut butter cups – perfect for S’mores.
That was the epitome of a good neighbor- a GOOD AMERICAN NEIGHBOR! There is something about being in a camp. You are all on equal footing. Every person gets a “hello” and cheerily gives one in return. This is the way it should be in all our neighborhoods – in every country. God has made us all and that’s good to remember!
We all want to make those special quilts for the men we know – but there’s always the dilemma of how to quilt them. Worry no more! Here’s a big selection of man-friendly patterns. Stock up while they’re on sale THIS MONTH!Hooray!
Modern Skylines 11″ Interlocking My Dad took took us on a Kiwanis Convention to New York City.
Backwoods 11″ Pictogram One son loves hiking up into the Backwoods.
Campout 11″ Pictogram My Dad always took us Camping every summer! My son-in-law takes the family camping in their “pop-up.” Another takes his family camping at the lake.
Fish Tales 3.5″ w Fish Bait Dad was from Minnesota and loved sitting in a boat all day fishing.
Who is a Father in your life? Is it your own distinguished Father? He might enjoy a lap-quilt for his recliner.
Is it your husband – the strongman who lifts things for you. He’s the one who reaches the high shelves and the one who checks the oil in your car. He might like a new quilt for the yacht or your family vacation cabin.
Or is it your collegiate son or the fun-loving guy who has made your daughter the luckiest girl in the world. They’d like rugged quilts for backpacking or camping with the kids!
Don’t you love those cute, funny snowmen roasting marshmallows and singing carols? For stitching your “Snowmen are so Silly” quilt just lift them out of the “Silly Snowmen” pictogram. https://www.meadowlyon.com/shop/silly-snowmen/
To make a “WINTRY” Table Topper or Wall Hanging use the FREE Snowflake Block/Quilt pattern that comes with the “Snowmen are so Silly!” tutorial above.
For a simpler approach, these four images are now available in stencil form through our distributor Full-line Stencils. Use them in lots of ways!
I’m always dreaming of food! So Scroll down for something Yummy!!
Snow Dyeing? YES! This seemed like a good time to pull out those wire baskets I insist on saving and open up my bottles of dye. Do you want to try? Follow along.
After preparing fabric for dying scrunch (or tie) fabric and place it on a rack or screen.Place a disposable pan underneath to catch the melted dye.Mix your Procion dyes outside in disposable containers.Using analogous colors, pour the dye in spots over the snow.Bank the snow up around the pan to prevent melting too quickly.Try some other analogous colors while you have the chance.Eventually it melts, but the fabric is held up by the grate so it does not soak in the “mixed” dye.Another day’s success with more snow.Be sure to leave your dye spattered boots outside until you clean them off.Enjoy great success! Blue and yellow.It is so fun to see the results. Red and blue.But it is so hard to cut into them. Red, yellow & fuchsia.A QUICK PIC-TORIAL ON SNOW DYEING IN YOUR BACKYARD.
My method:
Snow dyeing with Procion dyes: First, after washing the white fabric, I soaked it in ½ c. washing soda and 1 gallon hot water for 1 or more hours. Then I scrunched up the cloth (twisting tightly gives a nice effect too), placed it on a grate over a disposable pan and piled about 5 inches of snow on top. After that I poured the pre-mixed dye over the snow. I did different analogous colors in spots. One set of pieces had turquoise, green and yellow and another with fuchsia, tangerine, and yellow. Then, I also did purple and turquoise, and used up the rest of the mixed red and green dyes. I scraped every last bit of snow together for them because in our area it doesn’t last long. They all turned out great. It’s been really fun. (I couldn’t stand to waste any dye, so I also stuffed fabric under the grate to catch the drippings.)
I left them in the cold for a couple of days because I didn’t have time to wash and rinse. Don’t worry it’s not a problem. The longer they remain in the dye, the brighter the colors. However, some melting must occur to liquify the dye. Cold temps make it take longer. (The liquid dye is the key. Once it is dry that is the end of the dyeing.) They actually only need about 24 hours if the snow has melted. (Sometimes I’ve shaded them or brought them into the shed to finish.)
For ice dyeing : Prepare t-shirts or fabric by soaking in washing soda and water.
Leaving the fabric wet, I wrung it out then wadded it lightly and placed it in a disposable pan. If you have a grate you can lift it out of the puddle. I piled ice cubes or crushed ice on top about a hands width high. Then I sprinkled “Tie-Dye” powder in spots over the ice. Don’t sprinkle everything in the same place or you’ll get “mud.” It’s always a good idea to wear masks when working with dye powder! Plus, wear rubber gloves. (You can get Tie-Dye powder at Walmart – don’t use Rit Dye because the colors will not be strong enough.)
In both cases, Wring out the extra dye out-of-doors and then rinse the fabrics well in the washing machine. I added Synthrapol to the wash to carry away any loose dye. You can also add dye absorbing dryer sheets to monitor whether any loose dye remains. Usually 3 times through the cycle gets out all the loose dye. Don’t stop at one and think you’ll be okay.
When you’re finished you’ll have beautiful hand dyed fabrics to use for your next quilt.
Have fun.
Here’s another way to use the Silly Snowmen Pictogram. Find it in the Star Quilt Fantasy PDF.
Lately I’ve been obsessed about getting my machine embroidery files on the market. You know how it is, when you’ve worked hard on something and spent money on it, you want it to succeed?
I’ve always loved my Around the World Santas. I drew them about 10 years ago. Even now I look at them and say to myself. “I drew that?” I’m proud of them and happy with the way each one is creative and unique. But sad to say they all sat in their books and I never had time to do more with them. Sob! Find out what changed below.
CREATION – I started off trying to make each one reflect the way the people of that country thought of their very own Saint Nicholas. Germany and France and Scandinavia were very much that way. I made a framework around each that was unique and reflected some of the image itself or the beliefs surrounding that character.
FRUITION – I needed samples to put on my website and for Oregonpatchworks.com who was selling them to the broader Machine Embroidery market.
Germany –Weihnachtsmann (“Christmas Man”) Germany has many names for Santa Claus. Most reflect variations of St. Nicholas such as Klaasbuur (Nicholas our neighbor) but I’ve chosen the father-like figure of Weihnachtsmann who trudges through the night with his burden of toys.
France – Pere Noel is a woodsy character. Children leave their shoes by the fire filled with treats such as carrots for his donkey Gui (mistletoe). If the children have been good they find presents in their shoes.
Scandinavia – Julemanden is helped by the Tomte or Nisse – magical farm folk. In Scandinavia everyone agrees Santa Claus is one of their own. Many say he lives in Greenland and flys over all their lands, while each country has claimed a local home for him. Regardless, he does ride in a sleigh pulled by reindeer. At Christmas time the dining room ceilings are festooned with stars forming a “Heaven.”
Next came some of the standards; the American Santa Claus and the British Father Christmas created by Charles Dickens and Albania’s Grandfather Winter.
United States – Santa Claus is the jolly old elf we all know and love. How he magically comes down the chimney may be attributed to St. Nicholas who dropped gold down a chimney, magically landing in a stocking hung to dry.
United Kingdom – Father ChristmasThis jovial figure was originally part of an old mid winter festival and was dressed green robes. He might look similar to the “Ghost of Christmas present” from Dickens. He goes about the town ringing his bell for the children to come out. Here the children enjoy decorating their homes with greenery reminiscent of “The Holly and the Ivy.”
Albania – Babadim ri (Grandfather Winter) In Albania, because it is a nation of both Moslim and Christian peoples the fun aspect of Christmas has been embraced and become a common ground for families and neighbors to share in the happiness and fun.
Then as I gained more confidence (or maybe came up with some stumbling blocks regarding the beliefs about Saint Nicholas in any given country) I started devising imaginative images depicting what “I thought” they might look like. Latvia and Finland and Ukraine were like that.
Latvia – Ziemassvētku Vecītis (“Christmas pop”) bundles up against the harsh winter chill. Latvia claims to be the home of the first Christmas tree.
Finland – Joulupukki rides in a sleigh pulled by reindeer. Finland claims its town of Korvantunturi to be the home of Santa Claus. It also claims to be the home of the candy cane.
Ukraine – Did Moroz , In rich tradition the grandfather magically leaves candy and gifts under pillows or the shoes of the children.
Finally – here’s where my Poetic license started to emerge. Russia (spreading frost!) and Switzerland (where I did not clothe him in a long robe but made a cheerful mountain-man) and Italy where he took on the look of the Renaissance.
Russia –Ded Moroz (Grandfather Frost) comes from the pagan tradition. He wears a long embroidered coat trimmed with fur. You may know him by the name “Jack Frost.”
Switzerland – Samichlaus knocks on each door consulting his big book of sins. Children gain forgiveness by reciting a poem and promising to be good. Then they can reach into his bag of treats.
Italy – Babbo Natale fills Christmas stockings with treats and traditional toys like the shepherds flute. Even more popular is La Befana (see Book 2.)
What did I do with all of these sample I was making? I photographed them and gave them as Christmas presents. They were so FAST and EASY!
Eventually I hope to get all of them converted to embroidery files. But that will be when I learn to do them myself.
In the meantime they are still available in book form for longarm quilting, hand embroidery or as digital files for computerized machines.
As you can see, mixed in with the very traditional figures like “La Befana” and “Saint Nicholas” and “Sinterklaas,” I might have started taking even more leeway as far as Santas Around the World, but I’m satisfied they represent their origins and the people who watch and wait for them each Christmas eve! Isn’t it fun to create!
I look forward to make more pillows and wall-hangings from them too! Someday, maybe a whole quilt! These Redwork files would make great “Quilting!”
Here’s the beginning!
Korea – Santa Kullosu (Santa Grandfather) If you were a Korean child you would pronounce his Kurrosu.
Here he’s loaded his CheeGai with miniature Turtle boats and fish kites as he wanders over the mountains.
How do I know about this I lived in Korea!
What changed? I had been begging friends to try out the embroidery files I commissioned, but that took time. So how did I finally get moving?? My unbelievably good friend gave my an Embroidery machine! I still can’t believe it!
BON VOYAGE! & MERRY CHRISTMAS!
Oh, BY THE WAY 100+ international patterns are also on sale this month!
Tag-on pillow tutorial!
1.embroider design2. trim3. trim to 10″4. mark lines to sew piping5. attach piping6. clip slightly to turn corners7. overlap to join8. cut 2.5 inch strips for borders9. cut interfacing 2.25 inch10. iron on interfacing11. Sew side strips on pillow over piping and trim ends off evenly12. sew on top and bottom borders13. trim off evenly14. squared up15. pressing from back16. clean up if not done already17. cut interlining to protect back of embroidery18. sew interlining to front19. interlining in place20. cut strips to make piping if you are making your own21. make piping22. trim edge to even it up before sewing on the pillow front 23. Sew piping around the front24. piping in place25. “round” these corners because the piping is so large26. from back27. cut backing fabric. 2 pieces about 3/4 of the length of front.28. Position the first back layer.29. position the second back layer.30. showing how they overlap. This is the opening rather than a zipper31. sew all the way around attach back to front. You’ll still need to use the piping foot.32. secure the raw edge33. turn the pillow and press34. fill with stuffing or pillow form
This year is moving so fast- of course I’ve been traveling a lot. And I’ve made 3 baby quilts for my 3 new grandchildren. Those at least, got finished.
It was the “Nemo” quilt! This was my first time doing applique with an embroidery machine. I learned a lot and will certainly be doing it again. I feel I had great success with the clownfish. See below for a few shots of how I did it.
Thai Temple Tiles
I’ve also made a UFO – Thai Temple Tiles- and I love it! To me the colors are great although I’m not a big fan of black, but in this case I think it really POPS! I realized the other day that it’s reminiscent of Amish quilts pieced with a black background. See below how I made the blocks.
I love the quilting too! It’s “Gulf of Siam.” The even, tight texture is a perfect complement to the tile design without competing with it. My new Oriental Elephant border works well on it too. Since it’s a PDF it could be sized to fit. It still needs a binding but the trunkshow date arrived, I displayed it, and had to move on to another baby quilt.
I want to go back and put some pebbles around the elephants to make them show up better. Awww, too much to do! See the FULL PICTURE tutorial below!
So I’m skipping ahead to Machine Embroidery!
I’ve finally got some Christmas things ready for Redwork by Machine Embroidery! The can be enjoyed simply as embroidered blocks or used for the actual quilting. You can buy them at my website until my link opens up on Oregonpatchworks.com.
Joyful Birth Embroidery Files
“Joyful Birth includes the following 12 designs: Holy family, star, choir of angels, shepherds (3), wisemen on camels (3), boy with donkey, animals, village.
You can stitch the blocks separately to make the entire scene or place them into a quilt with sashings between.
In Albania, because it is a nation of both Moslim and Christian peoples the fun aspect of Christmas has been embraced and become a common ground for families and neighbors to share in the happiness and fun.
I don’t have them all posted yet, but will do it as possible. You can purchase them separately ($3.99) to get your favorites!
While I’m on the topic of Machine Embroidery – here’s how I did the Nemo quilt. I appliqued the fish on with the Machine embroidery!! I resized some of the fish and positioned them and flipped them to add some variety to the blocks.
Sterling’s Nemo/Fishy Biz
It was all quilted with my “Fishy Business” pictogram.
I’m finally back to the Picture Tutorial for my THAI TEMPLE TILES QUIILT!
Inspiration from Tiles on the Temple of the Emerald Buddha in Bangkok. (I made a shiny copy.)
Block layout
Quarter Sq.Triangle-step 1
Quarter Sq.Triangle-step 2
build strips for chain piecing
Chain piecing strips ready
Chain piecing on the machine
All chain pieced!
Individual finished block
Black border corners 14×5
inspired by Thai ruins
Applique placement on corner
Cutting an applique pattern
Quilted with Gulf of Siam inspired by Thai monument
Thai monument for inspiration
Gulf of Siam on Back
Oriental elephants
Autumn Variation
This quilt was surprisingly fast and easy. If you use a “jelly roll” it will be even easier. Since I didn’t use one I can’t tell you how many you’ll need. Sorry. If anyone makes it, let us know how many jelly rolls it takes. Of course, you can make this quilt small for a lap/baby quilt or large for a bed. This one measures 60″x60.” (when I get the border on!)
I’m afraid I have been accidentally quarantined from the longarm. I had big plans, but then there were masks to sew and a donation quilt and working on my embroidery patterns for Christmas sales and…
I’ve been trying desperately to get this set of Santa’s out for Embroidery machines. Watch for them in the next newsletter. Here’s Scandinavia’s Julemanden.
There are always a million things to do and this month we had a beautiful new granddaughter. Here’s the quilt I made for her. It’s stitched with Fairy Spring.
Then there is the quilt I made for a new great-grandson!
Were having a “last chance” beach and vacation sale. Along with that is a Beach Borders misprint I’m offering Free with purchase. THE BEACH??? Well, I’m from So Cal and we go to the beach on New Year’s Day! But so many of the beaches were even closed this summer! Sob!!! I thought You might be thinking of the vacations you WERE able to have this year in spite of quarantine. Maybe you’ll make a quilt to commemorate. “Sandy Shores” is a good choice and so is “Campout.”
BEACH BORDERS – A limited number of FREE misprints are available. Order the $4.00 version on the product page and enter coupon misprint2020 at checkout. These patterns can also double as E2E for short-arm machines.
It’s nice to see how these “Fishy” ideas can be used.
The great MeadowLyon Adventure began when we returned from living in Malaysia where Monkeys would sit on our shoulders at the park or steal our lunches. My son would lie on the floor pouring over animal books. So I decided to make him a Rainforest Quilt to help him remember that wonderful adventure. I pieced it with tropical fabric and as I got deeper under the canopy used darker fabrics with bigger animals. Finally I turned the trees upside down and pieced the lower ones with fish fabric. Then I asked my friend Angela to quilt it for me – and put in birds and animals. She said she’d be glad to quilt it, but I’d have to draw the pattern. So I did. I didn’t know it could repeat so I made it all different. It became the basis for our first 4 “Pictograms.” “Rainforest,” “Jungle,” Safari,” and “Fishy Business.”They were highly pictorial – almost a “Whole Cloth” pattern yet on an easy to use 12 ft. roll. Read more about Pictograms here.
Take a LOOK! How many animals, plants or landmarks can you spot in this quilt. See the full list on the Southwest Vistas page.
“When I was a child, our family built a desert cabin in the high desert of California just outside Joshua Tree National Park. The boulders of Rattlesnake Hill behind the house were my playground. Later as a college student I went with friends to explore rock formations of several western states. I was at home on the desert rocks. Recently when someone suggested I do a Southwest pattern I leaped right in. It was fun remembering climbing on boulders, feeling the wind and chasing the jackrabbits. Of course, there were plenty of giant Joshua trees and snakes, too. The adventure turned my thoughts to the fun times of my childhood. I drew all those memories into my “Southwest Vistas” pattern. “Campout” and “Backwoods” are two other patterns that take me back to those happy-go-lucky days. Didn’t you ever go camping as a child? Did your Dad make you sit in the boat for hours to catch fish? With book in hand, it seemed like forever. That was tedious, but it’s fun to remember now. Re-discover such memories when you stitch pictorial Pictograms on your quilt!”
Here’s a complete list of all our Pictograms. Search by name HERE.
When you go to each post you’ll see closeups and the special BORDERS planned to compliment them.
Often as I sat drawing patterns I would imagine the quilt I would make on which to stitch them. Although this is not my main focus, I’ve published a few that you might use. Some are FREE, some are full sized and some are normal patterns.
I don’t know about your kids, but mine did a lot of Monkey-ing around! In fact, it wouldn’t be incorrect to call them little monkeys! (Plus, I told them many times NOT to jump on the beds.) So let’s make some cute quilts for Children’s Day coming up on June 14th.
Let’s have fun with kids – many have been with their kids 24-7 for the first time these past weeks. I hope it’s been a fun, if revealing, experience. For many it’s been a great opportunity to increase the familial bonds and have fun together. If you haven’t had the privilege of being with your kids, you might consider gifting a kid’s quilt to provide a fun distraction for weary parents or for refugees. (Even a whole cloth with a fun panto is easily done but very enjoyable.)
When I lived in Korea I discovered Kids Day was May 5th. I had never heard of a kids day and was pleasantly surprised. In the US it is June 14th (or the second Sunday in June.) So you’ll have time to get a quilt or two made for your favorite kids.
I’ve started making a list of some fun and easy ideas for kids quilts. First is my Monkey Fun/Socky Monkey pattern. This is the link to the PDF version. I’ve made several from this pattern with slight variations and fabrics. Here’s a little gallery of them all. AND a tutorial. (The PDF pattern was FREE for the Virtual Quilt Show and I’ve extended the price for May.)
When I was growing up we didn’t have a sailboat but we did have an “outboard” for water skiing. Good memories! My brother asked the “shop” teacher in high school if he could build a boat. “If your Dad takes the night class and works on it with you.” And so they did. Can you imagine the rest of the guys in class making lamps while my brother worked on his boat??!!
Novelty Pantographs paired with novelty fabric=cute little quilts!
“Peaky and Spike” was a design element popularized by Doreen Speckmann. I asked my local quilt guild to make me these easy blocks of “fish.” I ended up with enough for 3 twin sized quilts! When my grandsons received them they spread them out on the floor and squealed with delight as they found all the fish that were quilted into them.
Cut from a 5 .5 inch strip for 5″ finished squares.
Turn any Blocks or even Pantos into a Coloring Party! Kids love coloring. Stitch out a few Fishy Business Blocks for them to color using dye coloring sticks or even crayons. Eleanor Sassnet did this on her beautiful prize winning quilt.
Turn any Blocks or even Pantos into a Coloring Party!
This is the quilt that was on my bed. It probably played a large part in my interest of quilting. It was my REAL LIFE!
by Estella Naomi Parkins Snyder
When I was a teen Grandma Snyder’s Flower Garden graced my bed. I had a double bed frame painted white, with turned spindles on the posts – giving it that comfortably antique look which perfectly complemented the flower garden quilt. I can picture it now in my bright room.
Sorting through my Mama’s old quilt blocks brings a lot of memories and many questions that will remain unanswered now. I wish I could ask more. I wish I could remember all the stories she told me. Do you have quilts from your family heritage? I hope so. As quilters you are undoubtedly the ones who will prize them the most. Lately, when distant family members and cousins come by and stop to spend the night I unpack those precious quilts. If they are sturdy enough I spread them on the cousins’ beds hoping to evoke visual memories that they may treasure, or at least remember after leaving my home.
The Redd Quilt
I call this the Redd Quilt! This is one I place on the beds of family visitors to help them remember the names!
When Mom came to live with me in her final years we worked on this Double Wedding Ring quilt together. We had the idea of embroidering the names of her family and their spouses in the centers. She came from a family of 14 children so there were a lot of names! Even so we stopped with not enough. We have 10 more centers unfilled for the direct line. So I’m trying to decide what other names to use. Maybe Mom’s 10+ aunts and uncles.
Here are the family quilts, the women, and their stories that have inspired me in my quilting journey.
Green Double Wedding Ring
Mom’s “surprise” double wedding ring quilt. The spool cabinet on top belonged to her mother, Verena.
Mama eloped. She was going on a road trip with her sisters and then up to her hometown in Canada to visit family. Sterling was afraid she would forget him or change her mind, so he persuaded her to get married on July 4th 1931, before her trip. While traveling she wrote a couple of letters – one to her “darling husband” and one to her mother in Canada. But somehow they got mixed up. When the letters arrived the secret was out. By the time she reached Raymond her family and friends had organized a surprise bridal shower for her and as they chatted they all worked on this special Double Wedding Ring quilt!
Blue and White Stars
When my mother Mary was first married she sewed for a dress factory owned by Del Grant in Los Angeles. She sometimes brought home scraps. Among them were these blue polka dot pieces. (Navy with white dots was sooo popular back then. I remember my Grandma Snyder wearing dresses from similar fabrics into the 80’s.) Her husband’s mother (Estella Naomi Snyder) and grandmother (Emma Jane Parkins) pieced this lovely star quilt from those scraps. Mom and I backed it sometime between 1970 and 1980 and hand quilted it (mostly Mom). I used it on my bed until it started showing signs of wear in 1988 when I was bedridden for several months. It will always be one of my favorites, yet I dare not wear it out even more. I’m sure you understand that feeling.
Robert and Emma Jane Thomas Parkins
Blue and white stars quilt
HORRORS! Your family quilts are not labeled?? Take care of that today! Download our little pack of 30’s Label patterns, trace them or print them!
More family quilts and their makers.
Mary’s stars
Mary’s basket blocks
Mary Redd Snyder
Verena’s Courthouse Steps
The “Ad” for our Heritage Trunkshow.
Mary Verena Bryner Redd
Grandmother’ flower Garden by Estella
Estella Naomi Parkins snyder
Estella Snyder as I knew her.
Dutch Cakes were Verena Redd’s specialty.
When company was offered one they’d say, “Oh, not a whole pie!” But they disappeared in short order!
Do you have some blocks or “Tops” from your mother or grandmother? Quilt them up with these nostalgic Pantos.They’re on sale for you now!
Of course, all of these antique quilts were quilted by hand. That’s how I learned! But that’s not the modern way. In fact the stability of machine quilting can help strengthen a quilt if the fabric is not too fragile. ( read about it on the “Clothesline” page.) Perhaps it’s better than leaving them in a box for another generation. So give pantos a try! Or if you are making a quilt from reproduction fabrics. These might be perfect as well as many other MeadowLyon patterns.
I remember hanging clothes on a “Clothesline.” How about you?
“Clematis Arbor” – it was so popular for ladies to cultivate a “flower arbor” in their gardens.
I designed this one about 8 years ago for a family reunion. I made up a small section to show at the reunion – it’s still not finished because I didn’t have enough of the “snow-dyed” fabric I used for it. But there’s another family reunion this year so I feel motivated. I’ve snow dyed more fabric that, miraculously, matched. You can read all about the stitched medallions in the download for Redd Wagons West if you’re interested. But what I really hope is you’ll feel inspired to make a memory quilt about your own family history. I wonder where your family lived? What they did?
Yoyo Quilt
The Yoyo quilt is definitely 30’s fabrics – the real thing. The squares were assembled but not put together into a quilt. I started making the “sashing” Yoyos from flowered fabric and then realized it was not vintage looking so I switched to green. I “gathered UP’ the circles from vintage fabric as I sat waiting in the car to pick up the neighborhood kids from school. I sure wish I could have found more of that pretty blue, but green it is. I’m ashamed for not getting this together yet!
Mom left several other block sets that I have not finished for her. Some that I can’t even find. 🙁 SO SAD! Maybe you are having some of the same feelings. Most of the time I feel overly busy. I mean, how can I possible do any more??? But last week on my trip for Christmas I realized I could have been sewing these Yoyos together in the car! Do your MOM a favor and finish her quilt!
LET ME KNOW ABOUT YOUR SUCCESS AND I’LL BE SO PROUD OF YOU! Love, Your friend Judy
I think I’ve always loved pinecones. In California we would drive up into the San Gabriel Mountains and breathe in the sweet smell of pine and the pinecones they sported. Even here in Kansas there were pine trees in the park across from our historic 3-story house on Ft Leavenworth where we gathered pinecones for decorating. Isn’t it fun to see their different shapes and sizes. I haven’t had much time this fall for finishing quilts, but I’m loaded with ideas. One is this great little Sweet Pine Quilt.
It measures 74 x 78 using 2” squares (2 1/2 cut). This is the measure by which I’ll give all my directions. But you could resize it in any way you wanted from 37 x 39 with 1” sq. and 55.5 x 58.5 with 1 1/2” squares.
I first sketched out this quilt when I was drawing the Ponderosa Pine Spray and Pinecone patterns—yes that was long ago! But now I have “Rustic Santas” just itchin’ to ride around my “Sweet Pine’s” borders. For this quilt I’m showing the “Rustic Yosemite Santa” (9” wide) with his sleigh pulled by California Grizzlies.
“Yosemite Santa” this is the Santa I grew up with in California! The 9″ size fit better on my quilt.“Northwoods Santa” is part of the same Rustic Santas pattern. 2 for 1 – great, huh? This one would need a wider border for its 11″ width. But everyone is enamored with big, hunkin’ Moose, right?
Chuckle! I’ve been including recipes, but just can’t think of a pinecone one. I found some on Pinterest and will include the links here. Gingersnap Pinecone cookies and Chai Spiced Pinecones.
Is Wild Moose good to EAT? I don’t know about that, but my Wild Moose Antler Dip is something you’ll want to try. Be sure to serve it with pretzel twists so they’ll look like antlers! I just can’t stay away from this. I keep sneaking into the kitchen to get another nibble!
BACK TO THE QUILT! Are you curious about the circle inset? I really imagined an Ombré fabric with a bright area in the middle fading to dark as it progressed outward. The circle was how I “suggested” it, but in the end I liked the circle. I’d also like to try it with a plaid border. In fact, I bought a lot of plaids this year for a new “Rustic” quilt and also 2 new plaid shirts!
Northwoods Santa sporting his plaids. You know, of course, it’s best etiquette to wear a plaid flannel shirt out in the woods.
The Inner border could be pieced with different browns in a special design if you’re into beauty and have plenty of time. An easier option is actually a Seminole Patchwork braid in 2 colors or in 1 color. OR even easier, it could be a solid border stitched with my “Toga Trim” or “Greek Braid” designs that come with the “Mosaic” Panto #2493. So you’ve got some wiggle-room depending on your time and expertise. I’m include the “Greek Braid” in the PDF so you’ll have it. (As I was developing the design I lost the “mock-up” so was unable to make changes on the corners of the brown border. )
As I plotted out the design I added lines to show the piecing. Each small square is 2” so you can figure out the sizes of all the sections. For example, the finished strips in the pinecones are all 2” wide (remember cut 2 1/2”). Therefore the small pinecones finish at 8” square. If you actually cut the center into a circle you don’t need to “piece” the large brown square at all. Just inset the circle, or applique it into the square. (Even though the circle is quite big you can still use the insetting method described in the T-shirt quilt tutorial.)
But what about the Mock-torial! And what is that anyway?
Since I didn’t actually make the quilt it is just a “Mock-up.” So I’m calling it a “Mock-torial.” Download it here: Sweet Pine Quilt.
But more is going on at my house. Here are some pictures of what I’ve been working on. This Pictogram pattern is called “Las Posadas.” The name refers to a Nativity play, of sorts, that is acted out in the towns of Mexico and Guatemala.
It looks like “Las Posadas” won’t make it for this Christmas. but maybe you’ll get a headstart on it for next year.
Light the World is our church’s theme for this Christmas Season. As part of the “kick off” we had a huge Nativity Festival. A Mexican Nativity Set seems appropriate for Las Posadas. Are you celebrating? Send me some pictures!
At home
Don’t forget the new Christmas patterns! On SALE this month!
Starfish – great for Christmas quilting or anytime all year!
The beautiful colors of Maple and Oak are all around us.
The leaves have all fallen from our beautiful Maple tree, so we’ll have a Maple sale! Sure maple! Oh, yes, we have an Oak Tree too and it still has a lot of it’s brick red leaves.
Christmas is coming the Goose is getting fat! But, don’t worry we’ll eat him for Thanksgiving!! Sadly, I’ll probably get fat(ter) too! There are just so many great recipes. Check below for a new “Maple-Bacon Toffee” recipe I just invented today! Okay, I know this is supposed to be about quilting! But I have other interests too. Food is a BIG one!
Here’s a fun Holiday quilt. I love the big stitch.
I do want to encourage you to make the Thanksgiving Table Topper. It’s so beautiful on the table. When I went to Oklahoma last week I noticed my daughter-in-law had it hanging in the entry to her house. It was a great way to use it before the holiday.
This reversible Table Topper is so beautiful on the table. Your guests on every side will have a different view of the Thanksgiving story; The Ship greeted by Native Americans, The feast table, Indians bringing food to the feast, and a Pilgrim family bringing their contributions to the feast. It’s so much fun they might just want to play musical chairs! Get the FREE Tutorial and pattern!
I was talking with some of my adult kids last night and they were laughing about the White Pilgrim Collars I made them wear for Thanksgiving Dinner. We also had/have Thanksgiving puppets. So fun!!
Yesterday a grown son asked for this little song we sang.
Do you have any traditions for Thanksgiving? Submit them in “comments.”
NOW for the MAPLE Recipes! Click the expand button to view each entire, delicious recipe! Also: From last year’s blog, see my original Pumpkin Biscotti recipe here. Believe me, it’s far better than others I’ve tried!!
I absolutely L-O-V-E Biscotti. I have dozens of recipes. Maybe it’s the kid in me that loves “dunking.”
Of course there is no guarantee that the Pilgrims had Bacon.
Sriracha is the key ingredient.
I don’t have an edible recipe made from Oak, but I love natural dyes.
Maple doesn’t have to be for desserts – but it will be Sweeet!
My Mom’s recipe!
Don’t forget to make your Ice Candles while there are still leaves available!
IT’S NOT CHRISTMAS YET – IS IT??!!Don’t miss the SALE!
I haven’t had time to start any new Christmas projects but I did manage to get one beautiful UFO done last month. I started it too long ago to make a “tutorial” but I can give you the count and directions. (see below) I absolutely love the “Snowbirds” Pantograph and “Snowbird Borders” designs! Don’t you?
Before I forget, here’s a special announcement. ALL our Christmas themed pantos are on sale for the coming 2 weeks. See them all on the HOME PAGE!
Don’t miss this sale.! You’ll find all your favorite Christmas designs, including our new “Mistletoe” pantograph. Everything is pictured on the “Home Page.”
Every year I’m too busy to start Christmas projects ahead of time. And every year I’m scrambling to get presents ready for my family and friends. I have a LOOOng list of projects to work on. Just take a look at my UFOs. I know a lot of you plan well ahead, like even making Christmas Projects in the summer. But are there any of you who are either too busy or procrastinate like me?
You know these UFOs are old because Pizza Hut doesn’t even use that kind of box any more!! I used to go down to the corner and buy them for 25 cents each! On this subject I thought I’d check my UFO list: I have 1 Tif (top finished) , 8 SNWTY (Snooty-SQUARES NOT SEWN TOGETHER YET) , 19 WIPs (work in progress), 1 WOMBAT (waste of money, batting+ time), 5 HSYs (haven’t started yet), & 15 Brazen HSYs (bought the fabric). Honestly all the fabric I buy “IS” intended for a particular quilt. I’ve just forgotten which.
So you see why I’m so happy to finally have the Snowbirds quilt done!
Now back to the Snowbirds quilt. I like to give you tutorials, but I started this too long ago to have pictures. I do have a few left over pieces so you can see what I’ll be talking about.
left over pieces
Laid out without outer border.
Close-up.
The stitching plan over-lay.
The pantos used.
Sometimes I like to paint my pantographs like coloring books.
Here are the requirements if you want to make one like it. Be sure to get the Snowbirds pantograph on the Christmas Sale!
Do you collect Antique Sewing Machines?Do you have a back-up sewing machine? What if your tension spring breaks? or you lose your bobbin case?Or there’s no ELECTRICITY!
Someone was asking whether I had a “back up” sewing machine. Very definitely!My first machine was a Kenmore that I received for a High School Graduation present! It was one of the best I’ve ever had! I’ve had a couple more over the years and don’t even remember their names. Of course, when I went to Thailand on a mission I couldn’t live without a machine so I bought one from a friend. It was a Juki converted from treadle with a little electric motor.See it in the far left corner.
I’ve always thought it would be a good idea to have a treadle machine—just in case the electricity goes out! So I currently have 2! My brother has my Grandmother’s old one (boohoo) but when we were first married I bought a REALLY old one from a little friend in Lawton OK. It’s not much to look at, but it has the long “spindle” type bobbins! It’s that old!
Next, my friend in Kansas gave me her mother’s machine. It’s much more beautiful. I use it as a base for my “holiday Tree” in the family room.
I do have my mother’s machine—a Wilcox and Gibbs factory power machine. (When she had little kids at home the factory she had sewn for in LA sent the machine home with her!) That’s the machine I learned to sew on! FAST & POWERFUL!!! That “attachment” on the left is a Tucking Arm.
Another friend gave me an old power (?) Machine (sitting on a shelf in my storage room.) It’s really beautiful, isn’t it?
And, Oh yes—there’s the “once top of the line” Elna that I bought at the thrift shop for $7.00. (Did you notice that gray case at the bottom of the shelf in the last picture?)
Now I have my Pfaff that I use almost exclusively. I think that makes 6 sewing machines that I still own!? Isn’t collecting fun!
Do you have a “back-up” machine? I’d love to hear about it!
If you haven’t already – Don’t forget to sign up for my newsletter! HERE
By for now! Hurry and get busy on your Christmas projects. Next time -some quick Halloween ideas.
Several years ago I wanted to draw some dog patterns so I sent out a request for dog pictures. Wow! I got some of the cutest pictures. Of course everyone loves their dogs and I could see why. You can spot “Lady” in my Dogpatch Quilt.
OLYMPUS DIGITAL CAMERA
Anyway, I drew up separate blocks of the dogs and then the “Dawgs” Pictogram (A non-repeating pantograph 12′ long)
. Eventually I pieced the Dogpatch quilt using both patterns with their fun dog-bones sashing. Angela Meadows (my business partner and founder of MeadowLyon) quilted it and I painted in the dog faces everywhere they went over a white triangle.
I remember I had it spread out on our pool table in the basement with plastic trash bags draped over it to protect the rest of the quilt. (I was terribly afraid of ruining it!) My high school son came down, stood still a minute, and said, “Mom! You can paint!” Yep! But I hadn’t had time for that pleasure with 8 kids.
The first show I took it to was MQX in New Hampshire. As I was setting up, the photographer, Jeffrey Lomika, came rushing over. “I was photographing the quilts in the exhibit and looking through the lens, all of a sudden I saw Norman!!” Yes, his dog was in that quilt – the cutest little wire haired terrier ever. Look closely, maybe you can spot him. He was so cute, I used his face two or three times!
Do you remember I promised you a tutorial on inserting round patches into T-shirt Quilts. It’s Here: Making circular insets in T-shirt Quilts. You might also want to re-visit the Blog about T-shirt Quilts.
I grew up in southern California. I thought I knew what it meant to be hot!! But I remember the first time I really got a handle on the thing – heat that is. Our family was on vacation and staying in a little motel at Lake Mead. When we walked out of the door it felt like stepping into an oven. After we got out onto the lake where my dad was fishing. I jumped in the water to cool off. It was like a bathtub!!
Years later, my son living in nearby Las Vegas actually cooked an egg on the sidewalk. Yes, he did! It can really happen.
But a heat wave seems never-ending. The long-hot summer! Maybe you can picture it – maybe you’re living in it. I’ve collected up all my MeadowLyon Pantographs and Pictograms that made me think about hot weather – like “Modern Southwest” pictured over a free-style, mock quilt.
My Dad and brothers built a desert cabin just outside the town of Joshua Tree, near 29 Palms, CA. It was rugged with only one room, but it did have two sets of French doors across the back and a gasoline powered generator mounted on an old lawn mower chassis that Dad could fire up when we wanted electricity at night. Before that we used a lantern.
I loved hiking up Rattlesnake Hill right behind our house. After I got to the top I could see out over the valley and into the National Monument Park where they used to “shoot” westerns. I used to dress up in my little cowgirl outfit and run around trying to “rope” our Cocker Spaniel Rusty.
Oh, Yes! Did you notice that straight rope twist and corner on the Rodeo Kids layout? It’s FREE right now. So put “Rope Twist” in your cart.
While you’re at it, be sure to scroll down to the bottom of the page and sign up for our NEWSLETTER so you’ll know when we have special offers, new patterns and sales!
When my friend Helen in Las Vegas asked me to draw a pattern with southwest images for her I remembered so many things I had seen and loved in my childhood. I drew them into “Southwest Vistas.”
Oh yes! Cactus! My mom was a crafty sort and she just had to have some of that decorative Cholla Cactus wood. I can remember her with a handerkerchief tied around her face like a mask and wielding a big butcher knife held by big heavy gloves – scraping the “stickers” off the cactus!! Those stickers are terrors!! They are the enemy!
I know that from experience. But, Cactus Flower that was another thing! They were friendly and had the brightest colors!!
I’ve rounded up all the “hot weather patterns and put them on sale for you – just for memory’s sake. Titles like: Southwest Vistas, Spiral Suns (an all time favorite!), Spinning Kokopeli, Modern Southwest,Mosaic, Laguna de Cancun, Great Plains on the Move,Mustangs, Rodeo Kids, Ropin’ Horseshoes w Knotty Pine, Snakeskin,Cactus Flower, El Dorado, Pueblo Pottery (see a special tutorial below!) , Barnyard Dreams, Sunflowers, Giant Sunflowers, Chicken Feathers, MooCow, Illusion, Tornado, Mayan Glyphs, Portico Blooms, & Bengali Mosaic. Whew! is it hot in all those places???
But don’t worry – YOU’LL NEED TO COOL OFF with FREESODA FOUNTAIN BLOCKS SET. The first 20 orders will get a PDF set emailed to them FREE within 24 hours! Just wrap your lips around them straws! On the Soda Fountain page you’ll see ideas for using them!
Now back to the longest of the hot days. They make me think of eating MEXICAN! I’ve attached a couple of favorite recipes for you down below. That reminds me – Do you know about EPAZOTE? It is the quintessential Mexican herb. Add it to your favorite chili recipe and you will be transported south of the border! Yep, but it’s hard to find out here in Kansas. I finally asked the guy at Acapulco and he gave me some sprigs. “Where did you buy this?” I asked. “I grow it myself!”
But now a little more quilt talk. I’ve got a new pattern to celebrate the heat – “Pueblo Pottery.” It’s a fun interlocking panto with all the flavor of the southwest.
I have an idea for you to use it on a quilt Remember the “Southwest Vistas” Pictogram (that’s a non-repeating panto) up above? I made a Southwest Pueblo quilt to showcase it. I used some simple improv piecing in desert colors to suggest the plateaus and native pueblo style houses. The round oven, the round beams, the ladders and drying racks all added a bit of interest, color and nostalgia. All this supported the amazing stitching of the “Pictogram” or vice-versa, the pictogram accented the strong southwest feel of the quilt.
I added more color to surround the main body of the quilt and have loved the
border ever since. So I’ve combined the blocks from that border into a quilt layout.
Here’s how you can put it together. And how it will look in a different colorway with the Pueblo Pottery design quilted over it.
So crank up that Air Cond and have fun sipping your sodas and putting together this fun desert quilt! Oh and don’t forget the recipes below.
Subscribe To Our Newsletter
Get info on new patterns, sales + freebies in our monthly newsletters!
Celebrate our Founding Fathers at Home and in History with Love, Honor and a FREE Patriotic pattern!
At this time of year we remember our “Founding Fathers,” both family and nation. Some founding fathers of our family are John Lyon, William A. Redd, Hans Ulrich Bryner, Lucius Franklin Snyder. Bryner, seated with a beard, was an immigrant to the US from Switzerland. In large measure he was the founder of the Bryner clan in America. Before coming he was blinded in an accident, but didn’t let that stop him. Traveling by ship and then covered wagon across the US he held onto the back of the wagon, giving up his seat inside for an elderly woman who needed a place. I designed a quilting Pictogram, Westward Ho, around his story and pictured him holding the wagon.
Just as you honor your fathers, we honor ours by telling them we love them, by giving them gifts, and by cooking their favorite treats. Our Dad loves tunnel of fudge cake – the old recipe with pudding. Yumm…. The kids all love making him treats each year! It’s no wonder in Sunday School we sing, “I’m So Glad when Daddy comes Home.” Now he’s a grand father and sooo good at reading stories. I get jealous – they want him! See his picture? Grandpas make us smile, don’t they? (I had fun overlaying the pix with an image from our America’s Pride Blocks- FREE PDF June 2019only.)
This time of year, climaxing with the 4th of July, is full of Patriotism. Because we live near an Army Post the boy scouts place flags on all the graves in the cemetery for Memorial day. That is the beginning. Memorial Day, D-day, Father’s Day and July 4th make a grand month of remembrance.
Patriotic service and red, white and blue décor and stories of valor are part of the fabric of our lives. In such ways we honor the Founding Fathers of our country. We obey the laws, we vote, we celebrate the birth of our nation. We enjoy the land through vacations and song – “Oh Beautiful for Spacious Skies…” I even decorate a 4th of July tree! (I’m also reminded of a Canadian hymn, “In days of yore from Britain’s shore, Wolfe, the dauntless hero came…” My mother grew up in Canada and I learned this song as a child right along with The Star Spangled Banner.)
Every year on the 4th of July, we watch themovie “1776.” Our kids have the dialogue memorized. We love lines such as “He plays the violin…” and “Pins!” – “Saltpeter!” What, you don’t know those lines? Pull out that old movie this year and find them. You’ll have to sing the words with Ben Franklin! I can see and hear it in my mind’s eye.
Another tradition has been to have a BBQ and Swim party in the back yard. Ribs and sweet potato salad are always on the menu. I’ll include my favorite ribs recipe for your 4th of July feast this year. It’s actually an oven recipe but we put it on the grill for that special smokiness I love. Homemade ice cream was also a favorite, Root Beer flavor as well as chocolate. Strawberry pretzel dessert was embellished with blueberries. We’d have a yard full of friends, family and neighbors and sit around until dusk while the kids played in the pool. Later we often drove onto the military post for a fireworks display. I miss those days now that the kids are grown. WHY DO WE DO ALL THIS? To honor the birth of our nation and the founding fathers who built us this heritage. To honor the birth of our families and our own beloved Founding Fathers.
What are your favorite Father’s Day or 4th of Judy (oops July!) traditions? Happy Father’s 4th of July!
This year I’ve had fun planning out some Patriotic quilt designs. “Patriotic Snail’s Trails and More! They’re not full-fledged patterns, just my plans – but enjoy!
Upstairs in my walk-in attic I have a box of T-shirts meant for a quilt or two. I thought how fun it would be to have a t-shirt quilt for the grandkids to use when they visit. They’d be sleeping under all the memories of their Mom or Dad. In particular I have a number of Hawaiian T-shirts and Hawaiian shirts and/or muumuus that he children wore when we lived in Hawaii. Here’s my plan for those great memory pieces. I’m showing it “virtually” stitched with my “Hawaiian Hibiscus” pantograph. (I’m including the titles of the Pantographs on the pictures simply for reference.)
Another box is filled with old cub scouts t-shirts. They’d be great and I plan to include some of the neckerchiefs and patches in the piecing (see my mock-up example). I’m showing how I would stitch it with my 8-inch double “Jitterbug 15 interlocking “ panto. (You could also use the -one row at a time- “Jitterbug 11 interlocking” panto.) Doesn’t it look great! It reminds me of boys at that age, JITTERY!
There are many standard blocks which sport a square in the middle, so get out your pile of magazines and find a block, or do like I did and open up Quilt-Pro and find a block you like that’s not too time consuming. Here’s a simple star stitched with one of my favorties, “Maori Moko”. It’s a 15″ pattern so if you want a smaller one that’s similar choose the 9-inch “Maori Moko Border” and use it as an E2E. Knit is stretchy anyway, so there’s no problem placing some of the pieces on the diagonal. Another option would be to include the star points only on the outer corners and fill the center with rows of T-shirts. However, I like the tilted squares because it adds so much interest!
.Here’s another idea for a little girls t-shirt quilt. One is straight placement with colorful sashing on which I over-layed our “Oh so popular” Flowerburst pattern. It comes in 2 sizes. “Flowerburst 15” and “Flowerburst 10” Another is a version of a star block using Drunkard’s Path inserts to give a flower effect. You can actually place your t-shirts in some or all of the squares available. I over-layed that one with “Dolly’s Tea Party.”
Just in case you’re making a T-shirt quilt for a guy who’s into cars, like Joe. FREE -I’m giving you my new “Tire Treads” borders PDF for a limited time. I didn’t quite finish the “Hub Caps” block but hope to get it done this week. Oh, gosh! That attic is so full! “Car Classics” and Tire Treads are both on this image. See Sportscars at the end of the blog.
This is a “Real” quilt. Finally! Connie Zwego quilted it in red with the “Snakeskin” Panto.
Here’s a great T-shirt quilt with Car Classics stitched on it, by Deb Rolek. I saw her a few weeks ago at the Quilters Musical.
Or simplify with straight sashing, but make it lively! “Sports Nut” looks great over all these team shirts!
Okay now, I’ve shown a variety of examples to get you going. But I do have some real meat to this Blog. Here are some super “Tips” I’ve gleaned and used over the years to help you along your way.
1. Check your fabric to see how tightly or loosely woven it is. Many made for Quilting” batiks are loose enough to withstand the heavy stitching given to quilts. But some are not. Although I don’t advocate discarding the tighter fabrics, you’ll need to take extra care.
OLYMPUS DIGITAL CAMERA
2. Use a finer needle to prevent puncturing the threads in a lightly woven fabric. (See the lower side of the purple picture – you can easily spot holes left in the batik where stitches were removed.) A ball-point might be helpful- but not too large. If you encounter “Frogging” the fuzz around stitches indicating broken threads you might be able to make them less visible by using a damp cloth, dotted with silicone and rubbing lightly. This can be a tricky decision if you have multiple layers of fused appliqué through which to stitch.
3. A silicone lubricant is useful. Spray on brands are available but difficult to find. You can apply a few drops of silicone (ie. Sewer’s Aid) to a damp cloth and rub over the quilt surface or apply a few drops to the spool.
4. Loosen the quilt sandwich on your machine slightly.
5. Batiks are a dream for machine appliqué because as a tightly woven fabric they do not fray easily. For hand-appliqué they may require a little more effort pushing the needle through the tightly woven folded edge. Use a finer needle and try some silicone.
“Quilters” Wow! It was a great performance. Knowing that I was a quilter, my friend Nancy M. told me about the show just last week. So, we decided to go. My husband made reservations and on Friday – Opening night (avoiding the snow forecast for Saturday). Umm-they had catered snacks for the occasion.
If you’re in the Kansas City area, and like quilting or like frontier history you should see it. It runs through March 10th, so hurry.
We had never been to the Theatre Lawrence before. I thought the staging was super. Checking it out, I had seen some clips on You-tube of other “Quilters” productions and I liked the staging of this much better than those I had viewed. Plus, the musical ensemble was delightful. Instruments and unique effects added to the character of the presentation. It was nice that you could see the instrumentalists in the dark depths of the open stage.
But, now to the show – Wonderful! (Of course, I couldn’t take pics inside.) The voices were strong and beautiful and the acting great, too. Costuming too, was era perfect. I was particularly impressed by Susie LeGault. Could she have been my age (or was it just make-up?) and her voice still strong and vibrant? Well, let’s face it- I enjoyed the evening immensely.
There were heart-breaking moments which could be expected from life on the plains which bonded the women of the family together and to their community: The Ladies of the Lutheran Church, or the Ladies of the Methodist…or the Ladies of the Baptist… All the quilts they made over the years which had been collected and offered to bless the lives of those facing tragedy and loss.
In the theater lobby were hung several quilts by members of the local quilt guild (s?) I even found an old quilting friend there who had stitched one of them. She promised to send me the pattern. I’ll use it for my hand dyed indigo pieces. (You’ll recognize it in the pics because it’s blue and white! Thank you Deb Rowden.)
In the upstairs lobby were 2 antique quilts; a butterfly and a simple red and white.
All in all it was well worth the drive to Lawrence.
Several years ago, I took part in a play about quilters, too. It was written by Julie Stapley and was so fun to perform for our church ladies. (The Church of Jesus Christ of Latter-Day Saints)
I love Chinese New year time. I remember visiting Lila Lawrence with my mother when I was a child. She had Oriental furniture inlaid with mother of pearl and wore chopsticks in her hair. When we went to China Town in Los Angeles I would get those little prize balls that would unwind spilling little rings, and other treasures.
A few years ago when the catastrophic earthquake hit China I decided to draw a Pantograph with Pandas – “Panda-Bamboo” was what I called it. when I made the quilt I “Top-liqued” pandas right into the stitching line.
Living in the orient we enjoyed the fireworks and celebrations.
Simmer the pork in lightly salted water until tender. Drain and place in bowl. Sprinkle with juice of 1 – 1 ½ fresh limes. (I used 1 ½ good sized ripe limes)
Stir in 3 Tb. Fish sauce. Add 1 tsp Rot Dii (This is a Thai seasoning containing MSG. I used ½ tsp. MSG with about 1/8 teaspoon white pepper and 1 tsp garlic juice.) Stir well. Taste the liquid to see if you like the blend.
Add ¼ c. chopped cilantro, 3 Tb. Green onions, ½ c. thinly sliced red shallots, Crushed red pepper to taste – I used about ½ tsp. and it wasn’t hot at all.
To serve, sprinkle with cilantro and “Rice Dust,” – browned glutinous rice, crushed****( Place 2 Tb. Uncooked glutinous rice in dry frying pan. Brown the rice, stirring constantly. Allow to cool and crush well, or put it in a blender like I did. I should not become like flour – just like rough corn meal so it remains a little crunchy. This adds an important flavor.)Serve with sticky rice, chopped cucumber, diced, garlic and green mango slices. Wrap them up in green leaf lettuce and dash with Thai Sweet Chili sauce.
In the past few years I’ve seen more and more paint and ink being used on quilts. I’ve noticed it mostly on quilts custom stitched from the front of the machine. But, I’m a pantograph lady, I love the ease of knowing where I’m going and what I’ll find at the end of the row. Several years ago as Angela stitched our “Dawgs” pictogram (non-repeating pantograph) over the expanse of a Big Block quilt I thought how fun it would be to color it like a coloring book—I must admit childhood memories play it big in my mind! I seem to watch them play out, just like a television show. I remember one Spring I was very sick and had to wear dark glasses for a month to protect my eyes. Because I couldn’t go out, Mom let me slide the glasses up and take a peek at the Easter dress hanging on the bedroom sconce. For entertainment she bought me lots of new coloring books and crayons. One afternoon on the bed I sneaked a look and saw, to my chagrin; I had colored the pig orange! Those pesky glasses!
You probably have memories of coloring too. Was your technique to apply a firm line around each color area and then lightly “shade in” the entire space? Or were you like me and made each color a solid, full strength statement? Later I learned about shading and could deftly change hues or tints in the pictures I decorated. I confess I always maintained the bold look. Don’t get me wrong—I admire pastel tints but even my figure (sob!) is bold. When we tried out crayons on small fabric samples in our local quilt guild meeting and then ironed them for permanence, mine was definitely the most intense.
Well, back to the subject. I decided to color the Dog-Patch Quilt to make it more interesting. Remember it was already quilted with a pictogram that offered a collage of doggie faces replete with flopping tongues, sniffing noses, and shaggy ears. I limited the coloring to certain areas. That meant sometimes a dog’s face would be only partially painted and the rest only outlined with stitching. I admit it was scary. I feared I might ruin an otherwise great quilt. At that time our pool table was still in the basement and hadn’t been banished to the garage to make way for my longarm machine. So I spread a tarp and plastic drop cloth over it and laid out the quilt. Nervously, I positioned flat, black trash bags over the areas I wanted to protect. Shiva Paintstiks were the medium I chose because, as usual, I wanted strong color. I rubbed the Paintstik onto the page of a disposable palette and then brushed it onto the fabric with a flat, short bristled, oil paint brush. My 19-year-old son came down to watch TV and stood stunned. “Mom, you can paint!”, he exclaimed. I laughed and said, “Well yes, I was an art major. You’ve just never seen me paint before.” (Isn’t it great when you get a little praise—especially from your kids! That can be a rarity until they’re old enough to appreciate you!)
Face by face, the dog’s expressions began to emerge and take life. By the end of the experiment I was thrilled. This had made my otherwise “lovely” quilt truly standout as being unique. I’m so glad I took the first step – or brushstroke!
I was hooked and eager to paint on another quilt. I pulled out my Westward Ho Quilt that had already been quilted and painted the “campfire” and “spokes” of the wagon wheel giving it a stronger focal point. I was reliving the coloring book experience of my childhood all over again – each time with successful results!
Soon after, I found myself rushing around, trying to get my Dino-Spinners Quilt with the “Dinosauria” pattern ready to send off to a show. I suddenly realized the quilt had no label. So I turned it over and picked out a stitched dinosaur on the back, painted it with the Paintstiks, and “presto” I had a super looking, automatic label!
My friend Patti Buhler (Quiltedartsstudio.com) promotes and sells Tsukineko Inks so I decided to try those as my next medium of choice. I pieced together a simple quilt of penguin fabric, and white-on-white with plenty of open spaces. Over the quilt top I stitched the “Penguins on Parade” pictogram. Then going back into the central white area, I picked out key penguin figures and painted them black with the amazingly easy, Inkstick Marker that comes with each bottle of Tsukineko Ink. Serendipity! – As I inked in the black penguins, I found, as I had secretly hoped, the stamped on design in the white on white fabric resisted the ink, leaving a white design within the blackened area! (Viewers always get up close and exclaim, “Did you appliqué this one?” It looks like a different fabric.) Finally, I used a little orange, red, and yellow to define the fluff on the penguin feathers and again, instant success! And I mean instant! I didn’t have to wait 4-5 days for the paint to dry. Ink dries in minutes. (Well, I didn’t actually wait that long on the Dog-Patch Quilt anyway, because of my impatient nature.) A few years later I went back and decided to apply white glitter over my Penguin Snowstorm Quilt. I did this as an “added layer of interest” as I always say to viewers.
The next time I tried the inks was on the backside of a Nativity quilt stitched with the “Joyful Birth” Pictogram.. I had stitched and appliquéd over the front and then, realizing the back was quilted with a pale batik, decided to color in some of the “Pictures” on the back. I generally don’t color in the entire quilt. I just pick motifs I want to emphasize. (Maybe you’ll want to color more.) The results were amazing! Just like the white-on-white, there was enough of the residual wax left in the batik so that those designs resisted the inks too. Now this quilt is “reversible”and some of us like the back best!
When you stitch with pantographs and pictograms there is an automatic coloring book effect created. Pictures are already stitched into the fabric of your quilt by the quitting machine. Adding colors to the designs you’ve stitched is easy. And they do add extra spark and appeal to the quilt. I’ll be using these techniques on more quilts. I hope you will too!
Shiva Paintstiks have a wax base and aren’t as oily as oil pastels or actual oil paints. Don’t try the latter or the oil will seep into the surrounding fabric leaving an unsightly ring around the painted area. The Paintstiks keep for years if you wrap them in plastic or place then in a tight can to prevent drying out. Paintstiks come individually or in sets.
Tsukineko Inks come in little one ounce bottles in a whole rainbow of colors, solid, sheer, pearlescent, and metallic. Just choose your color and dip the tip of the reloadable “inkstick” into the bottle. Use it like a magic marker. Don’t get right up to the stitching line, the ink will move toward it and happily, in almost all cases, will not pass the stitched line. Caution: do not thin the paints with water or they will “bleed” more easily into unwanted areas. If you want a pastel or transparent color mix a few drops of the ink with clear Aloe Vera Gel and brush it on. Or if you’re trying for a watercolor wash effect, paint some gel onto the quilt first and then apply the ink.
Of course one must always heat set the painted surfaces whether you are using Paintstiks or Inks to render them permanent and washable. To heat set my quilts, I place brown wrapping paper under the quilt on an ironing surface and place additional paper on top. Then I iron from the top. The heat, applied from the top, draws any loose oil towards the heat source and into the top paper.
Remember the serendipity effect: white-on-white printing will repel the ink. This is also true of some “authentic” batiks which often have residual wax still left in the fabric. Have fun with your next “grown-up” coloring book! Judy
It’s not too early to start thinking about Thanksgiving. I saw Turkeys on sale in our local market yesterday.
A few years ago, I made a couple of fun Thanksgiving Table Toppers. The first was a grand experiment. I tore off the colored silk leaves from an artificial autumn bouquet, arranged them on the fabric I had chosen for the top (and lightly glued them) and placed a shimmery piece of sheer chiffon over them. Of course, I quilted the glittery square with my Thanksgiving Table Topper Pictogram. I was excited by the result. I was so easy yet so special.
The next year I wanted to try something new. I decided to make it reversible. After all with the renewed popularity of “modern” style, I might want a lime green topper instead of a brown one. Who knows? I’ll have to admit it was quite ambitious but turned out super!
I chose a Dk. Brown Batik for one side and a good strong Chartreuse for the other. (Oops, threads not buried!) The Autumn leaves around the edge could be the same colors for both.
It turned out so great I wanted to share it. So, I took photos of the “step-by-step” and converted them into a FREE PDF tutorial for all of you.
Golly, I need to make one for myself. One of these decorates my Daughter-in-law’s table and the other my Daughter’s. I’ll have to go there for Thanksgiving!
This 20% OFF anything sale is such a great opportunity.
I want to share even more ideas with you if you’re willing.
I’m always trying to push the limits. I guess that’s the way it is with creative minds, right? I know you have one because you’re a quilter!
Here’s a fun way to use this cute Halloween pattern on a block exchange.This is Helen Baczynski’s Pumpkin patch quilt. And this is Funny Bones by Diana Reinhardt Annis. Someone sent a picture of a quilt with Ghostly Feathers and I can’t it anywhere. Wish I had it to show you.
I love decorating for Halloween and Fall. There are cute ideas I’ve collected over the years. AND great recipes. Yes, Secretly I’m a wanna-be Chef!
When he was young my son helped me make a Halloween, Jack Pumpkin-head, giant marionette. He was dressed in some old coveralls of my kids’ and old Camouflage boots. We hung him up every year by our various front doors.
Halloween tree
Another tradition at our house is the “Brown Tree.” The kids retrieved it from the trash one year after Christmas and begged to keep it to play with in the backyard. I finally said,”Okay, but after 3-4 days you must throw it away!” Well, when the needles fell it was such a cute twisted shape that I’ve kept it now for almost 30 years. It even moved with us to Hawaii and back! I decorate it for every changing season. Here is the Halloween version.
Our very most favorite Halloween Cookies are – Pumpkin Face Cookies adapted from an old BH&G. (Not a great picture, but it is a great recipe!)
I almost get jealous of the children who to head back to school each fall.
One reason why I love MeadowLyon Patterns is that they are also educational! Every petal, every species, every historical scene is drawn accurately, with meticulous attention to detail and after much research. It just tickles the nerd bone in me! These are smart patterns for quilters of above average intelligence…and the rest of us too!
So how about we head off to school this year, just for fun, and see how much we can learn with our MeadowLyon designs! Don’t worry about textbooks, at MeadowLyon.com you’ll find brilliant patterns to enlighten any subject.
Swallow those first day jitters and say goodbye to teddy, we are off to school!
Here’s Our Class Schedule:
HISTORY
US Civil War? Ancient Egypt? American Westward Expansion? Don’t forget to study! If you don’t learn your history the first time, you are doomed to repeat it!
BIOLOGY
Hey! Where are you all hopping to? We were going to do dissections today!
MUSIC
Our teacher is getting out her earmuffs and Advil- that means it is time for music class!
CHEMISTRY
Also known as the class where we can have explosions! Heart be still! Who is that dreamy boy who just walked into class? I think I’ve just found my flame nouveau!
PE
You can run, but coach says you can’t hide. Love it, or hate it, there is no escape.
LUNCH
Finally! I’m so hungry I could eat an elephant . . . wait, maybe that’s what this gray stuff actually is?
GEOMETRY
Putting math right after lunch? Who thought that one up? Today we will be calculating areas of squares, perimeters, volume and z z z z . . .
HEALTH
Eat more vegetables! Drink your milk!
WOOD SHOP
To get an A all we need to do is make a wooden napkin holder and keep all 10 fingers. What’s so hard about . . . ouch!
FOREIGN LANGUAGE
Any of you study Mayan in school? Could you please help me with this translation?
I always enjoy reading the top 10 lists that start appearing at this time of year. My family and I also always write a few of our own, remembering the best and worst experiences of the past year.
In that spirit of year-end reflection, I thought I should list MeadowLyon’s top 10 best and worst selling patterns of 2015.
Our best selling patterns are also 10% off this January. If you don’t have these yet, you will surely use them, so why not get them now?
1-Star Banner It is not hard to see why this one is so popular! All those waving stars and stripes- I love it!
2-PsychedelicThis pattern is so popular it is hard to keep it in stock. Go ahead and order it if you like it, I’ll be getting more soon.
3- Backwoods A cozy backwoods quilt, a country cabin, and a roaring fire- I guess I am not the only one who thinks that is the perfect combination.
4-Funny Bones Yes, quilters do have a sense of humor!
5- Ponderosa Pine Spray One of my favorites too! It looks great with everything!
6-Spinning Kokopelli This one is so much fun, it’s no wonder so many people love it.
7-Cloudy Skies This pattern is so easy and all-purpose!
8- Modern Squares I love seeing the modern masterpieces quilters create with this pattern.
9- Flowerburst This one is featured as the background of our website design. It is also available as a 15″ pattern and a PDF.
10-Maori Moko Maori Moko is such a lovely pattern, it is no wonder that it is always a favorite. It is available in multiple versions to fit any quilt design.
Of course even our “worst” patterns are still pretty amazing, they just may not appeal to as broad a range of quilters. Maybe our 30% off sale for these patterns will help them find just the right home and get them off this list for 2016!
1- Indonesian Puppets If you love Indonesian Puppets, you will love this pattern. Maybe more people should love Indonesian Puppets.
2- Didgeridoo If the Didgeridoo was just included in more orchestral scores or used in just a few rock bands I am sure this pattern would be much more popular.
3- Mayan Glyphs Any of you have any Mayan friends? I bet they would love this pattern!
4-Fleur-de-Lis Spread the word, the fleur-de-lis is not just for Boy Scouts! (What, you mean I was the only one that did not know that?)
5- Bengali Mosaic I am sure there is someone out there looking for just this pattern. If you meet them, please let them know it is here and on sale this month!
6- Ski Slopes Maybe not many quilters like to ski?
7- Egyptian Papyrus These pretty, modern, and stylistic flowers would work for so many designs, not just in an Egyptian themed quilt.
8- Geisha Gardens Doesn’t everybody need at least one Geisha quilt?
9- O Canada It’s pretty chilly up there in Canada and I bet they need a lot of quilts. This should be a perfect combination.
10- Interlocking Anastasia This one is so lovely, I think it just must be overlooked. You won’t pass it over, will you?
When my family was together recently we made a game of counting and writing down our blessings onto small cards. Then we went back around and each had to pick a blessing to give up, until we had just a handful of the most precious things left. It was a fun exercise and a challenge too! Would we give up air conditioning before or after our cell phones? Do we let go of fresh vegetables or soft beds first? What we all agreed on was that we have many things to be grateful for.
One thing I am thankful for is people who have the skills, talents and desire to make beautiful things for others. That includes all of you who put your energy into crafting wonderful quilts. Our lives are filled with so many things, and in the end a quilt is just another material thing. But the mind that envisions it, the hands that make it, and the heart that sees the need it will fill for another person are precious gifts. And what would life be like without the creative rush and satisfaction that comes from taking simple materials and making them into something beautiful? A quilt represents so many blessings that I am grateful for!
Thank you for your interest in and enthusiasm for the creative spirit that runs through the patterns at MeadowLyon designs. I hope this rapidly coming busy holiday season can also be full of moments of gratitude and joy for you and your loved ones.


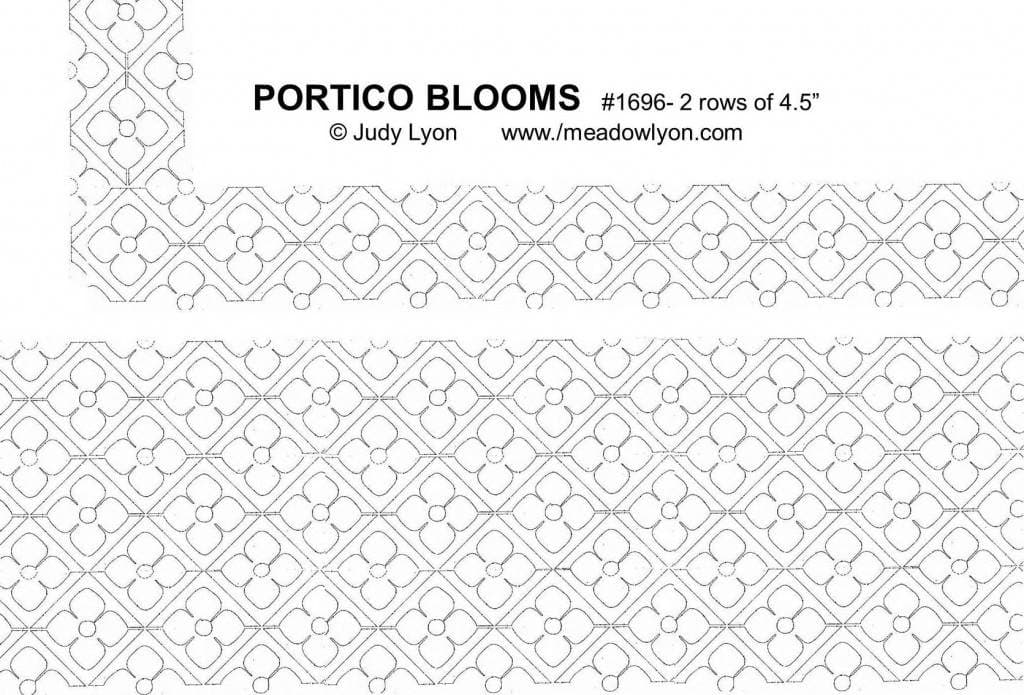


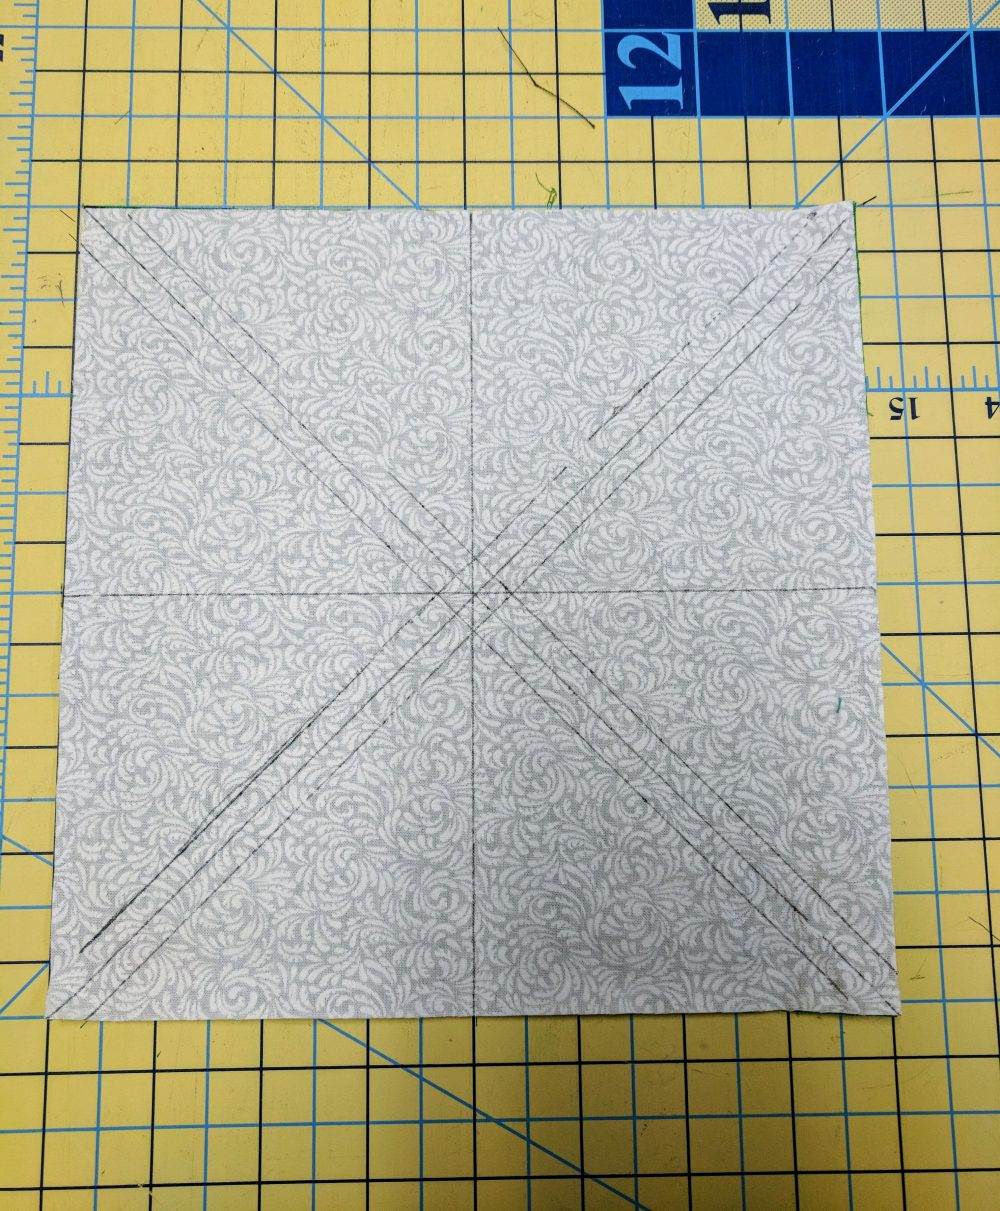

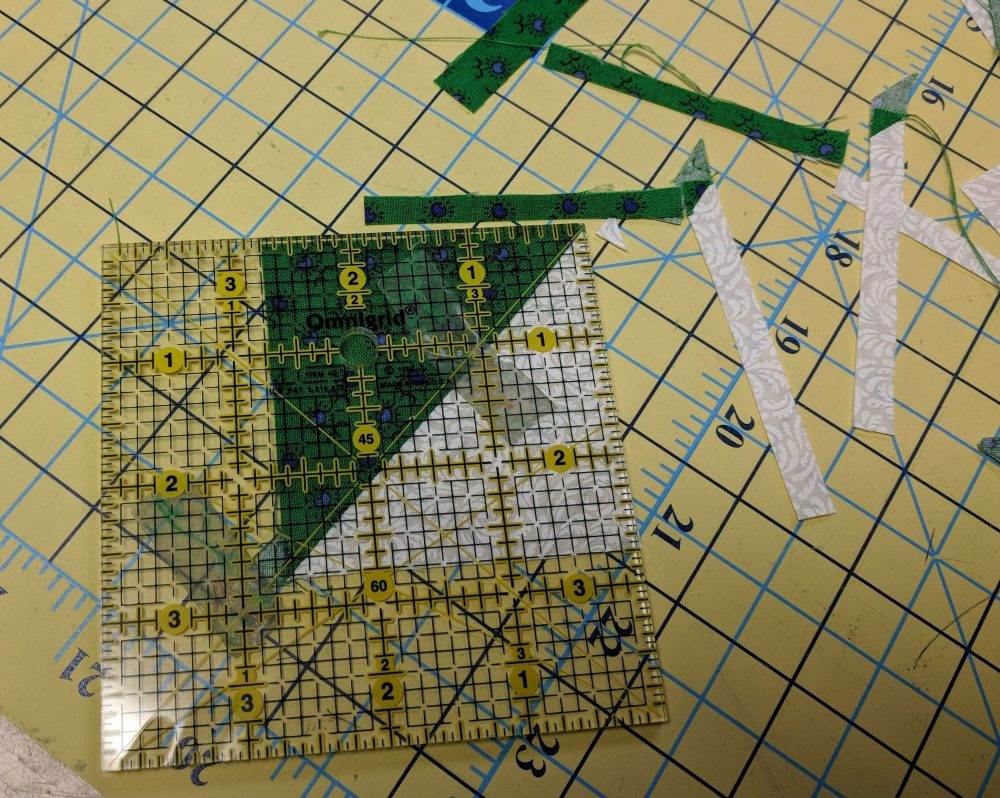

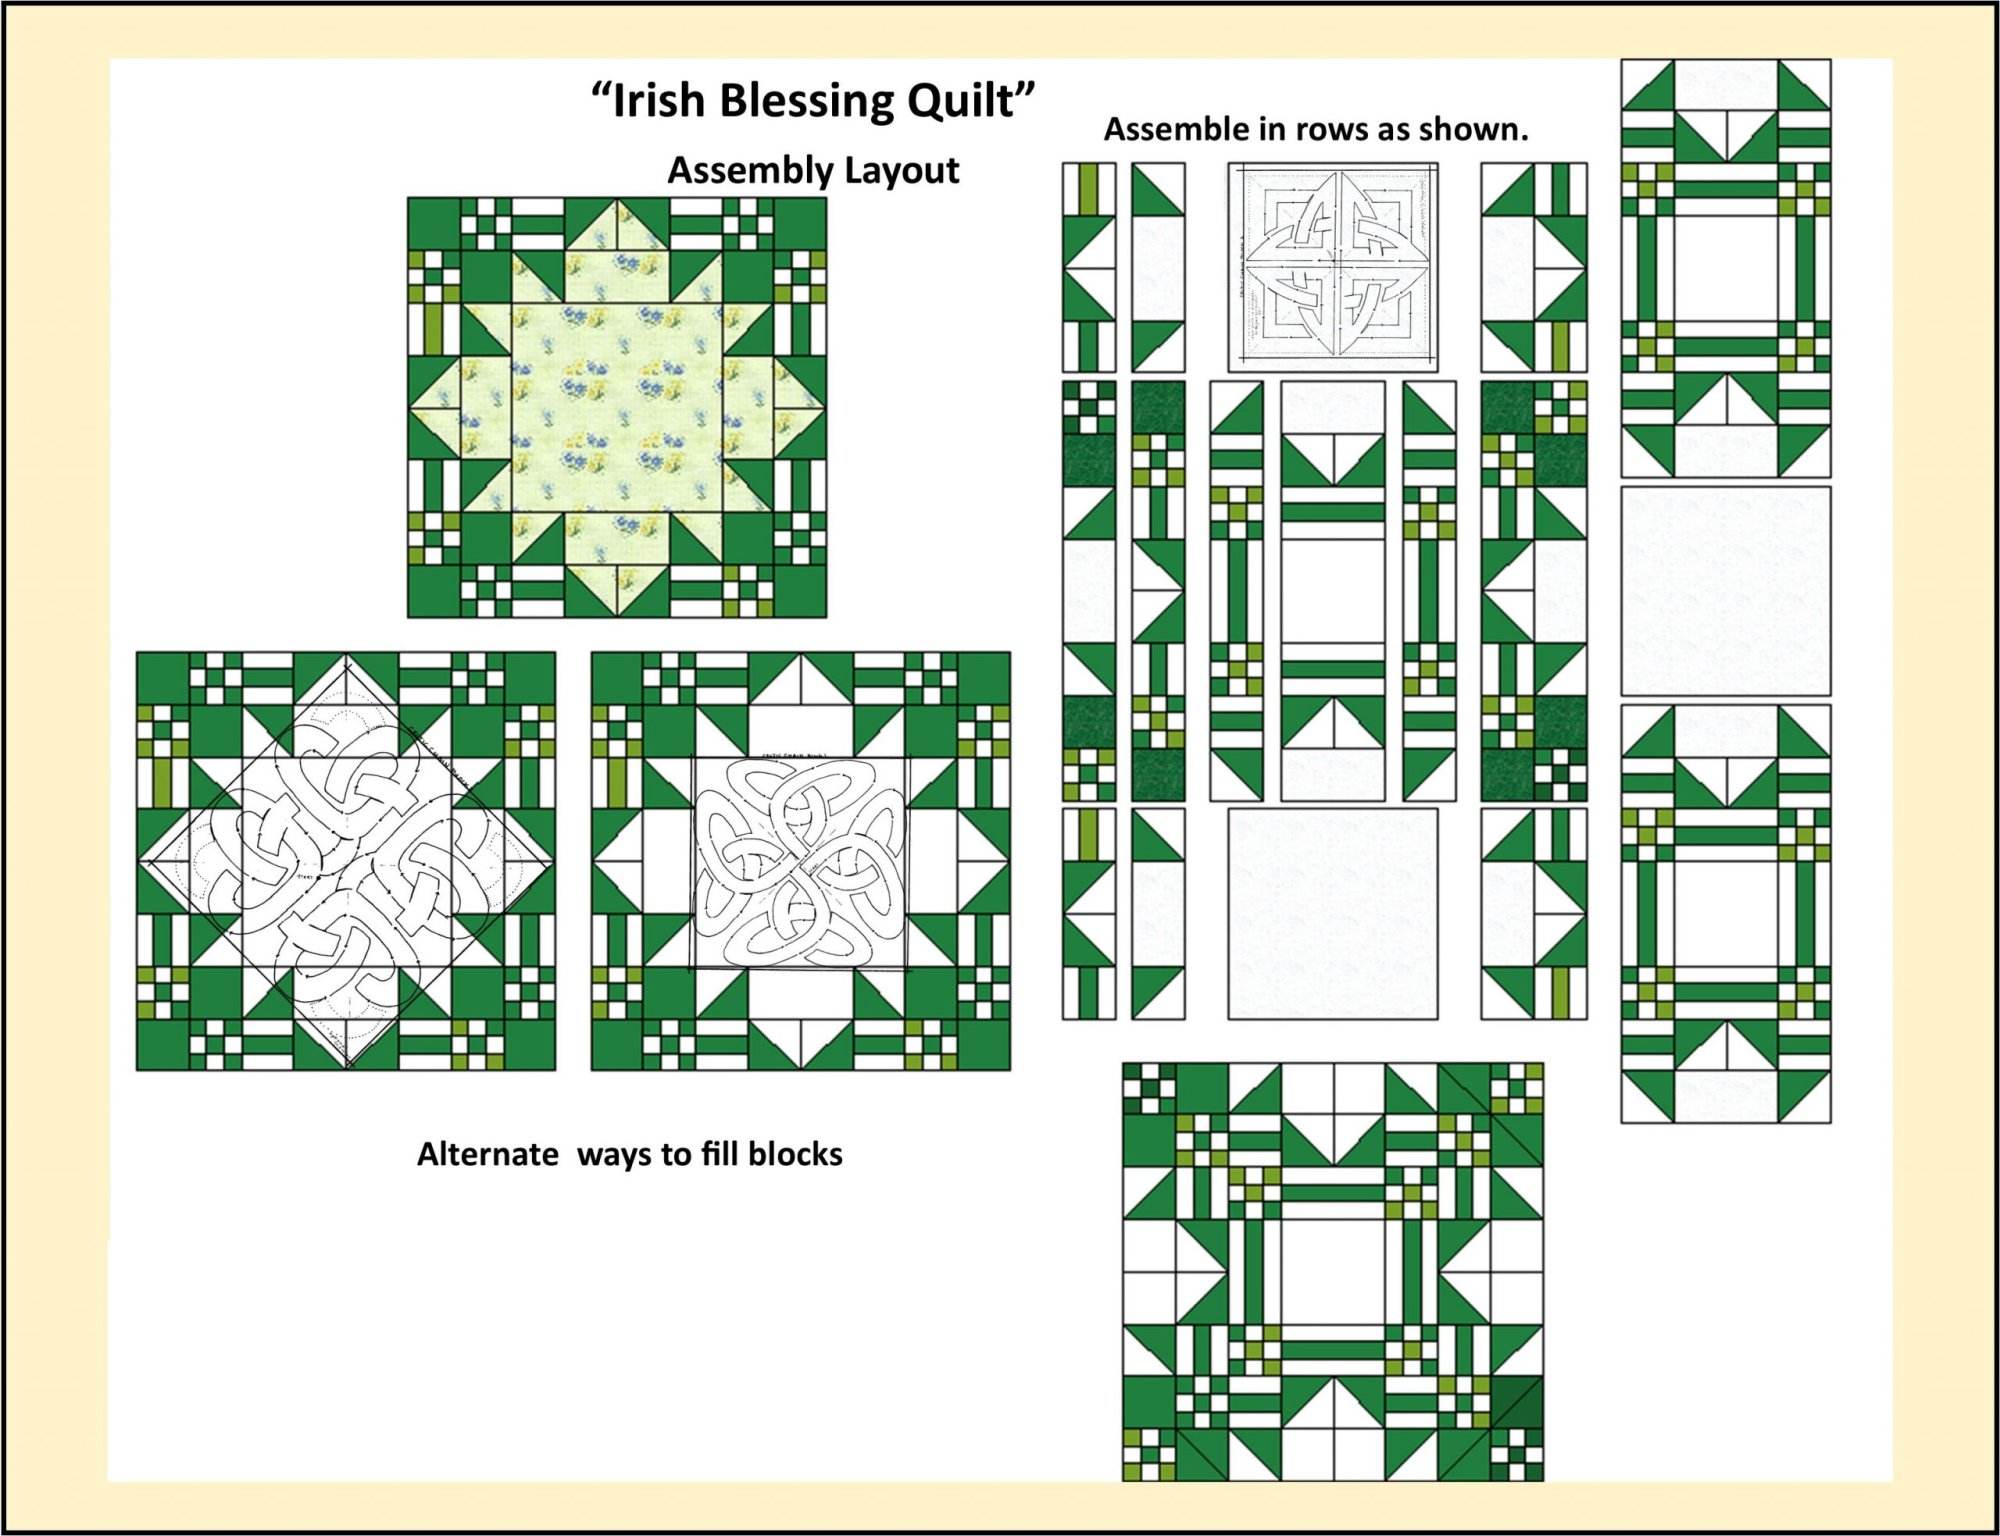
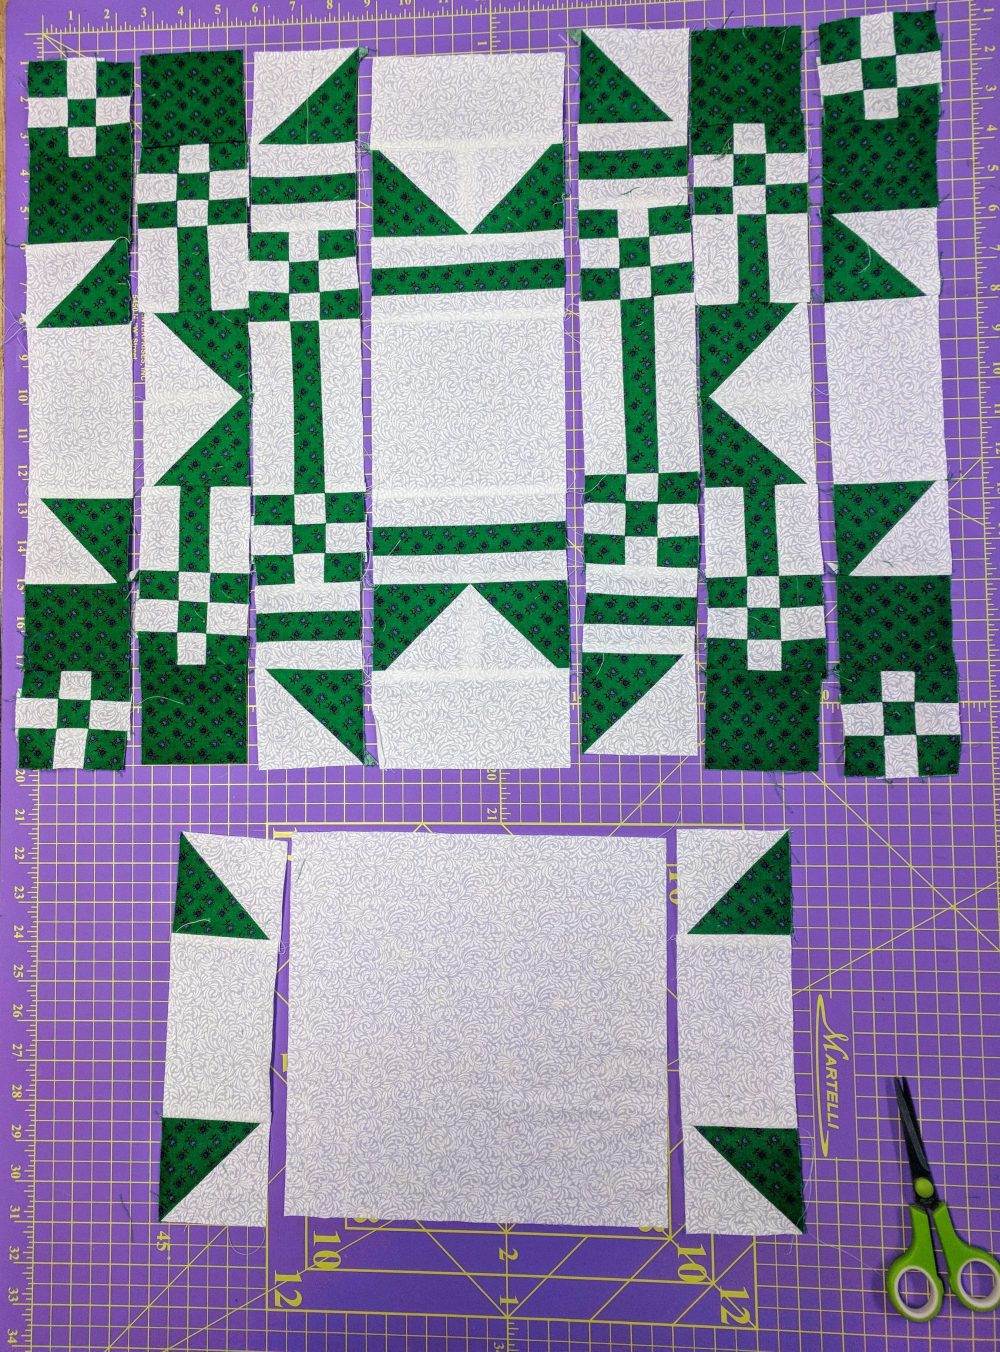


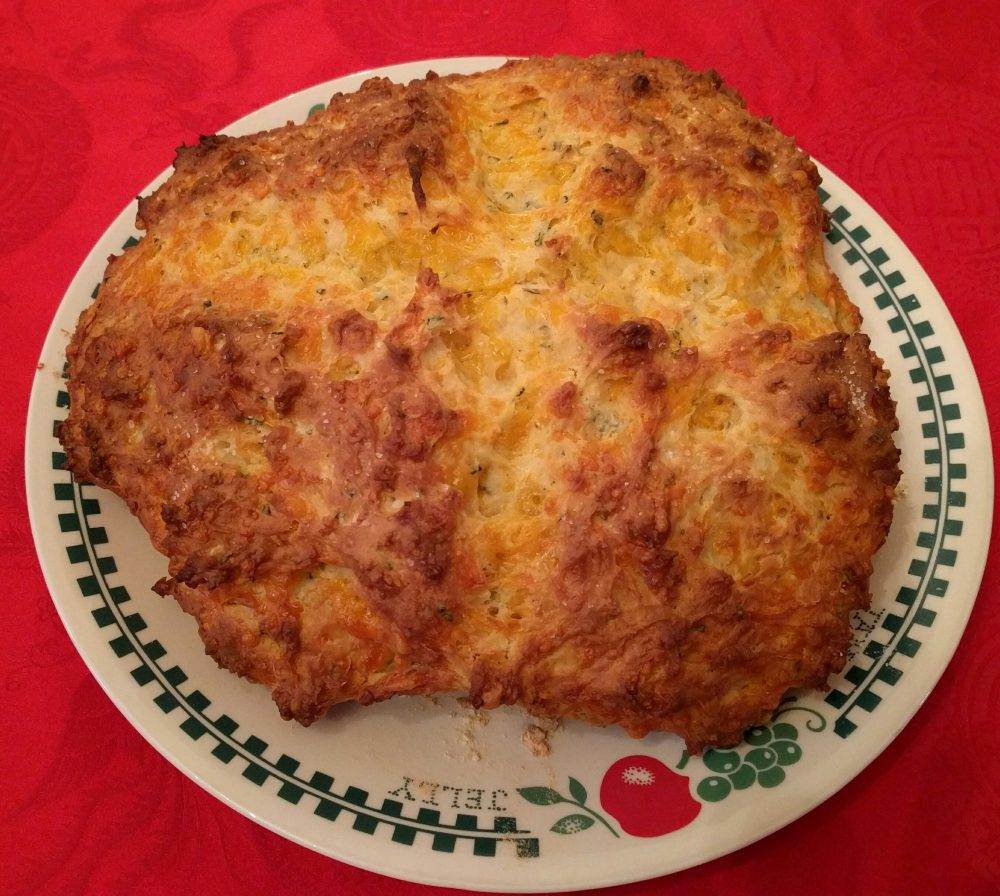


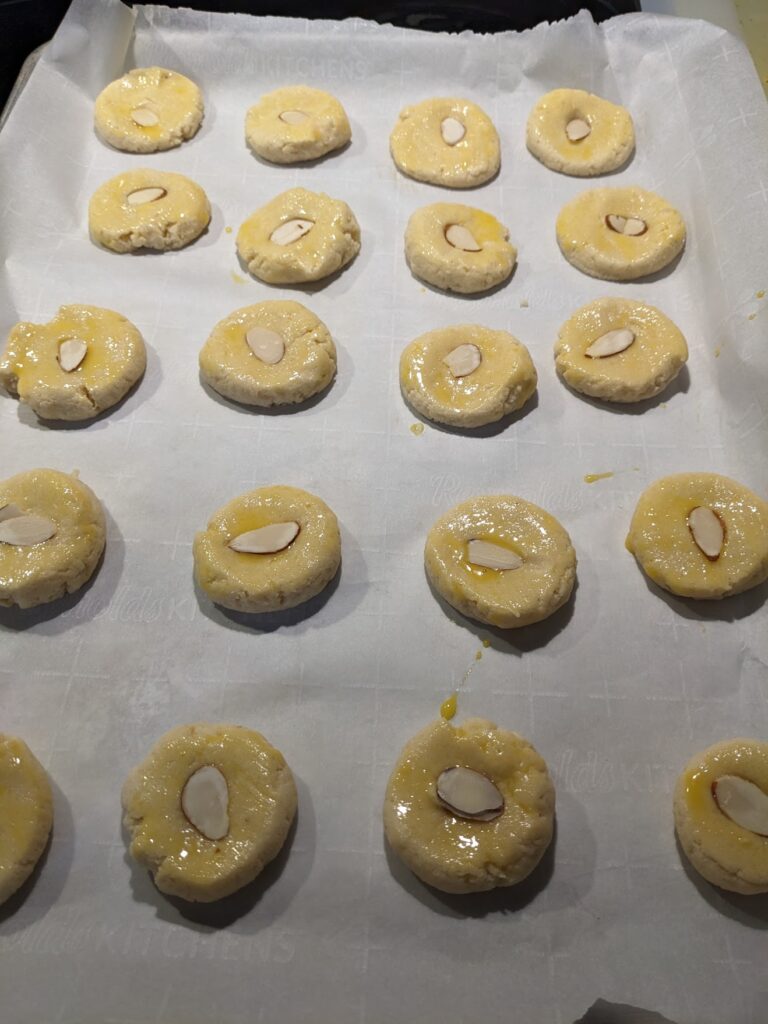
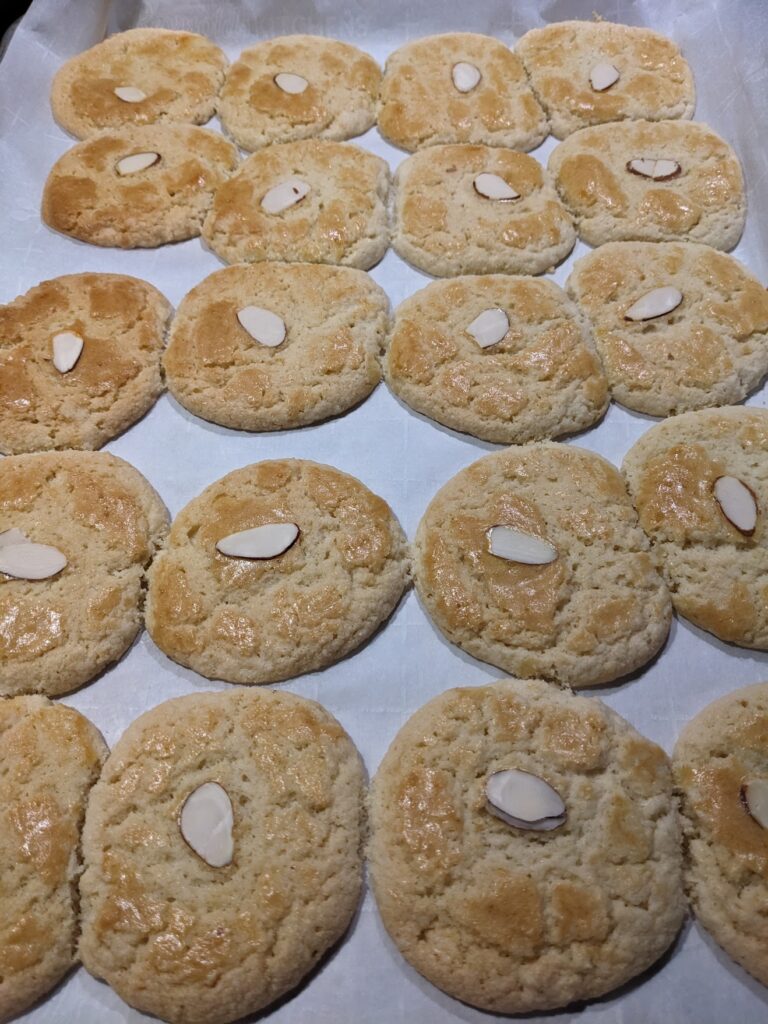


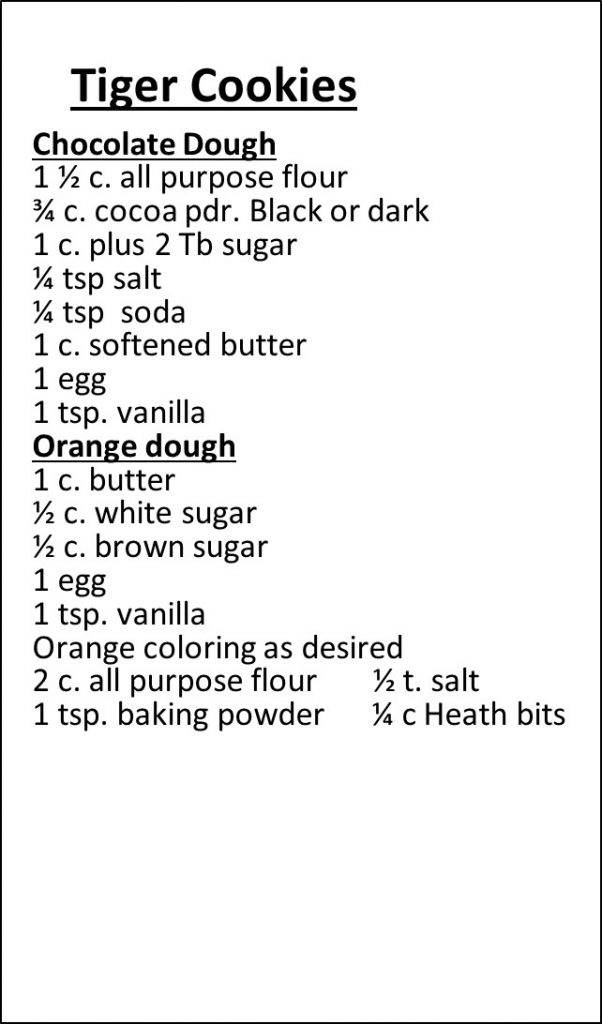

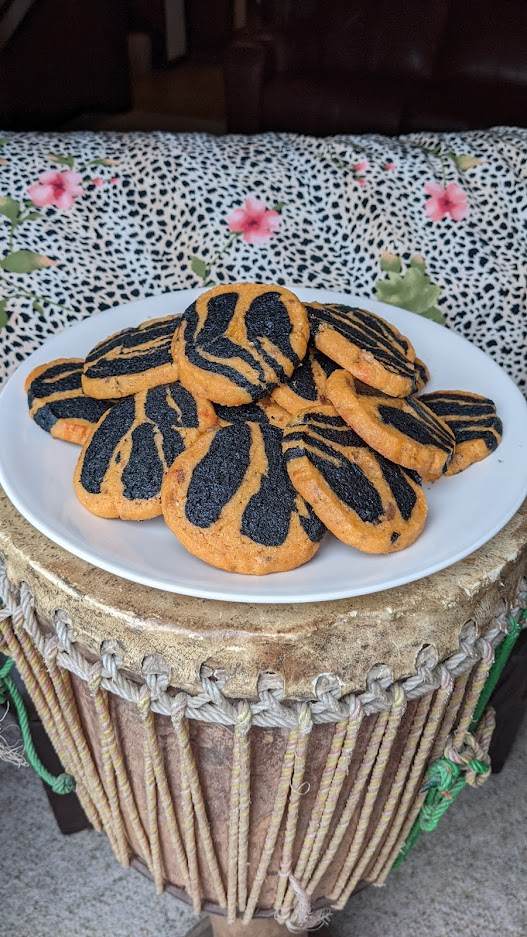
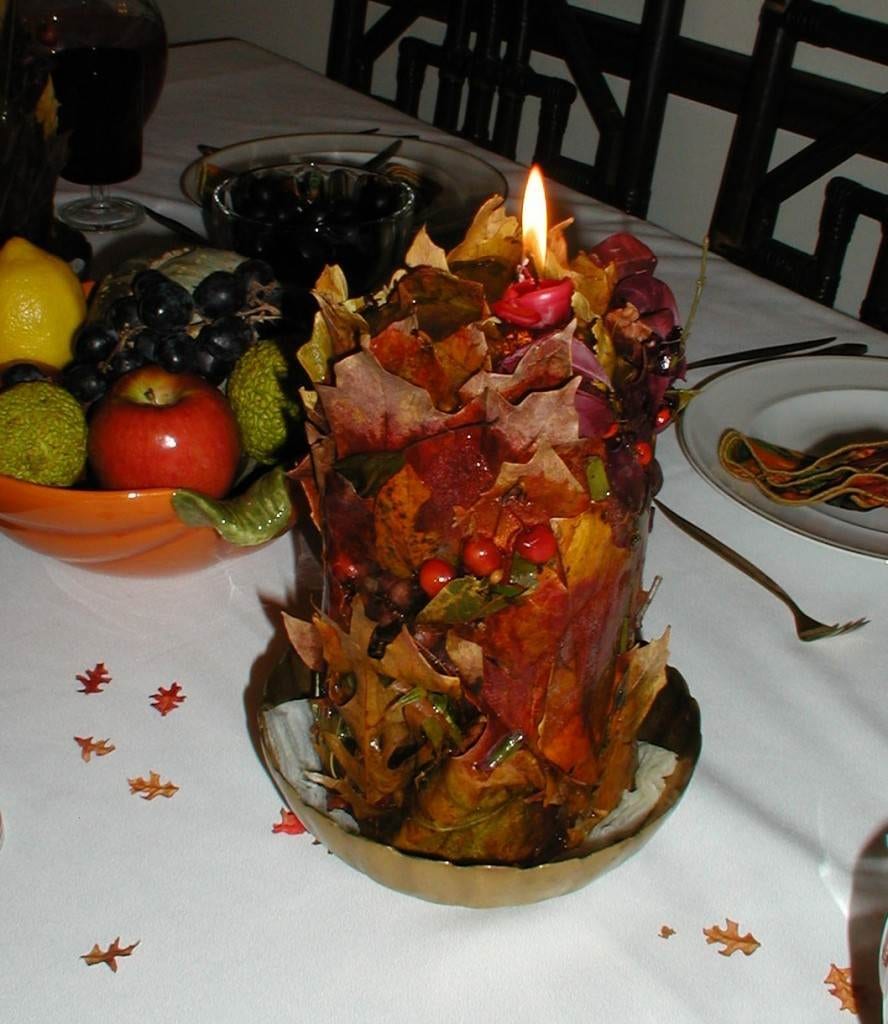


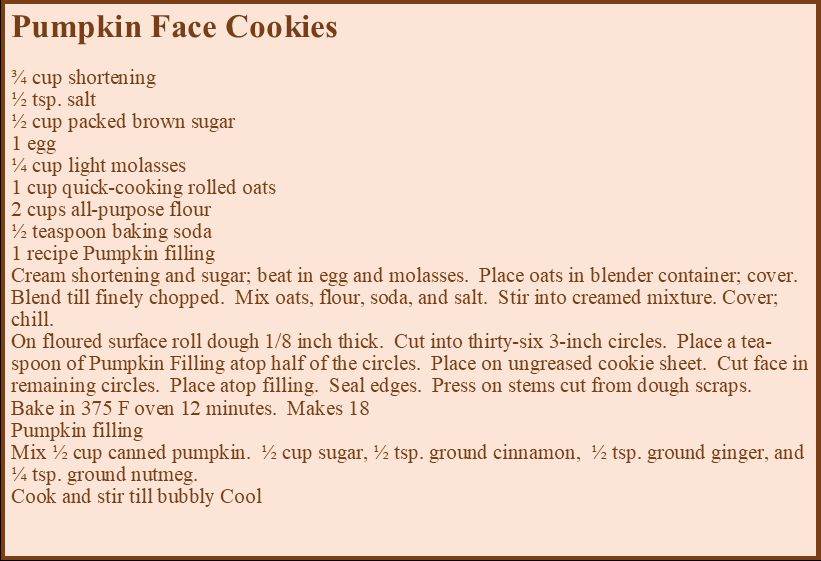
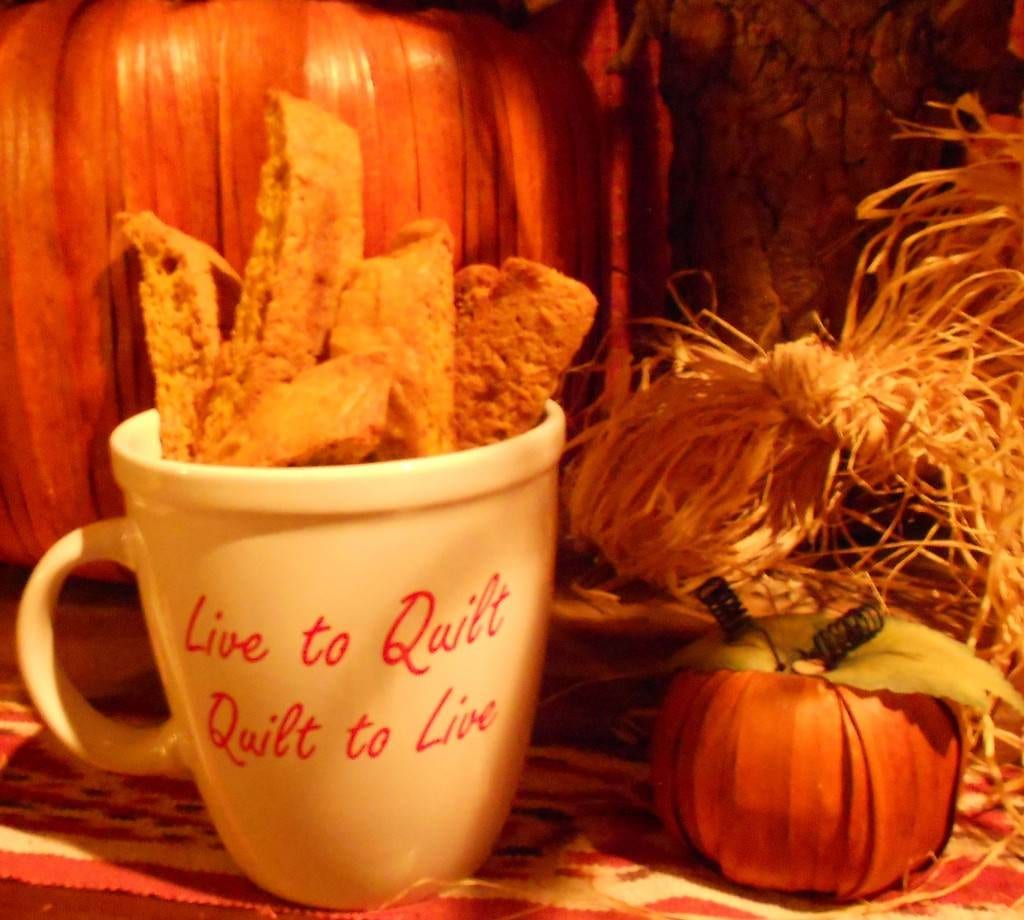


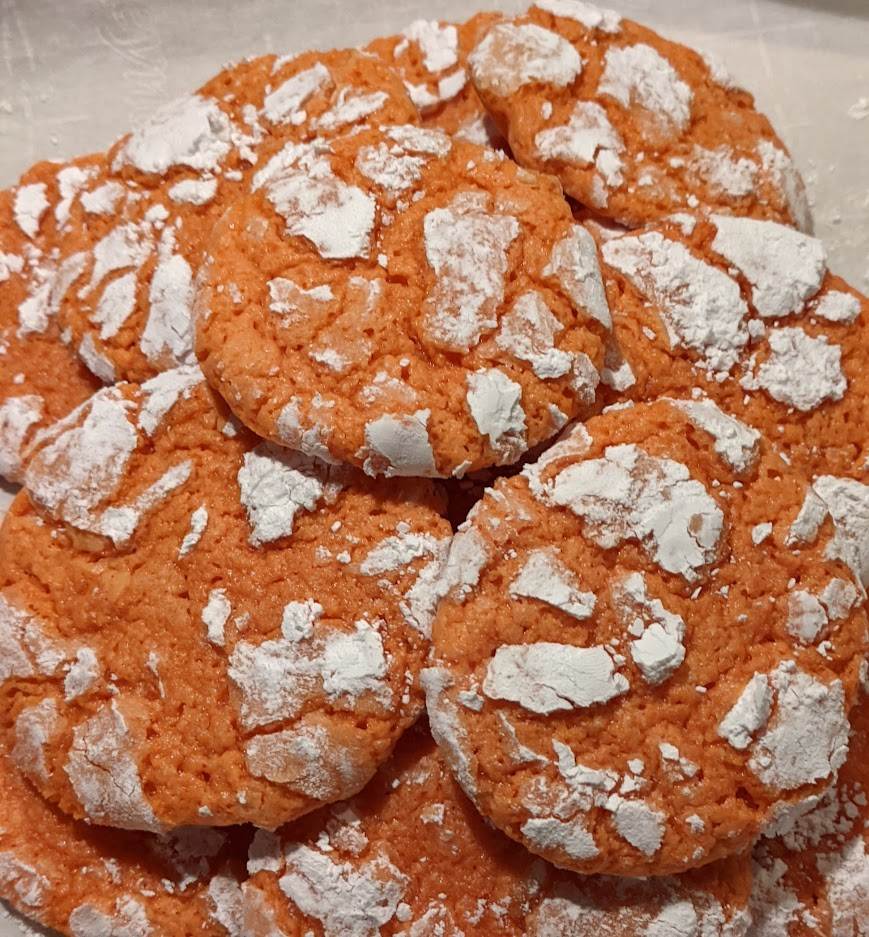


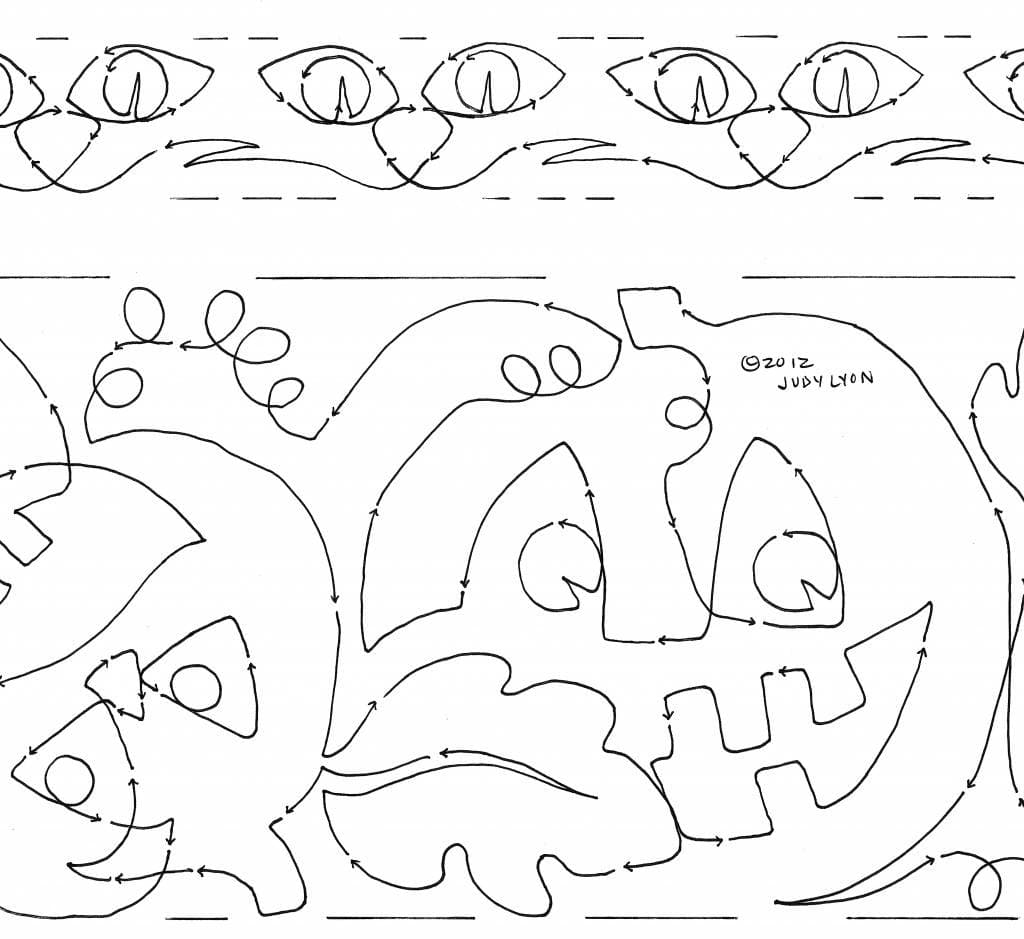


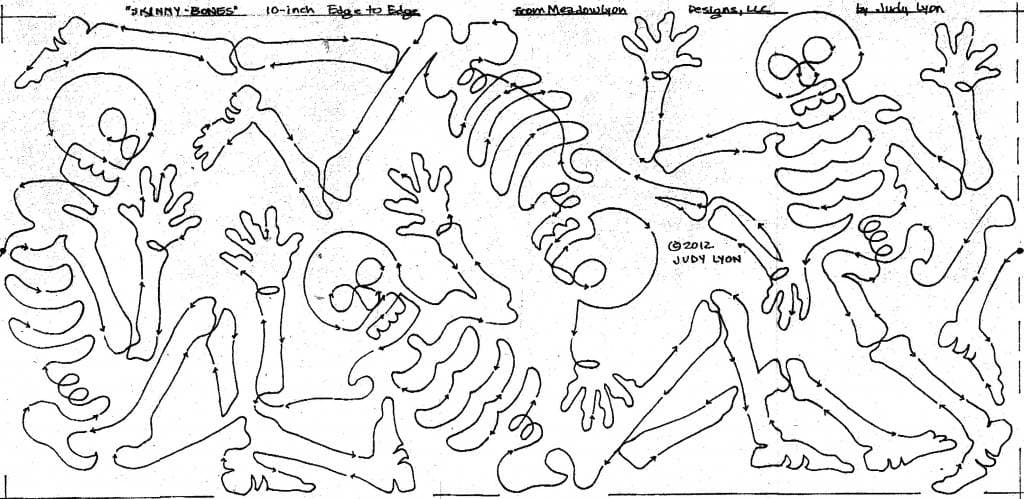


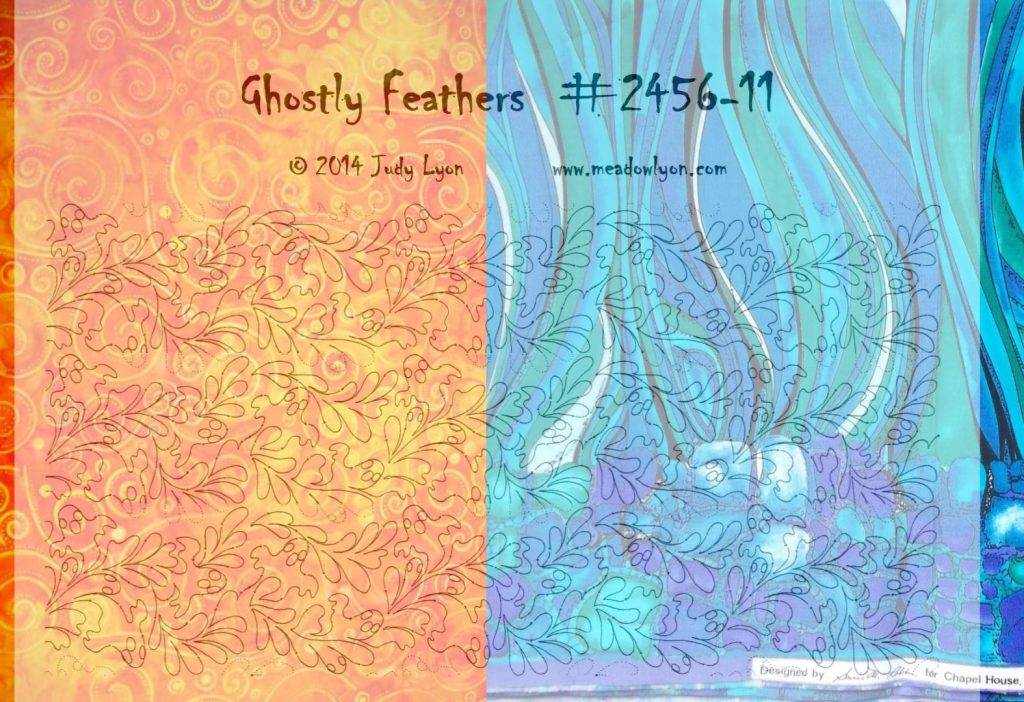


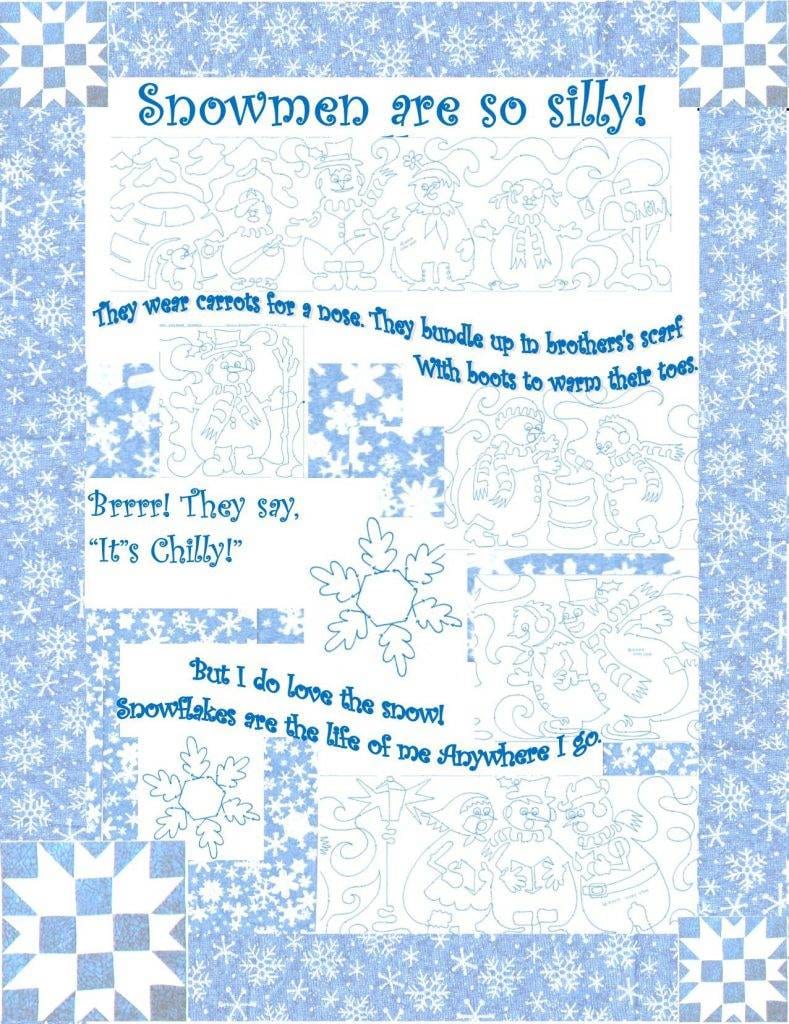


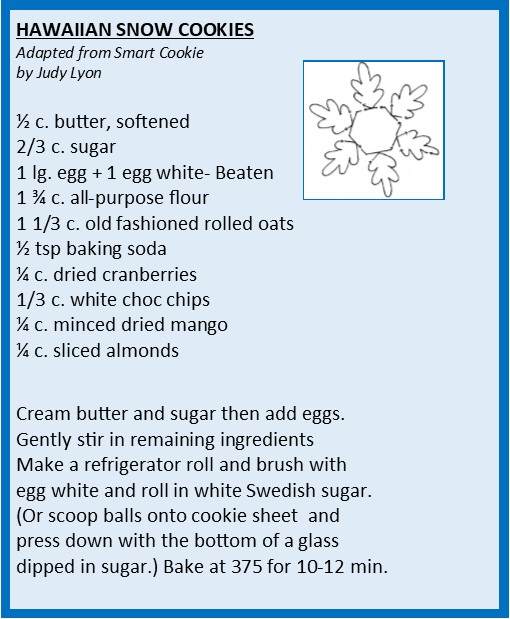


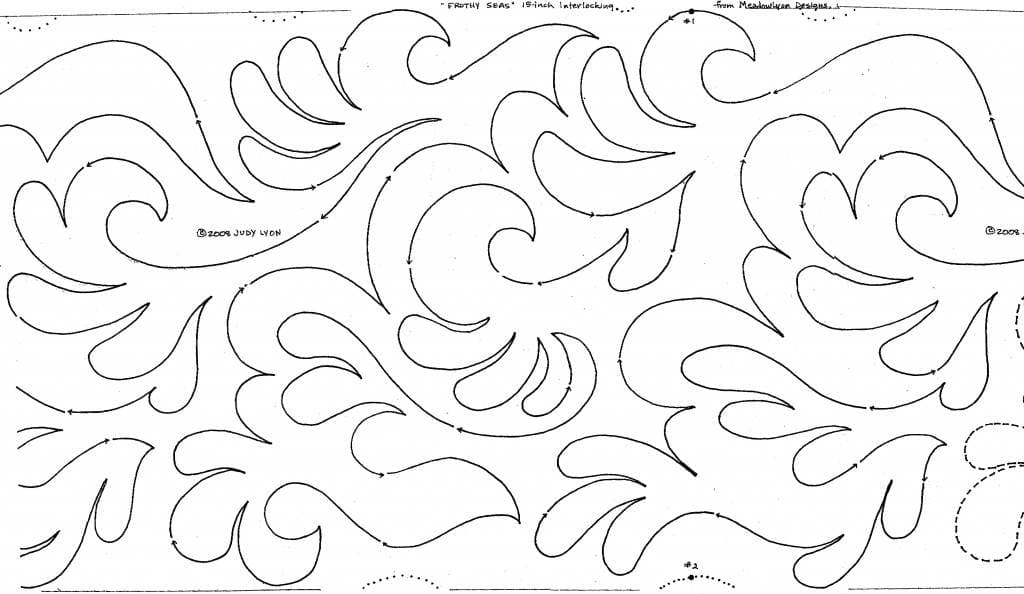


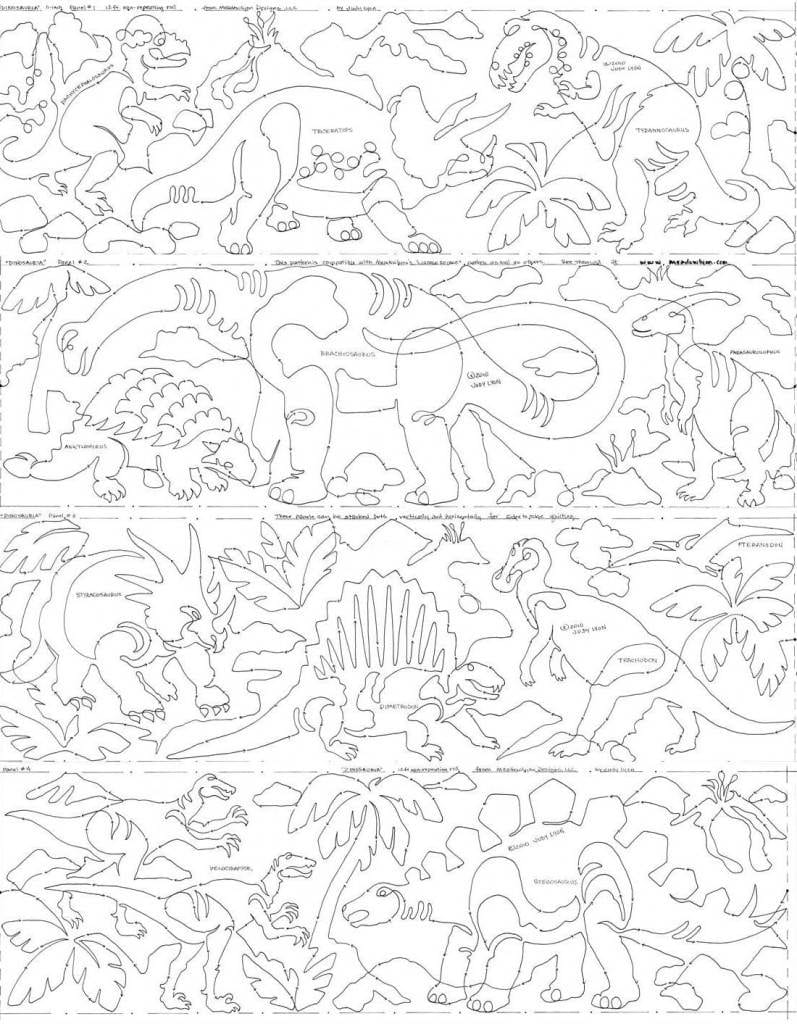

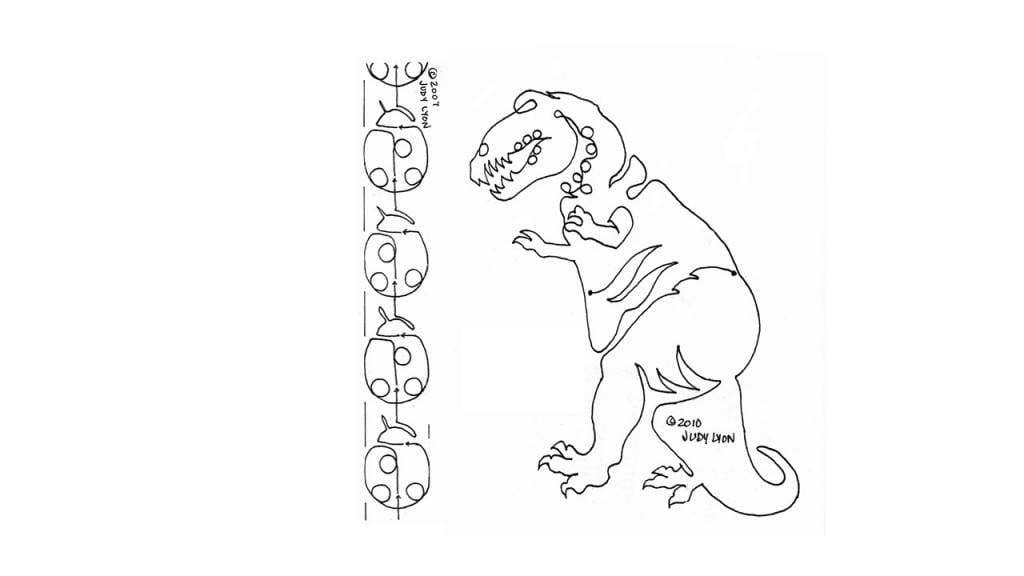

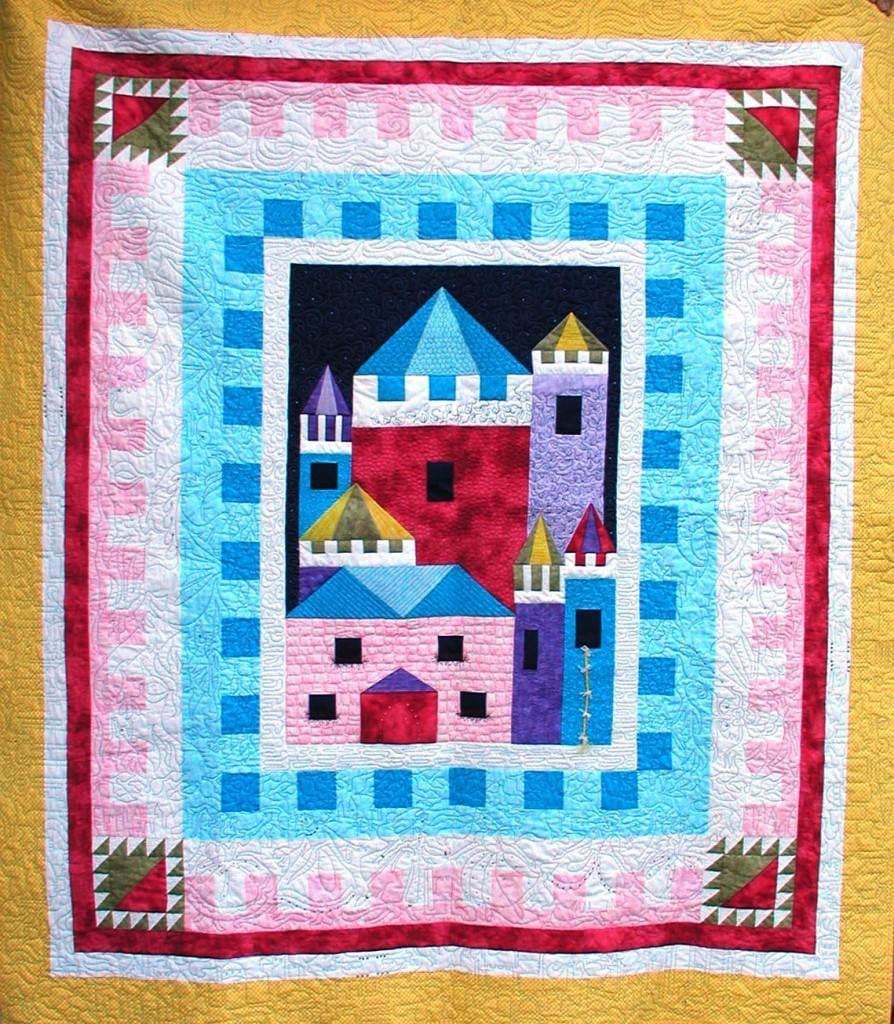


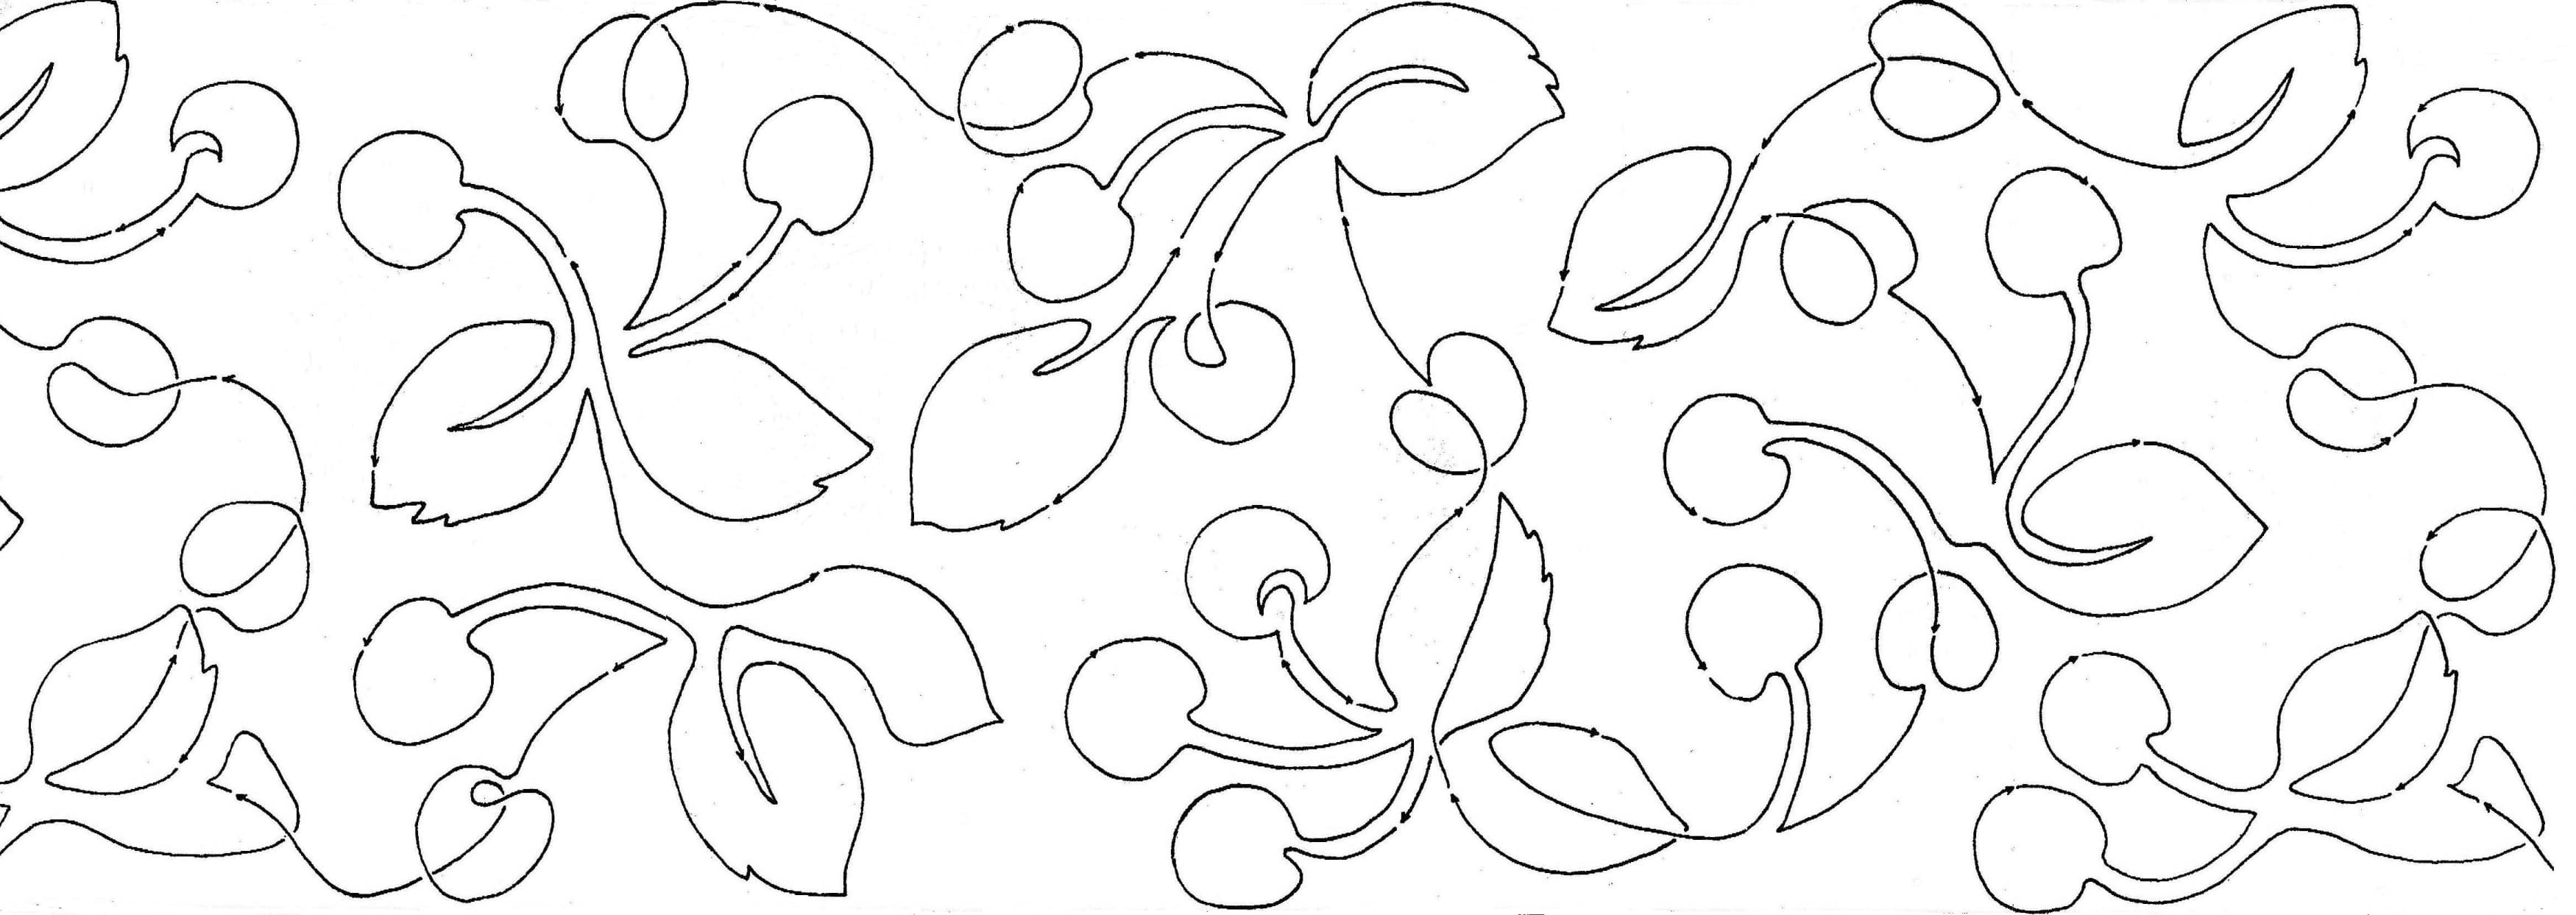
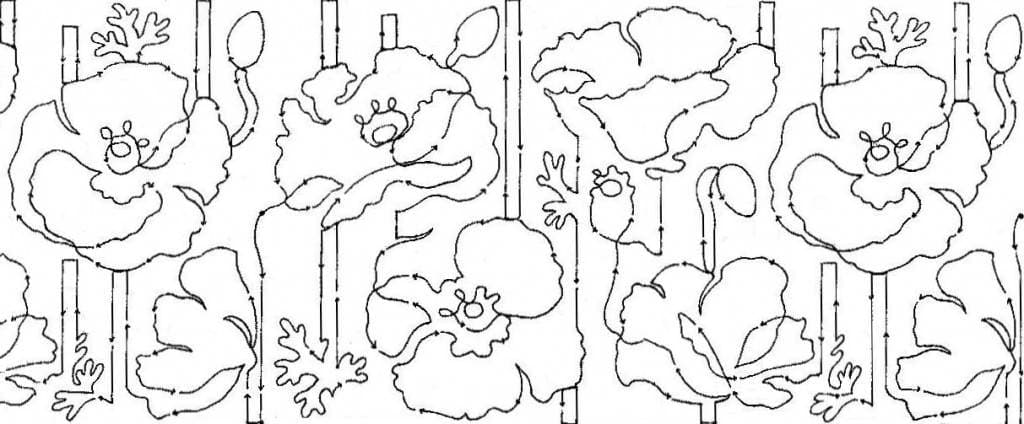


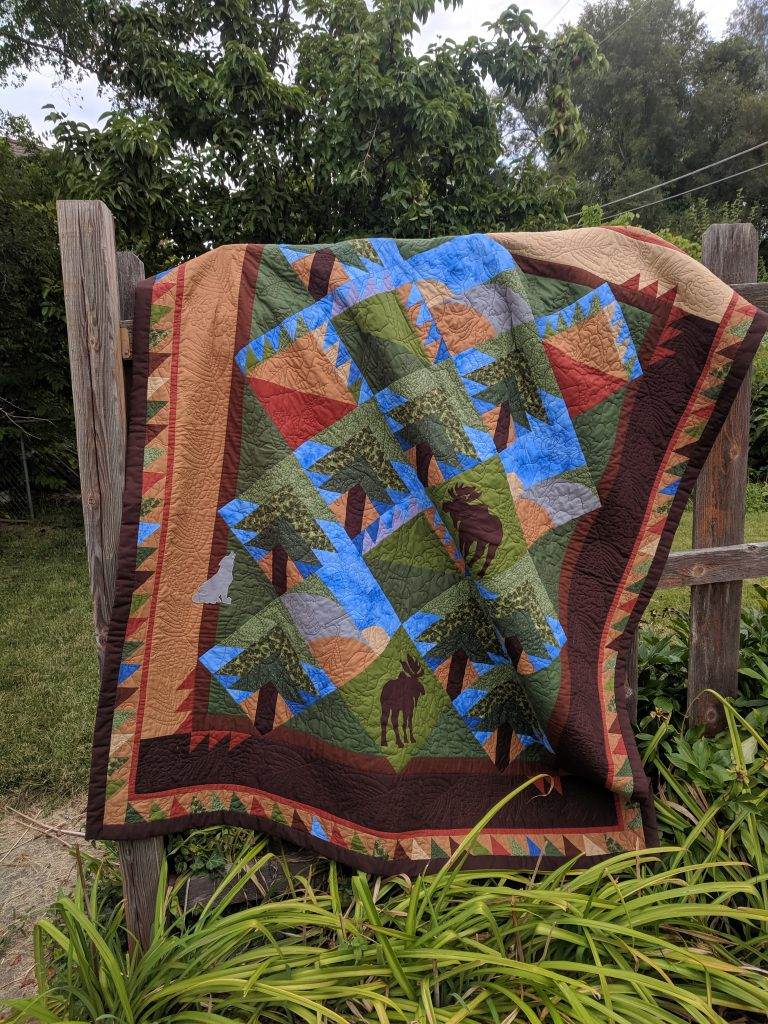


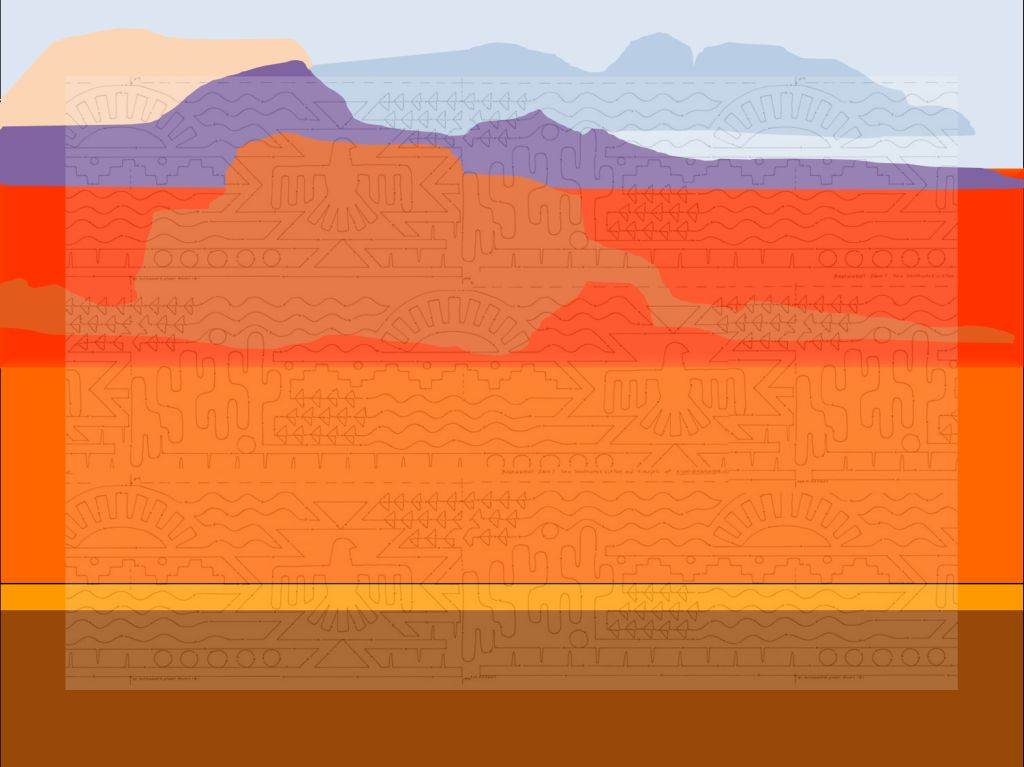

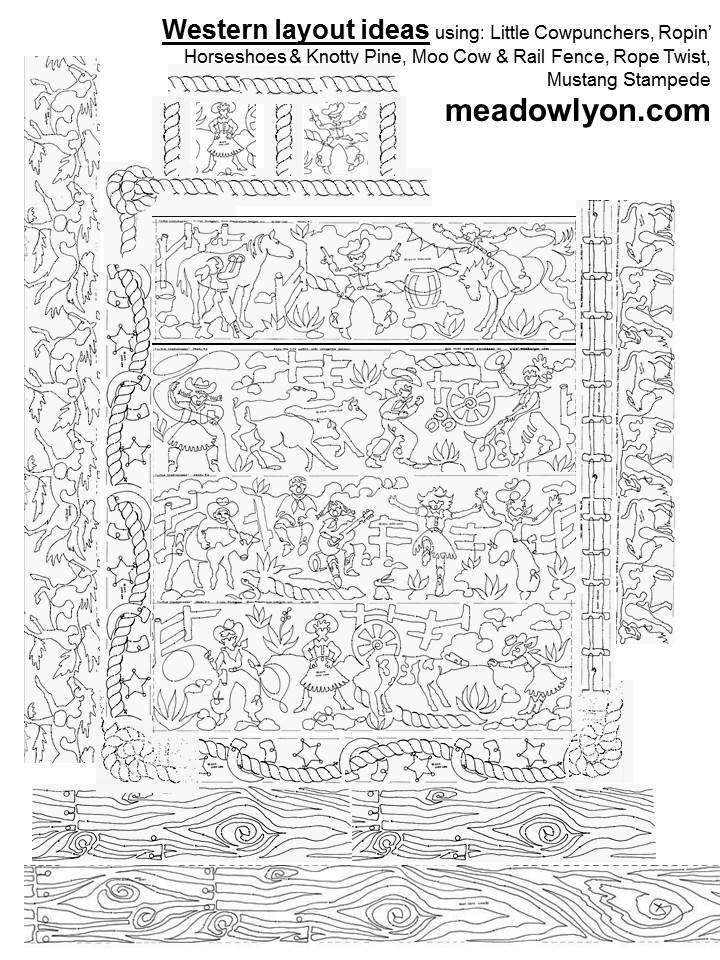

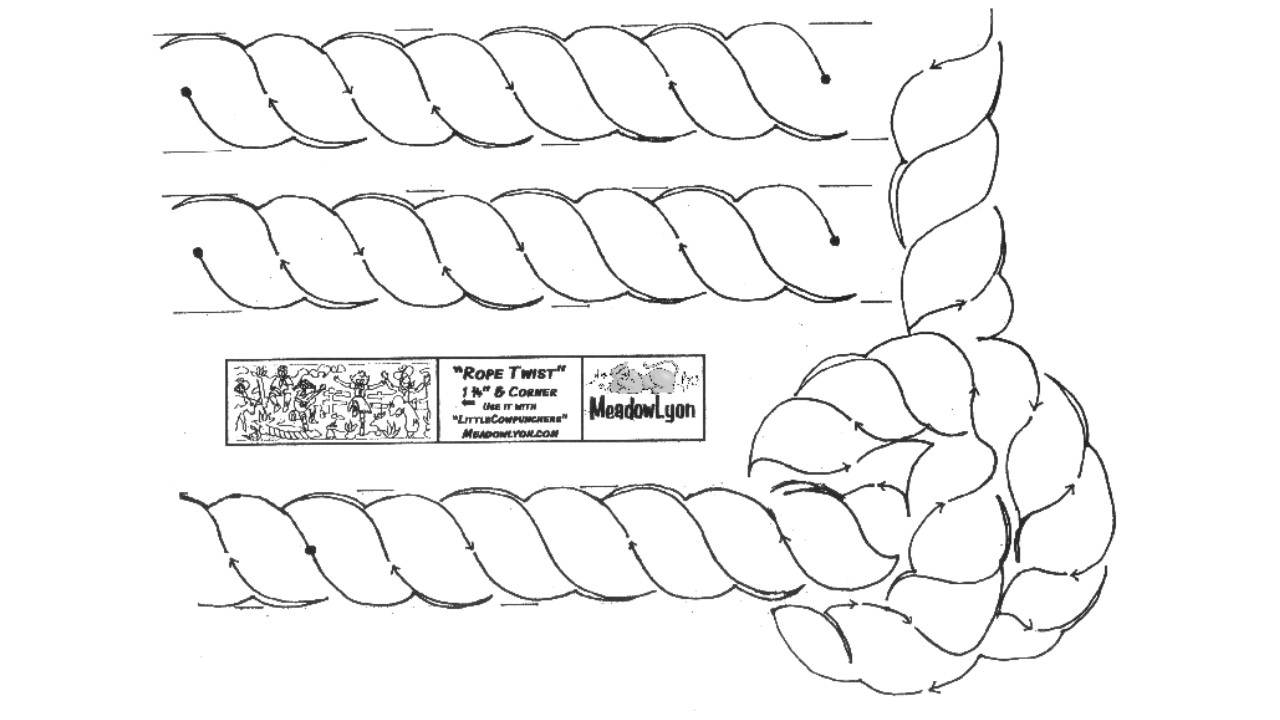
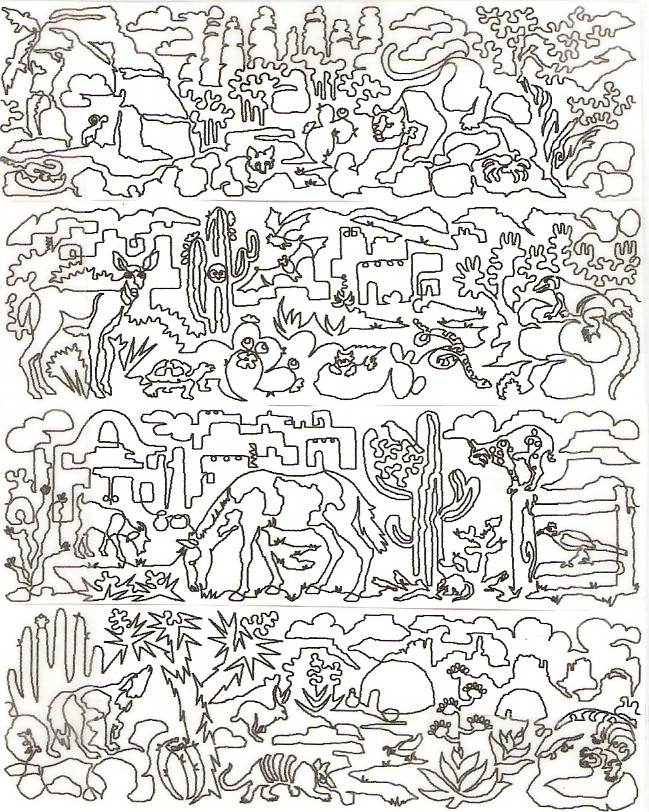
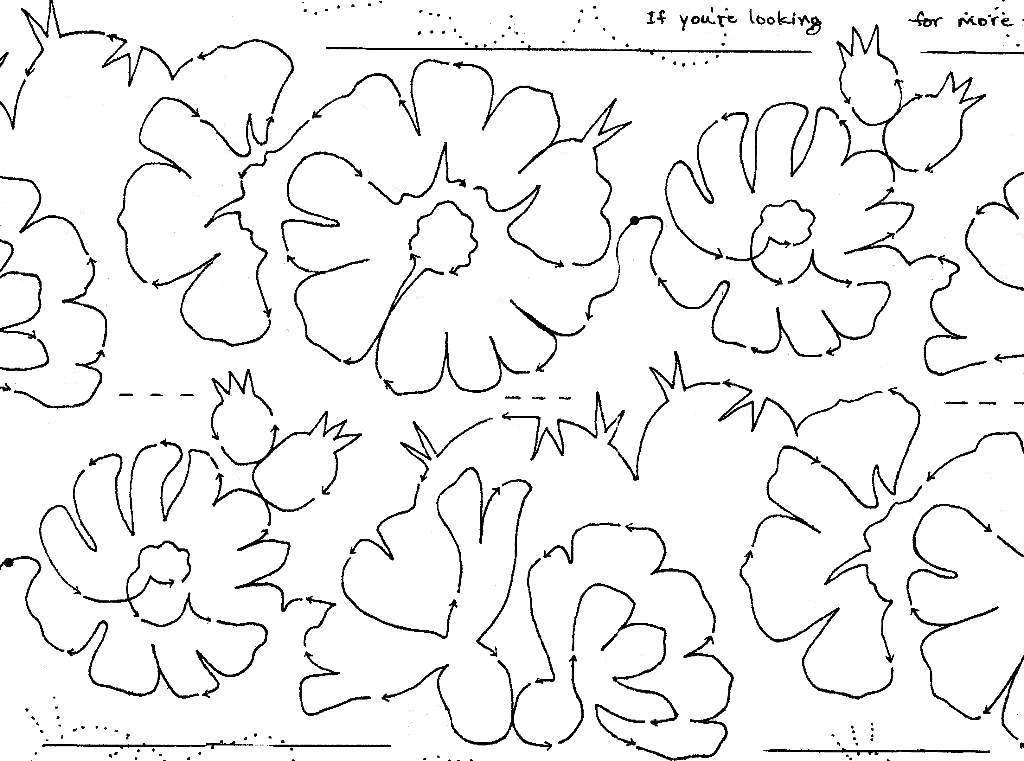


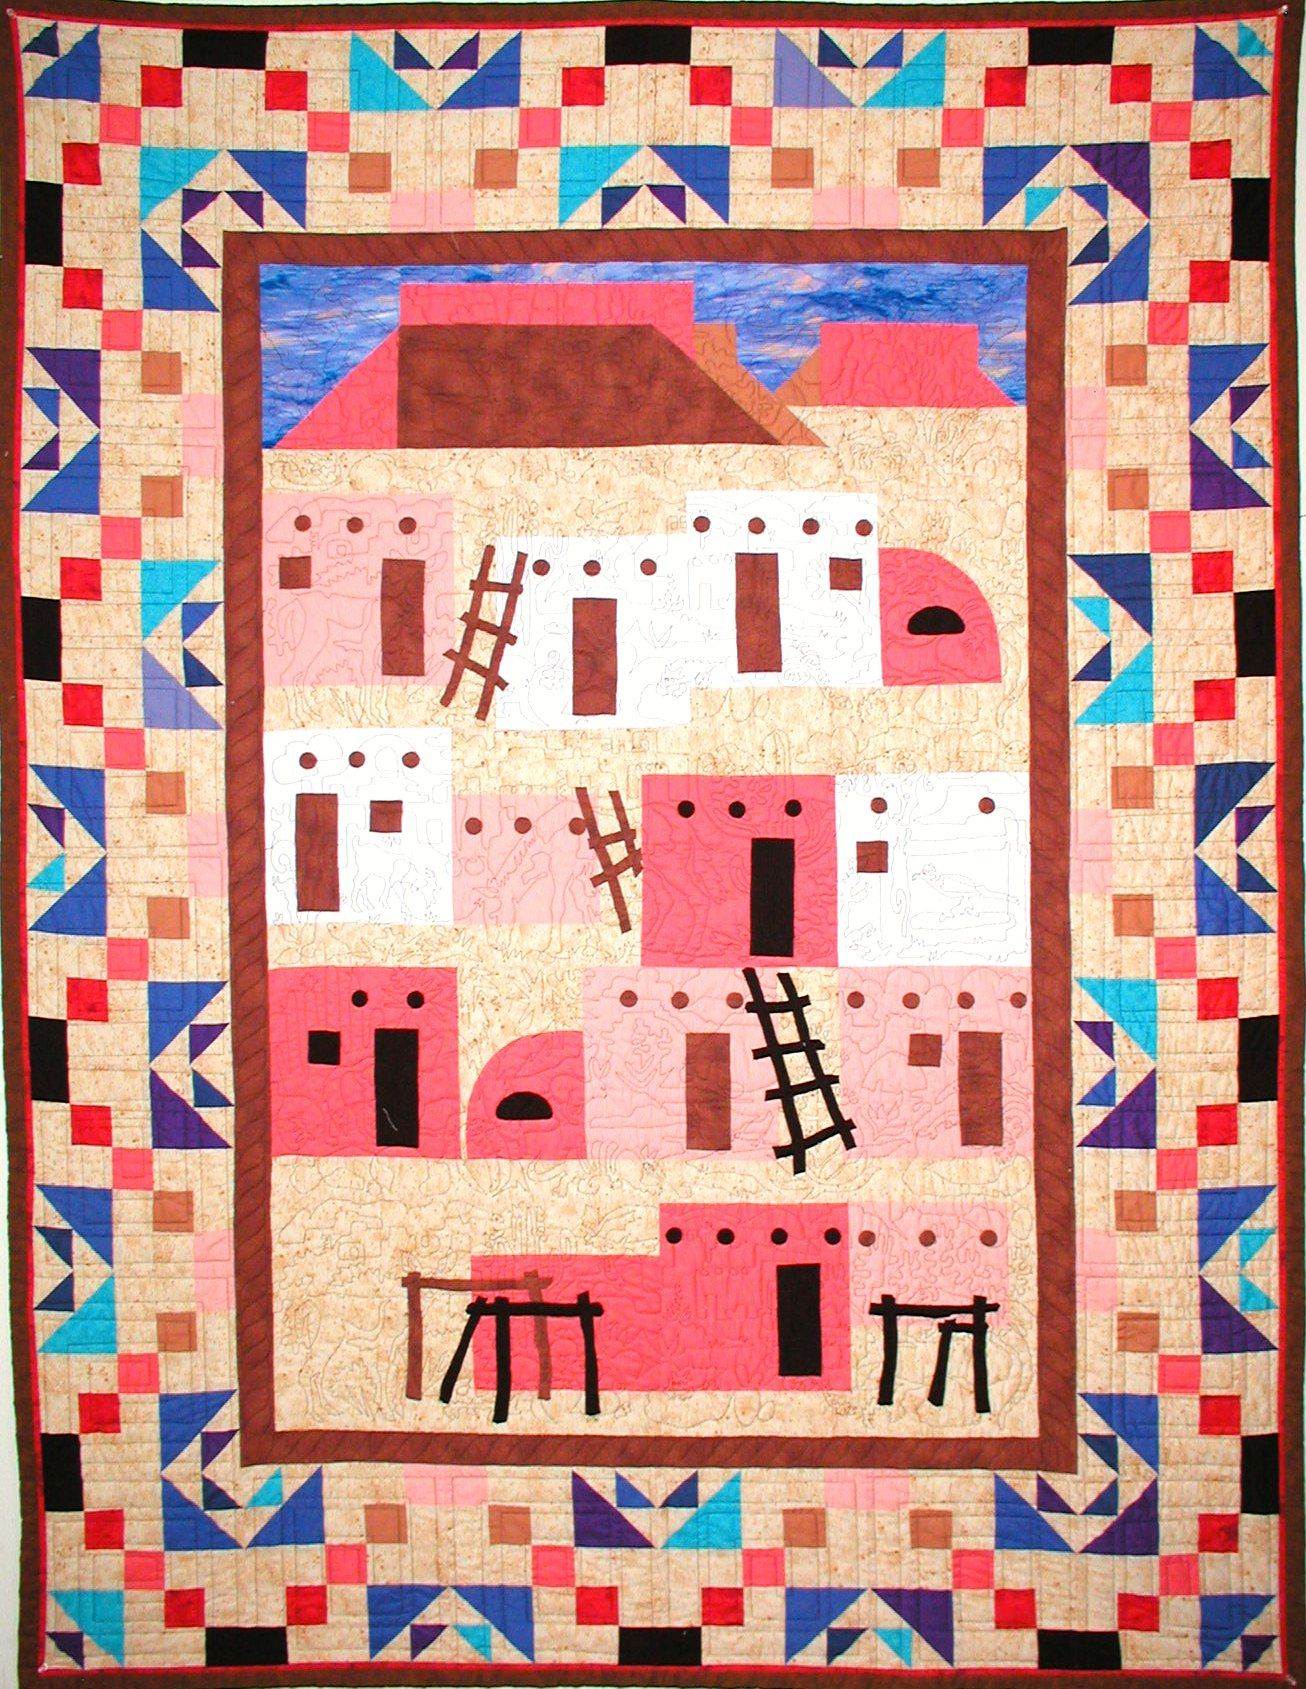
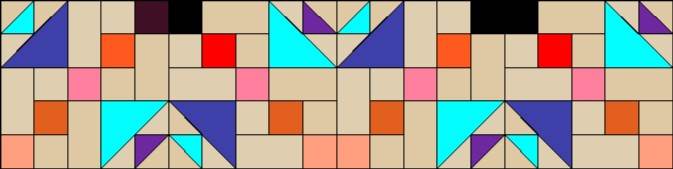

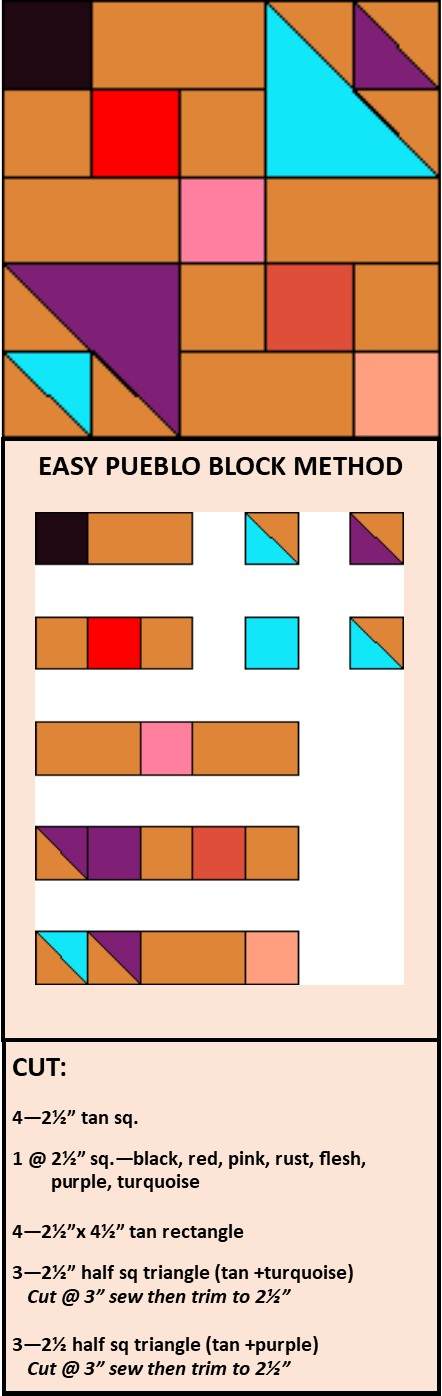

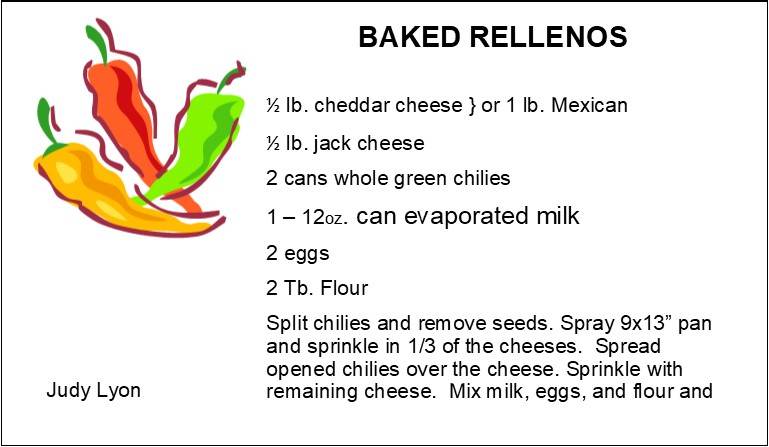


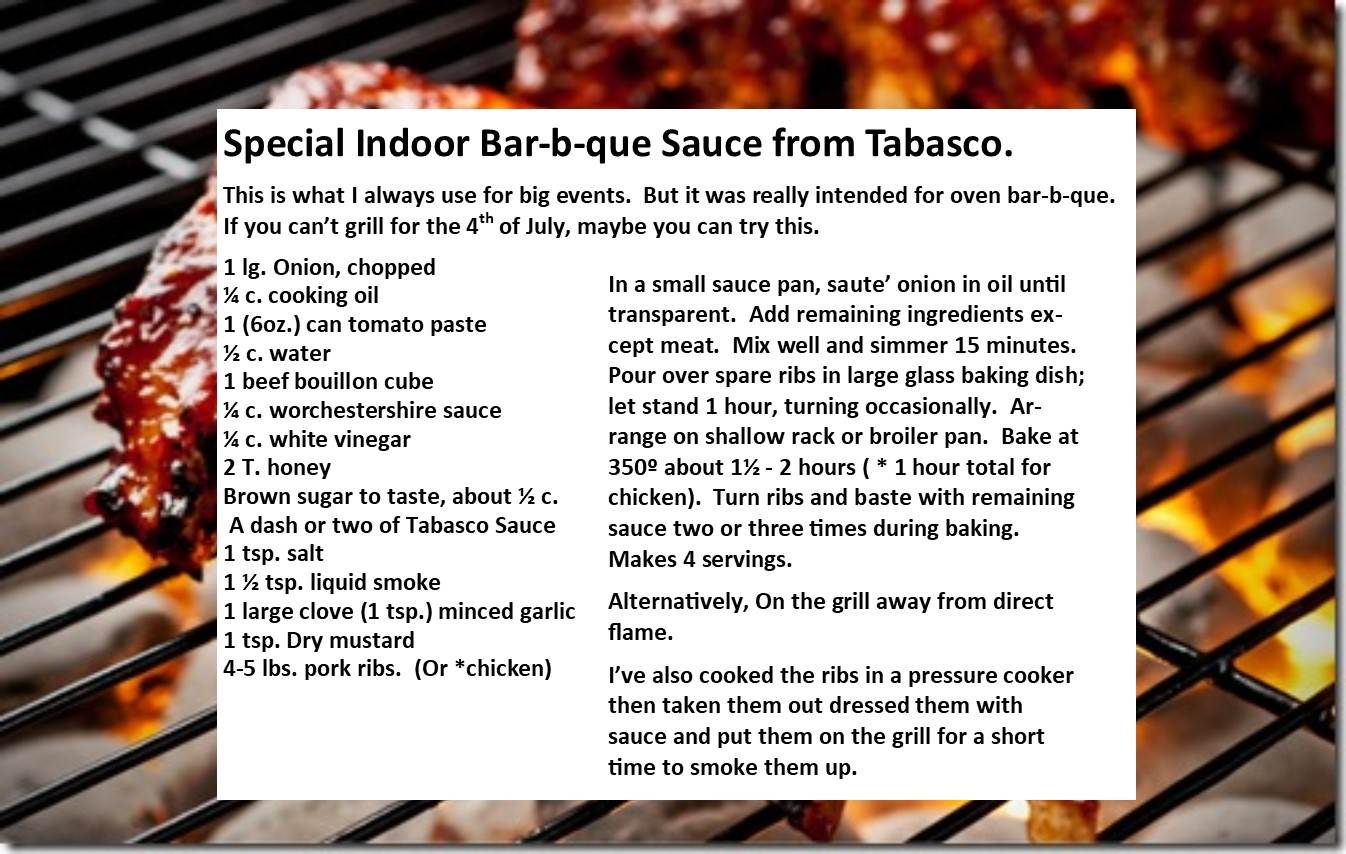


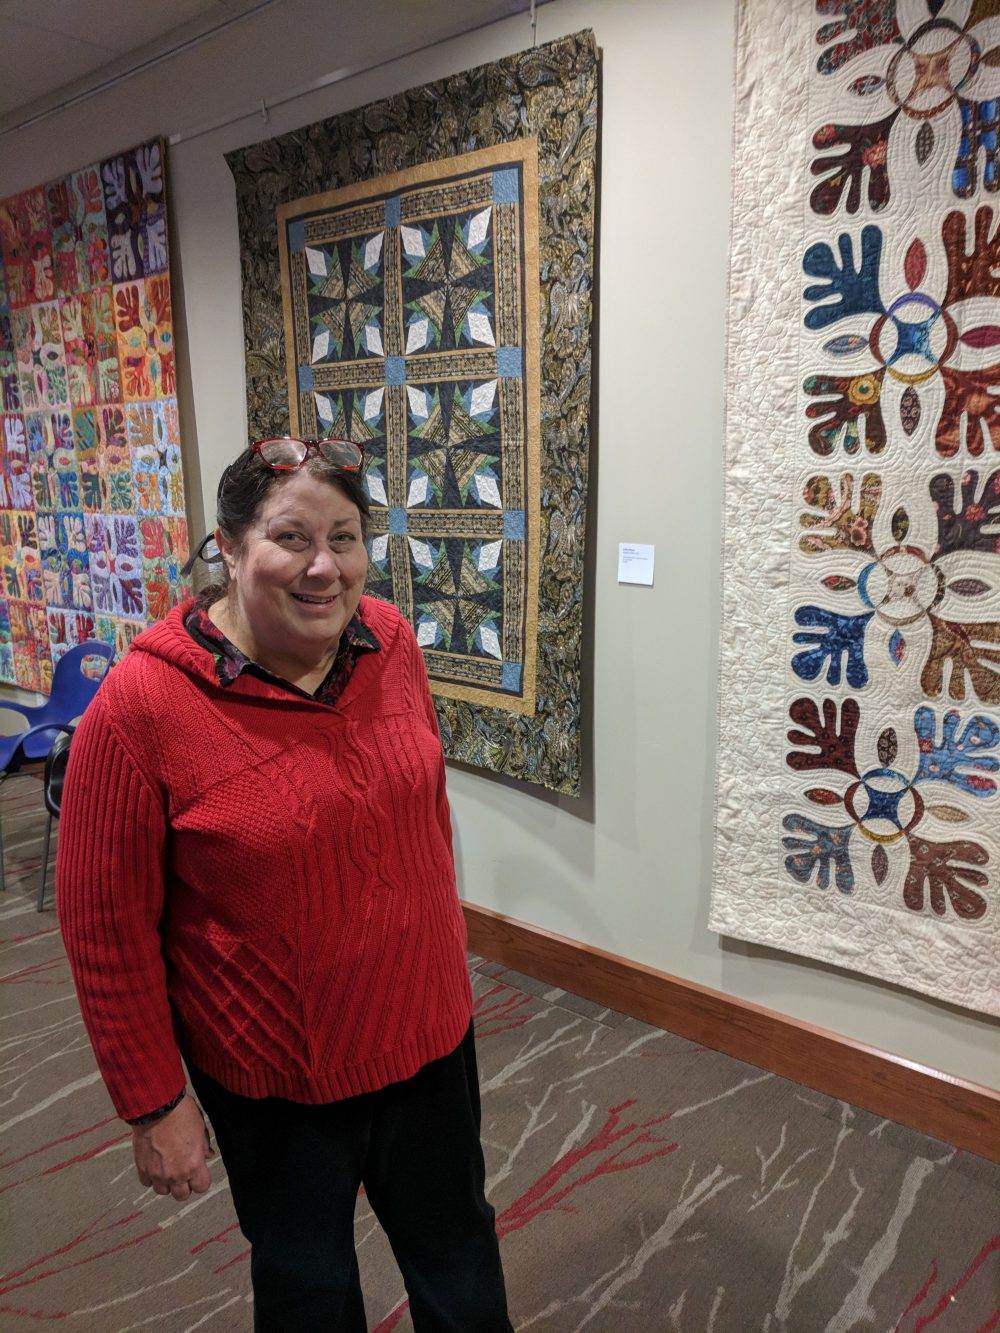
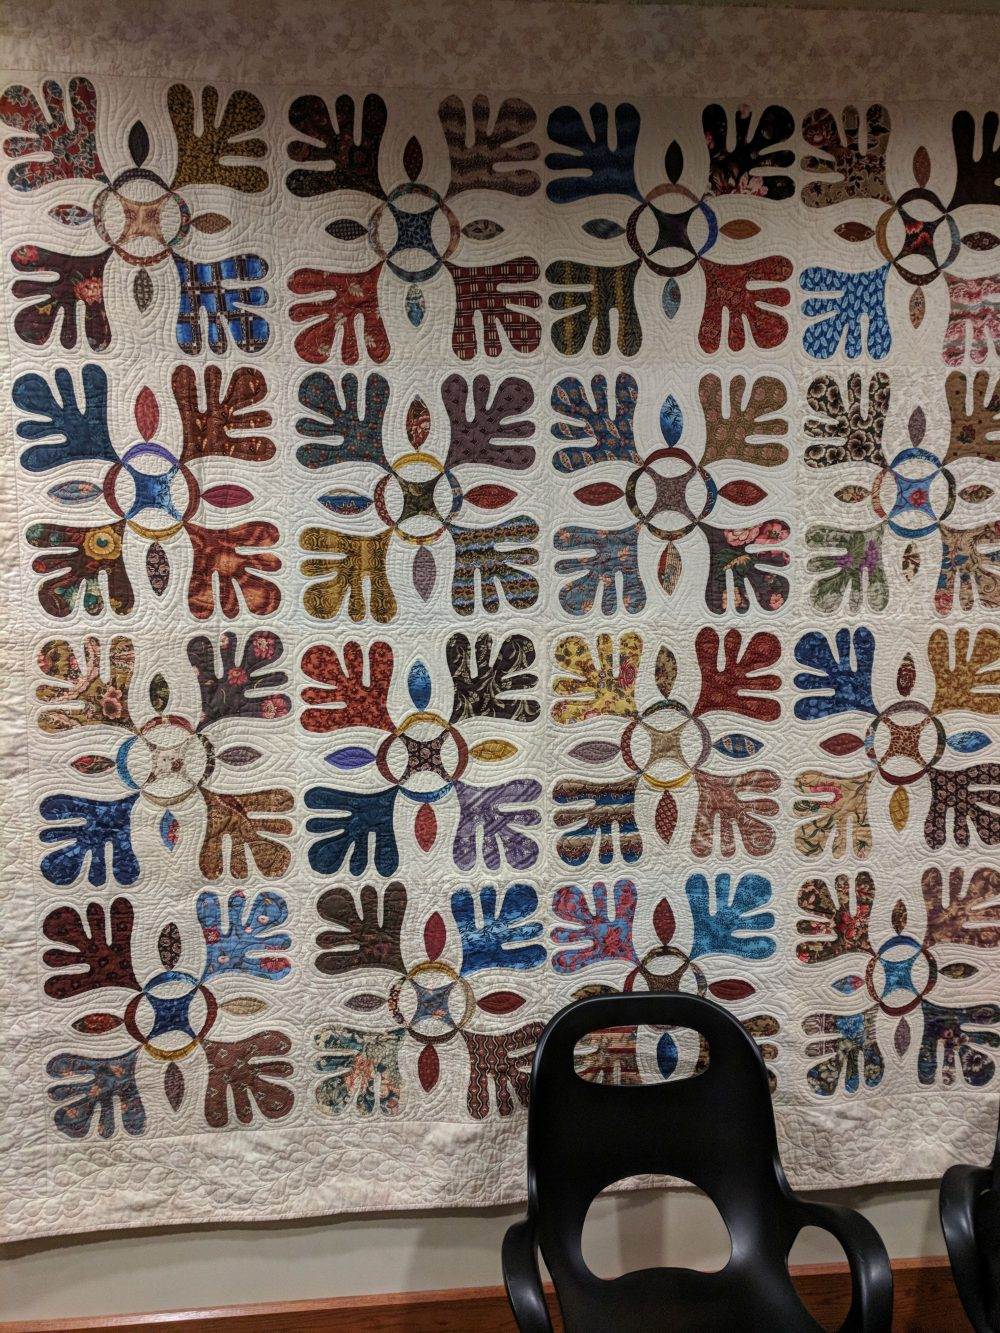


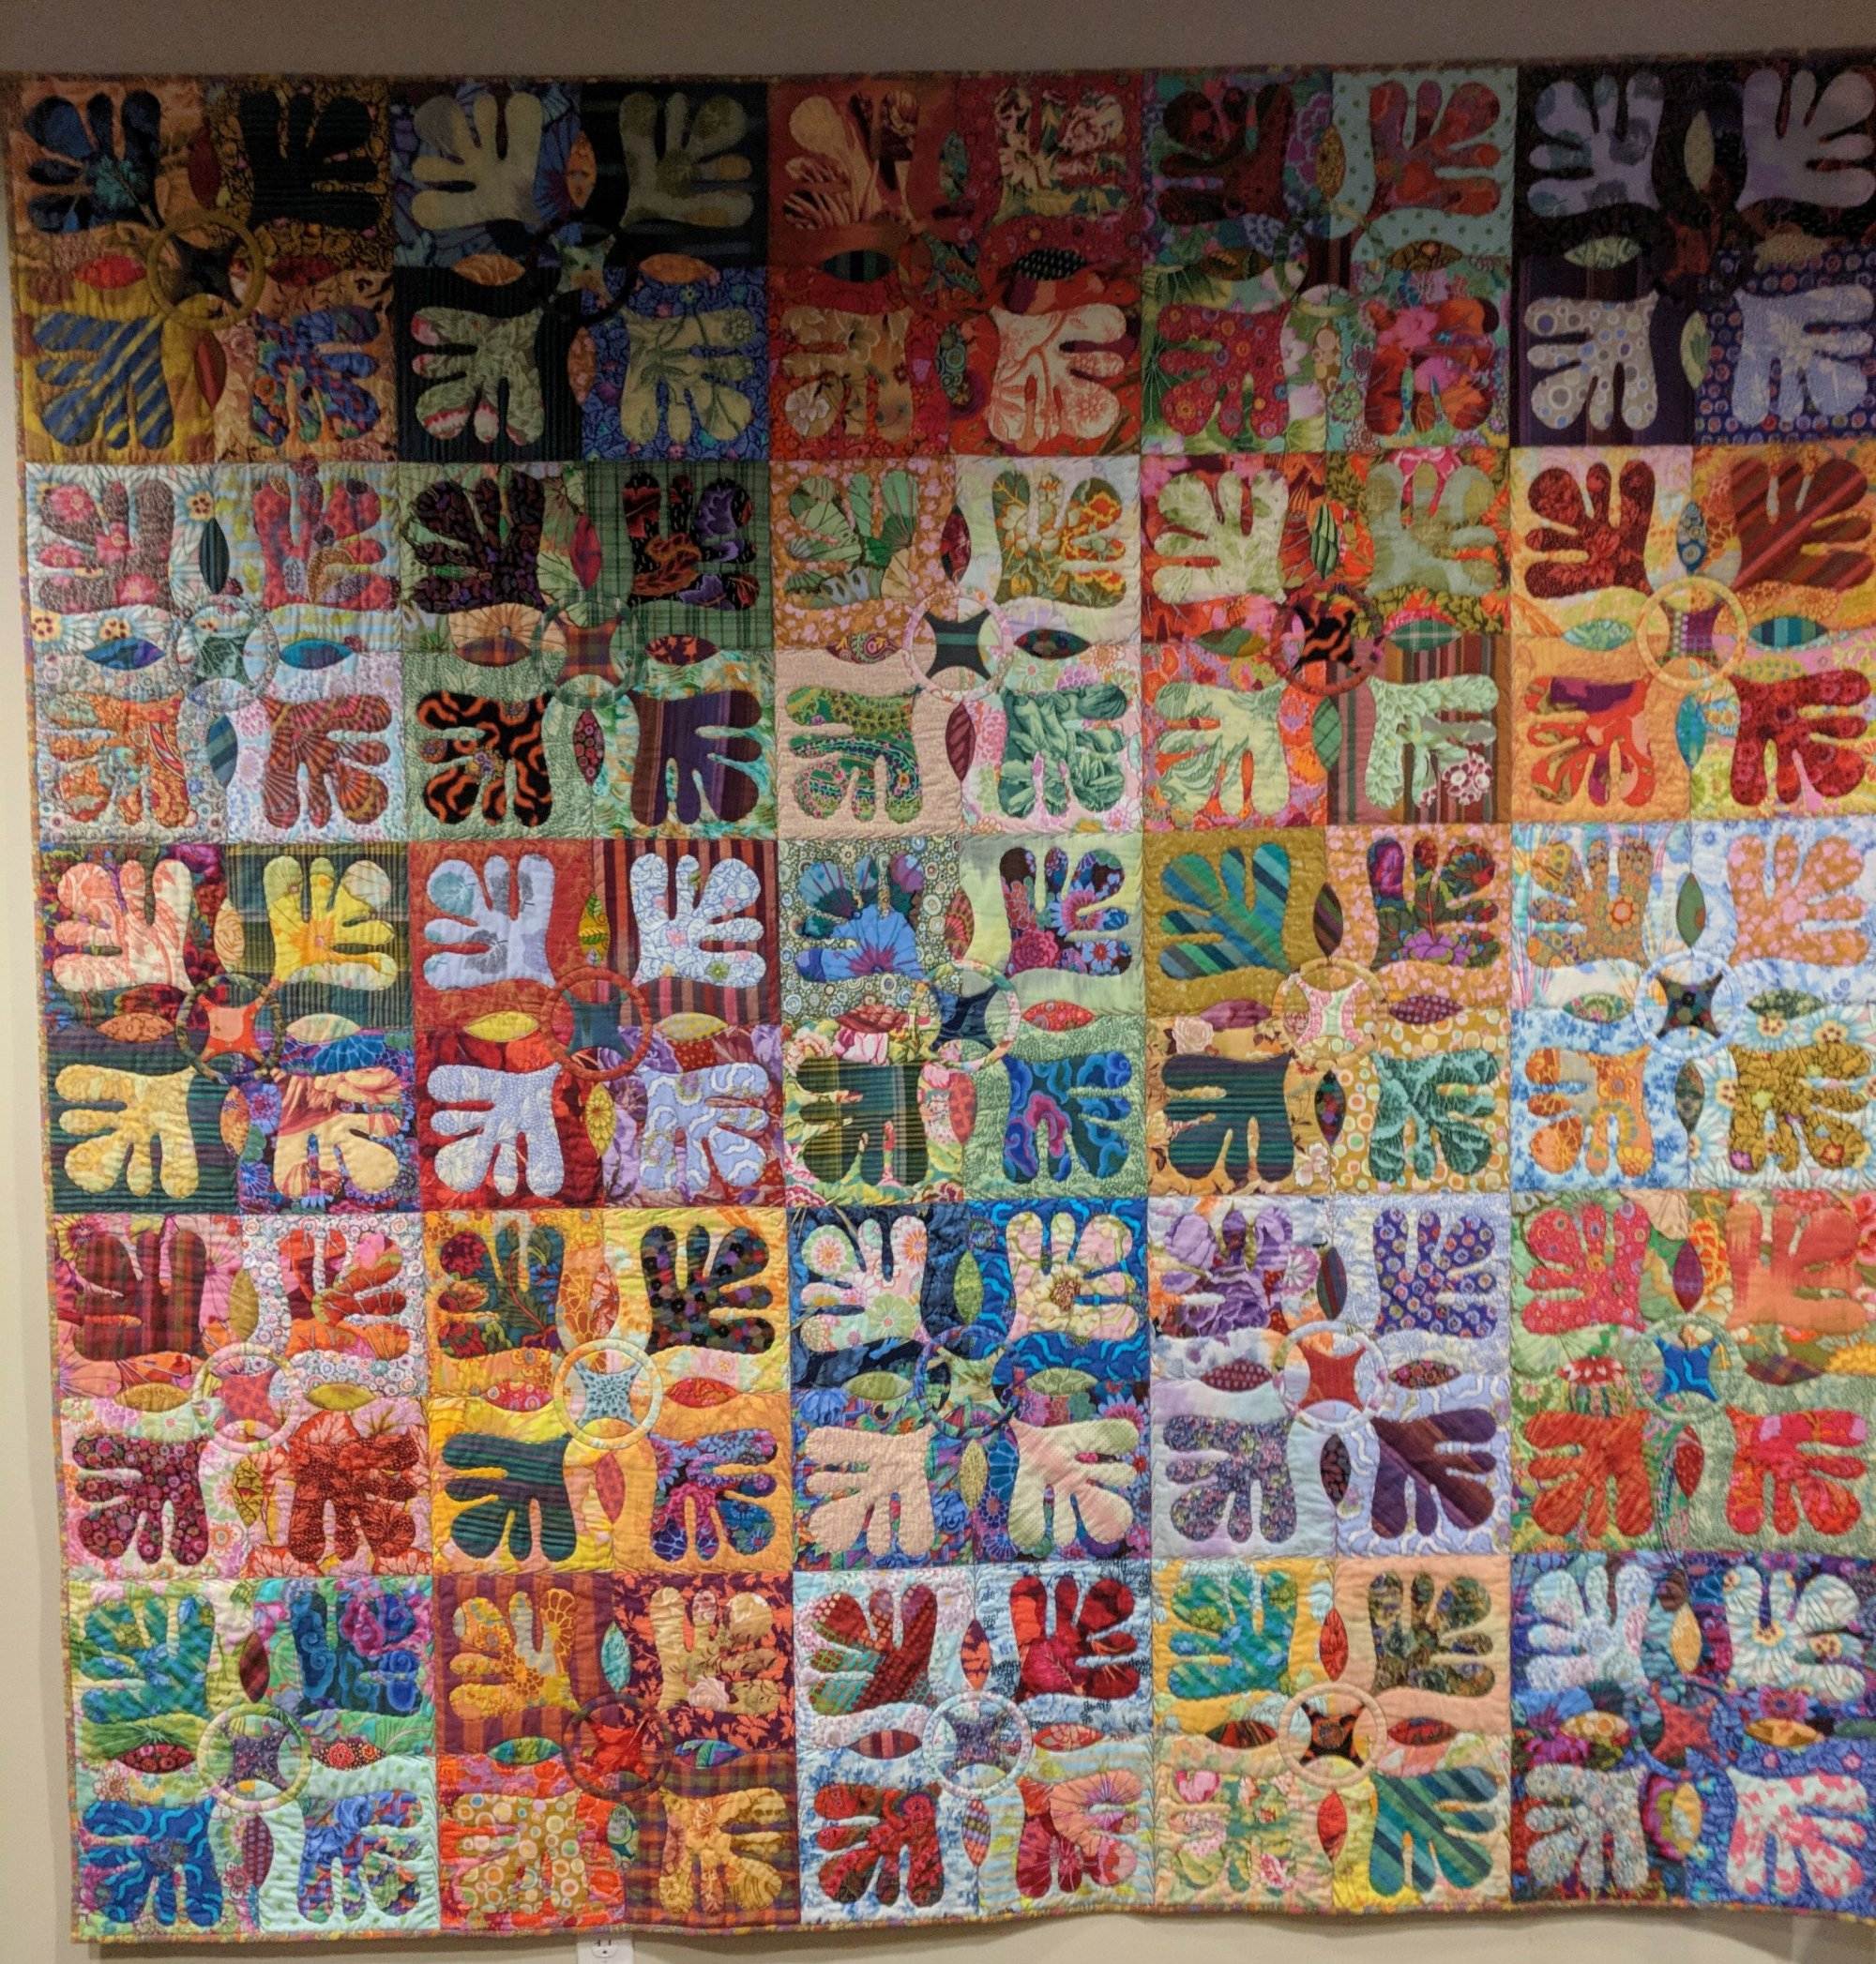


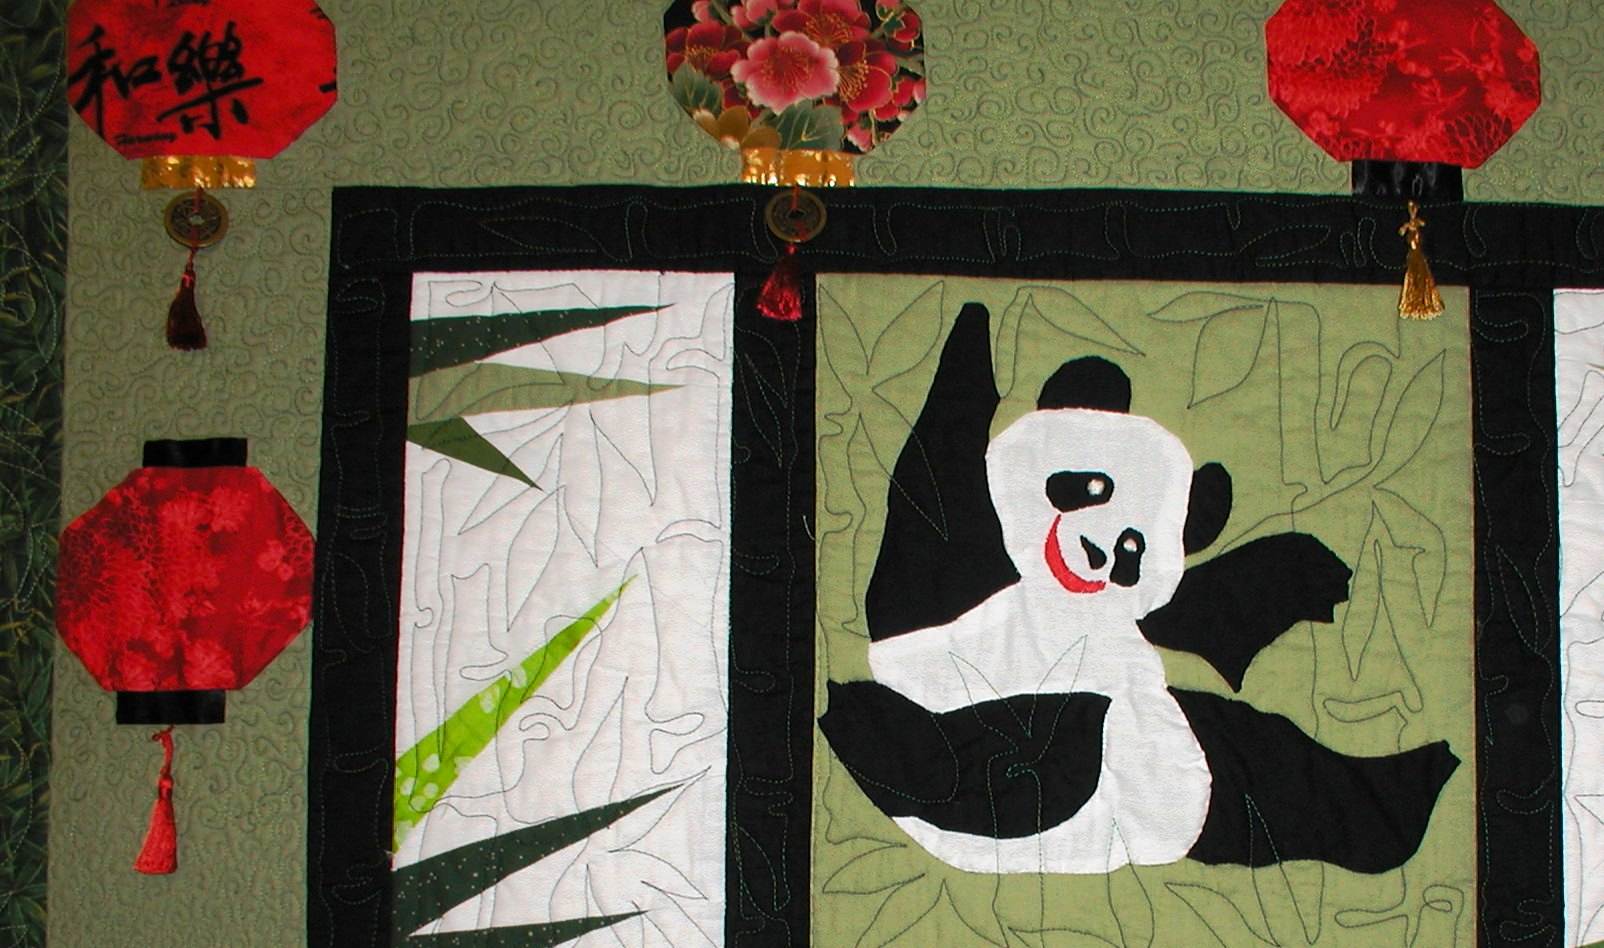


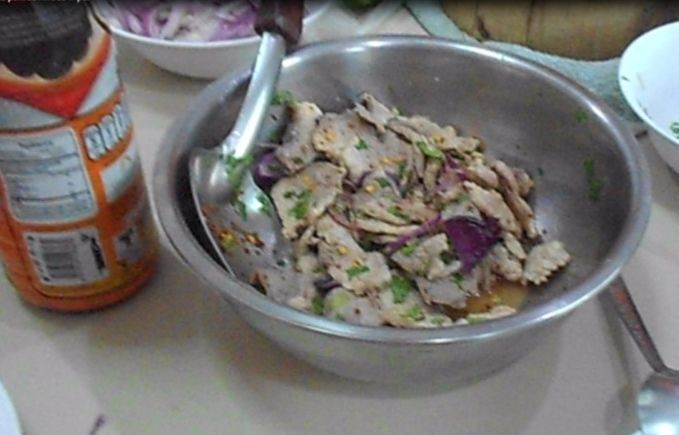


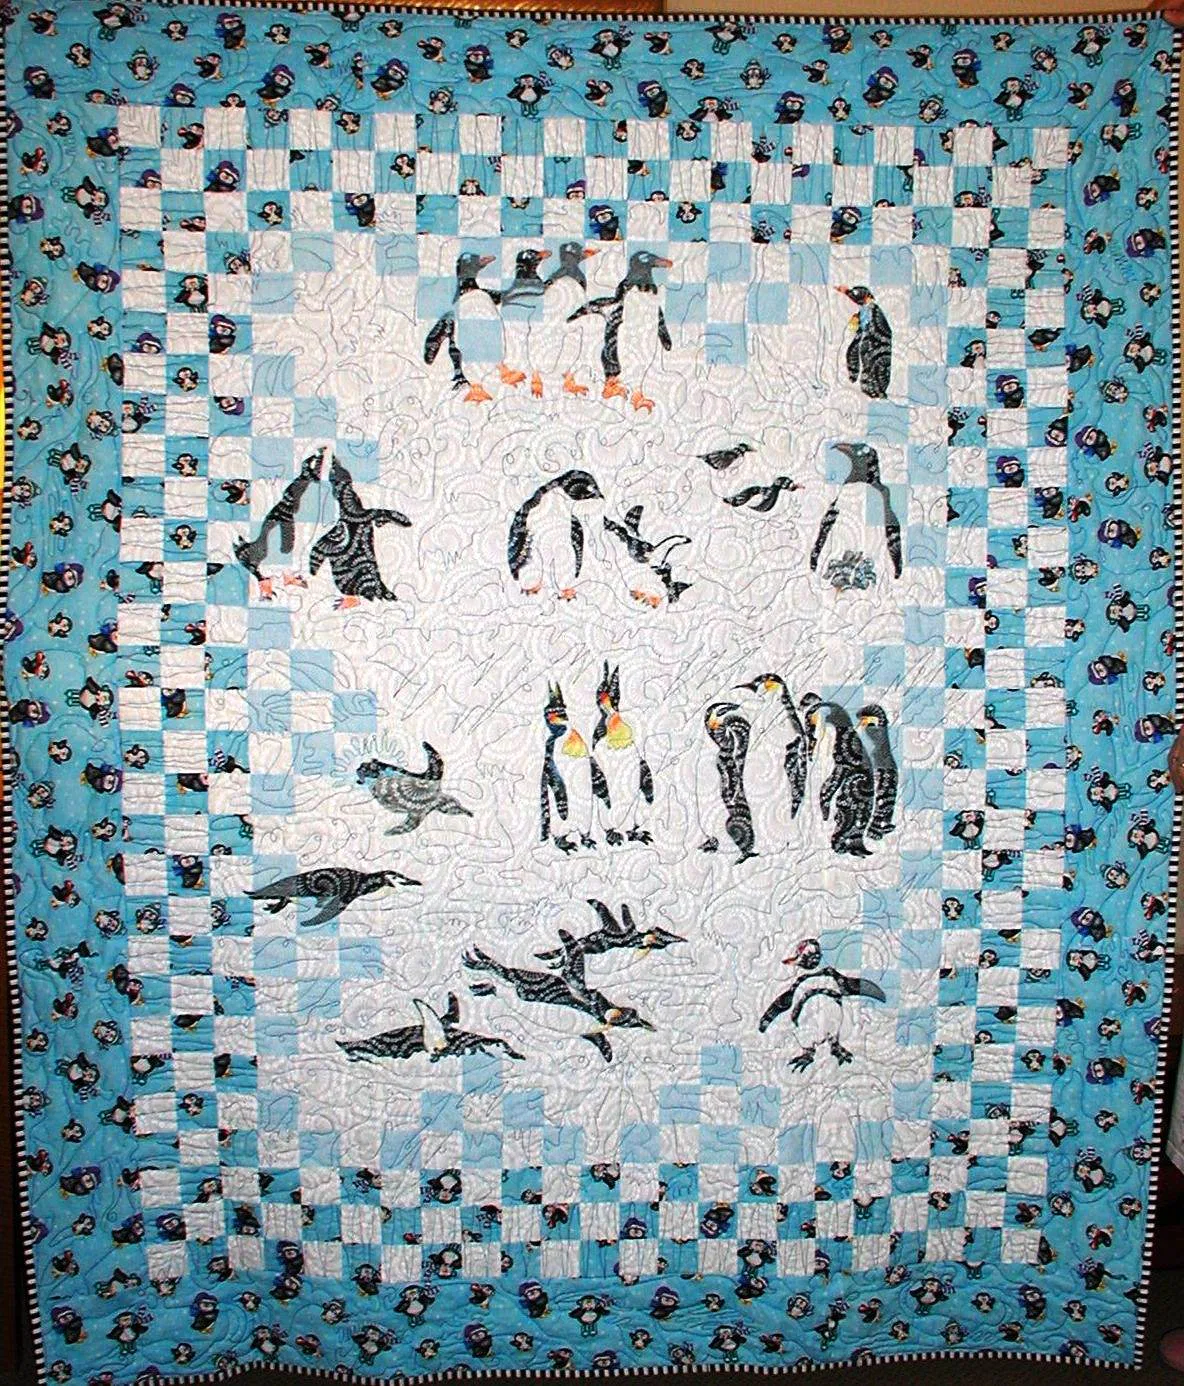


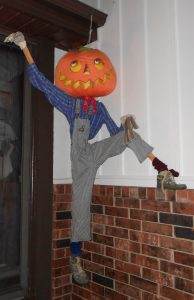


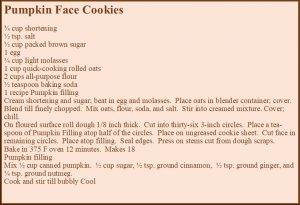


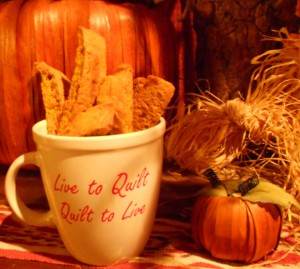


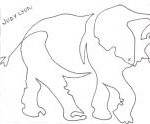


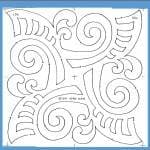


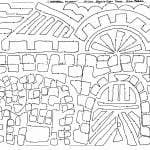


